Element translation in JavaFX Canvas is a crucial skill when building interactive and dynamic user interfaces. It allows you to move graphical elements around the Canvas, creating engaging visual effects and improving user experience. In this article, we’ll explore how to achieve element translation using JavaFX.

with hands-on learning.
get the skills and confidence to land your next move.
What is Element Translation?
Element translation, in the context of JavaFX Canvas, refers to the process of moving graphical elements from one position to another. This can be useful for creating animations, user interactions, or simply repositioning elements within your application.
Translating Elements
To translate elements on a JavaFX Canvas, you can simply change the x and y coordinates of those elements. Let’s create an example where we draw a rectangle and then translate it to a new position.
import javafx.application.Application;
import javafx.scene.Scene;
import javafx.scene.canvas.Canvas;
import javafx.scene.canvas.GraphicsContext;
import javafx.scene.layout.*;
import javafx.stage.Stage;

public class Main extends Application {

    private final BorderPane parent = new BorderPane();

    @Override
    public void init() throws Exception {
        super.init();

        // Build the user interface
        this.buildUI();
    }

    private void buildUI() {

        // Create the Canvas
        Canvas canvas = new Canvas(600, 400);

        // Get the GraphicsContext
        GraphicsContext gc = canvas.getGraphicsContext2D();

        // Draw a rectangle at the initial position
        double rectX = 50;
        double rectY = 50;
        double rectWidth = 200;
        double rectHeight = 200;
        gc.fillRect(rectX, rectY, rectWidth, rectHeight);

        // Translate the rectangle to a new position
        double newX = 150;
        double newY = 150;

        // Clear the old position
        gc.clearRect(rectX, rectY, rectWidth, rectHeight);

        // Draw the rectangle at the new position
        gc.fillRect(newX, newY, rectWidth, rectHeight);

        // Add the Canvas to the center of the BorderPane
        this.parent.setCenter(canvas);

    }

    @Override
    public void start(Stage stage) throws Exception {

        // Setup and display the stage
        this.setupStage(stage);
    }

    private void setupStage(Stage stage) {

        // Create a scene with the BorderPane as the root
        Scene scene = new Scene(this.parent, 640, 480);

        // Set the stage title
        stage.setTitle("Element Translation in JavaFX Canvas");

        // Set the scene for the stage
        stage.setScene(scene);

        // Center the stage on the screen
        stage.centerOnScreen();

        // Display the stage
        stage.show();

    }

}
In this example, we initially draw a blue rectangle at coordinates (50, 50). Then, we translate it to a new position at coordinates (150, 150) by clearing the old position and drawing it again at the new position.
You can apply similar translation techniques to other graphical elements on the Canvas, such as circles, lines, or text.
Using translate Method
Alternatively, you can use the translate method of the GraphicsContext to translate elements. This method translates the current transform by a specified amount in the x and y directions. Here’s an example using the translate method:
import javafx.application.Application;
import javafx.scene.Scene;
import javafx.scene.canvas.Canvas;
import javafx.scene.canvas.GraphicsContext;
import javafx.scene.layout.*;
import javafx.scene.paint.Color;
import javafx.stage.Stage;

public class Main extends Application {

    private final BorderPane parent = new BorderPane();

    @Override
    public void init() throws Exception {
        super.init();

        // Build the user interface
        this.buildUI();
    }

    private void buildUI() {

        // Create the Canvas
        Canvas canvas = new Canvas(600, 400);

        // Get the GraphicsContext
        GraphicsContext gc = canvas.getGraphicsContext2D();

        // Translate the current transform by x=150 and y=150
        gc.translate(150, 150);

        // Draw a rectangle at the translated position
        gc.setFill(Color.MEDIUMPURPLE);
        gc.fillRect(0, 0, 200, 200);

        // Add the Canvas to the center of the BorderPane
        this.parent.setCenter(canvas);

    }

    @Override
    public void start(Stage stage) throws Exception {

        // Setup and display the stage
        this.setupStage(stage);
    }

    private void setupStage(Stage stage) {

        // Create a scene with the BorderPane as the root
        Scene scene = new Scene(this.parent, 640, 480);

        // Set the stage title
        stage.setTitle("Element Translation in JavaFX Canvas");

        // Set the scene for the stage
        stage.setScene(scene);

        // Center the stage on the screen
        stage.centerOnScreen();

        // Display the stage
        stage.show();

    }

}
In this example, we call gc.translate(150, 150) to translate the current transform by 150 units in both the x and y directions. Then, we draw a medium purple rectangle at the translated position (0, 0) on the Canvas.
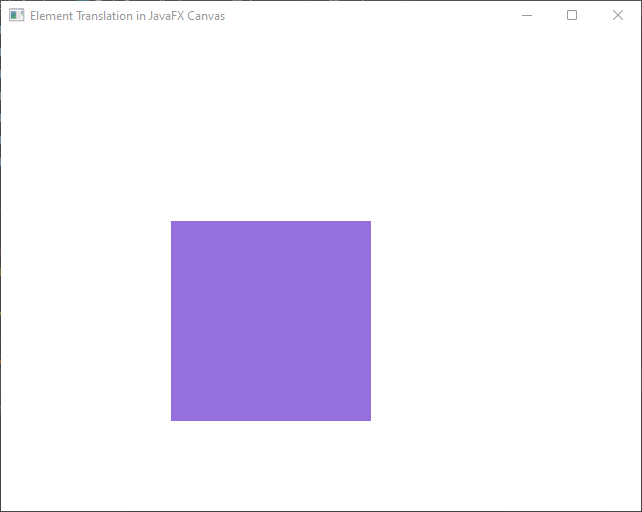
You can modify the gc.translate parameters to change the translation values as needed for your specific use case. This approach is especially useful when you want to apply the same translation to multiple elements on the Canvas or when you want to maintain the translated state for further drawing operations.
Resetting the Transform
You can reset the transformation by using gc.setTransform(1, 0, 0, 1, 0, 0), which sets the transform to the identity matrix (no translation).
Conclusion
Element translation is a fundamental aspect of creating dynamic and interactive JavaFX applications. Whether you choose to manually adjust coordinates or use the gc.translate method, mastering element translation in JavaFX Canvas opens up a world of possibilities for creating visually appealing user interfaces. Experiment with these concepts and adapt them to your specific projects to enhance user experience and engagement. Remember to check the JavaFX Canvas Documentation for more.
I hope you found this article informative and useful. If you would like to receive more content, please consider subscribing to our newsletter!
