When building apps, you often need to show a list of items. Whether it’s a list of messages in a chat, a to-do list, or a gallery of images, having a way to display lists is crucial. Flutter makes this easy with the ListView widget, which allows you to display a scrollable list of items.

with hands-on learning.
get the skills and confidence to land your next move.
Think of ListView as a long, scrollable list—like scrolling through your phone’s contact list or the feed on social media. Flutter’s ListView makes it simple to build and manage these types of lists.
What is the ListView Widget?
The ListView widget in Flutter is used to display a scrollable list of items. It’s perfect for when you have multiple items to display, and you want to allow users to scroll through them easily. You can create vertical lists, horizontal lists, or even custom layouts for each item in the list.
Imagine scrolling through your list of friends, where each friend’s name and picture is shown one after the other. This is what a ListView helps you do in Flutter.
Basic Usage of ListView
Creating a simple ListView is easy. Let’s say you have a list of fruits and you want to display them in a scrollable list. Here’s how you can do it:
import 'package:flutter/material.dart';

void main() {
  runApp(const MyApp());
}

class MyApp extends StatelessWidget {
  const MyApp({super.key});

  @override
  Widget build(BuildContext context) {
    return MaterialApp(
      home: Scaffold(
        appBar: AppBar(title: Text('Fruit List')),
        body: ListView(
          padding: const EdgeInsets.all(16.0),
          children: <Widget>[
            Text('Apple', style: TextStyle(fontSize: 18)),
            Text('Banana', style: TextStyle(fontSize: 18)),
            Text('Cherry', style: TextStyle(fontSize: 18)),
            Text('Grapes', style: TextStyle(fontSize: 18)),
            Text('Mango', style: TextStyle(fontSize: 18)),
            Text('Orange', style: TextStyle(fontSize: 18)),
            Text('Peach', style: TextStyle(fontSize: 18)),
            Text('Pineapple', style: TextStyle(fontSize: 18)),
            Text('Strawberry', style: TextStyle(fontSize: 18)),
            Text('Watermelon', style: TextStyle(fontSize: 18)),
            Text('Blueberry', style: TextStyle(fontSize: 18)),
            Text('Kiwi', style: TextStyle(fontSize: 18)),
            Text('Papaya', style: TextStyle(fontSize: 18)),
            Text('Plum', style: TextStyle(fontSize: 18)),
            Text('Pear', style: TextStyle(fontSize: 18)),
            Text('Lemon', style: TextStyle(fontSize: 18)),
            Text('Coconut', style: TextStyle(fontSize: 18)),
            Text('Apricot', style: TextStyle(fontSize: 18)),
            Text('Avocado', style: TextStyle(fontSize: 18)),
            Text('Fig', style: TextStyle(fontSize: 18)),
            Text('Raspberry', style: TextStyle(fontSize: 18)),
            Text('Blackberry', style: TextStyle(fontSize: 18)),
            Text('Dragonfruit', style: TextStyle(fontSize: 18)),
            Text('Jackfruit', style: TextStyle(fontSize: 18)),
            Text('Grapefruit', style: TextStyle(fontSize: 18)),
            Text('Lime', style: TextStyle(fontSize: 18)),
            Text('Tangerine', style: TextStyle(fontSize: 18)),
            Text('Cantaloupe', style: TextStyle(fontSize: 18)),
            Text('Cherries', style: TextStyle(fontSize: 18)),
          ],
        ),
      ),
    );
  }
}
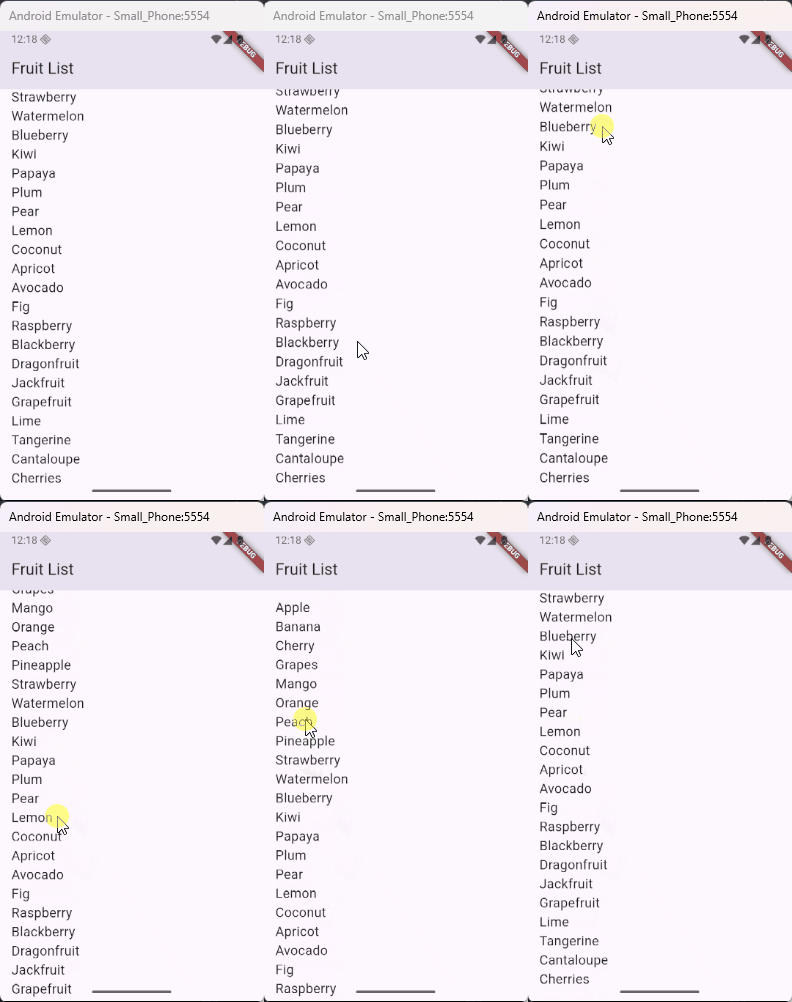
In this example, the ListView contains a list of Text widgets, each displaying a fruit. The ListView automatically makes the list scrollable. So if you have more items than what fits on the screen, the user can scroll down to see them.
Different Types of ListViews
Flutter offers different ways to create lists depending on how you want your list to behave.
ListView.builder
If you have a long list of items and want to load them efficiently, ListView.builder is the way to go. It only loads the items that are visible on the screen, so it saves memory and makes the app faster. Here’s how you can use it:
import 'package:flutter/material.dart';

void main() {
  runApp(const MyApp());
}

class MyApp extends StatelessWidget {
  const MyApp({super.key});

  @override
  Widget build(BuildContext context) {
    return MaterialApp(
      home: Scaffold(
        appBar: AppBar(title: Text('ListView.builder Example')),
        body: ListView.builder(
          itemCount: 100, // Number of items in the list
          itemBuilder: (context, index) {
            return Padding(
              padding: const EdgeInsets.all(8.0),
              child: Text('Item $index', style: TextStyle(fontSize: 18)),
            );
          },
        ),
      ),
    );
  }
}
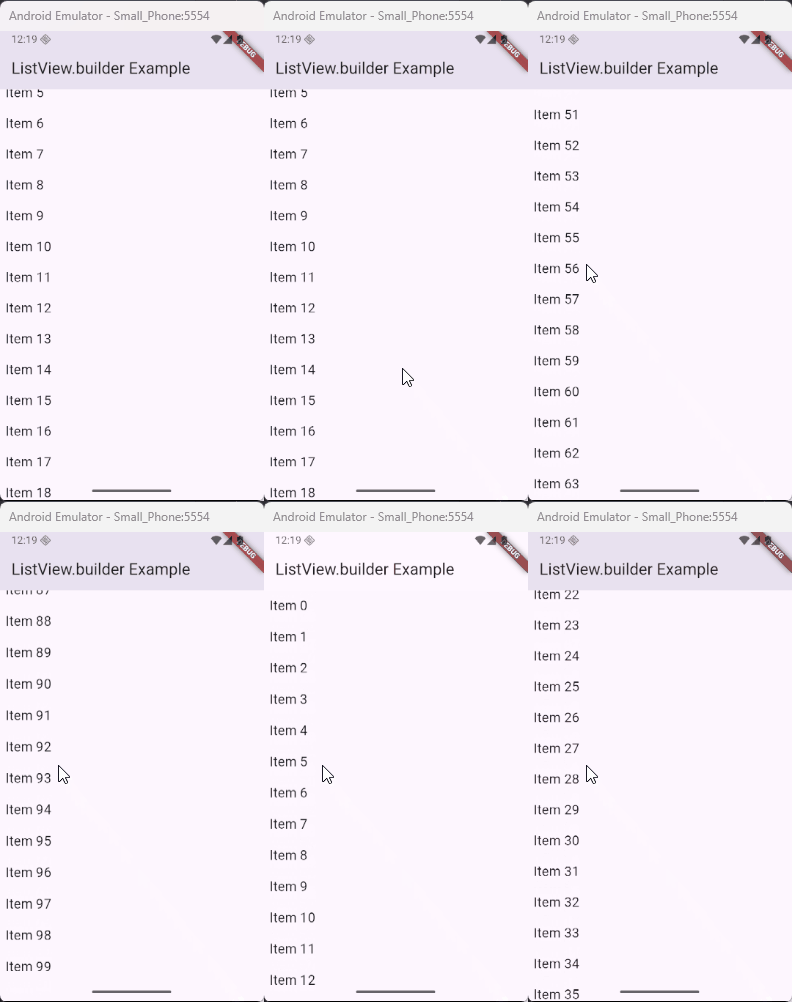
In this example, ListView.builder creates 100 items. However, only the items visible on the screen are loaded. This is great for large lists!
ListView.separated
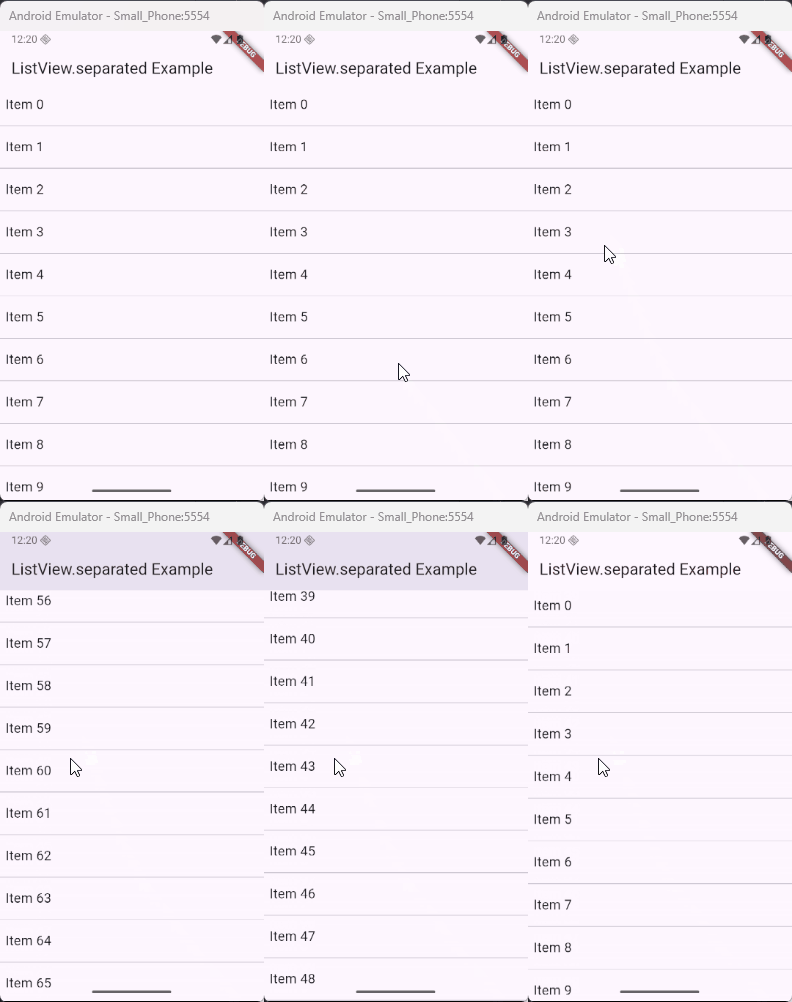
If you want to add separators between your items (like lines or space), you can use ListView.separated. It allows you to easily add a separator between each item.
import 'package:flutter/material.dart';

void main() {
  runApp(const MyApp());
}

class MyApp extends StatelessWidget {
  const MyApp({super.key});

  @override
  Widget build(BuildContext context) {
    return MaterialApp(
      home: Scaffold(
        appBar: AppBar(title: Text('ListView.separated Example')),
        body: ListView.separated(
          itemCount: 100, // Number of items in the list
          itemBuilder: (context, index) {
            return Padding(
              padding: const EdgeInsets.all(8.0),
              child: Text('Item $index', style: TextStyle(fontSize: 18)),
            );
          },
          separatorBuilder: (context, index) {
            return Divider(); // Adds a divider line between items
          },
        ),
      ),
    );
  }
}
This creates a list where each item is separated by a line, making it visually clearer.
ListView.custom
If you want complete control over how each item in the list is built, you can use ListView.custom. This gives you the flexibility to create custom layouts for each list item.
The ListView.custom constructor in Flutter allows you to create a custom list using a SliverChildDelegate. This gives you more control over how each item is built and allows you to manage the list’s children in a more flexible way. Here’s how you can use it:
import 'package:flutter/material.dart';

void main() {
  runApp(const MyApp());
}

class MyApp extends StatelessWidget {
  const MyApp({super.key});

  @override
  Widget build(BuildContext context) {
    return MaterialApp(
      home: Scaffold(
        appBar: AppBar(title: Text('ListView.custom Example')),
        body: ListView.custom(
          childrenDelegate: SliverChildBuilderDelegate(
            (context, index) {
              return Padding(
                padding: const EdgeInsets.all(8.0),
                child: Text(
                  'Item $index',
                  style: TextStyle(fontSize: 18),
                ),
              );
            },
            childCount: 100, // Total number of items
          ),
        ),
      ),
    );
  }
}ListView.custom: This constructor allows you to create a list where you have full control over the list’s children.childrenDelegate: This is aSliverChildDelegatethat defines how the children (items) are created. In this case, we’re usingSliverChildBuilderDelegate, which is similar toListView.builder, where the list items are built on demand.childCount: Specifies the total number of items in the list (100 in this case).
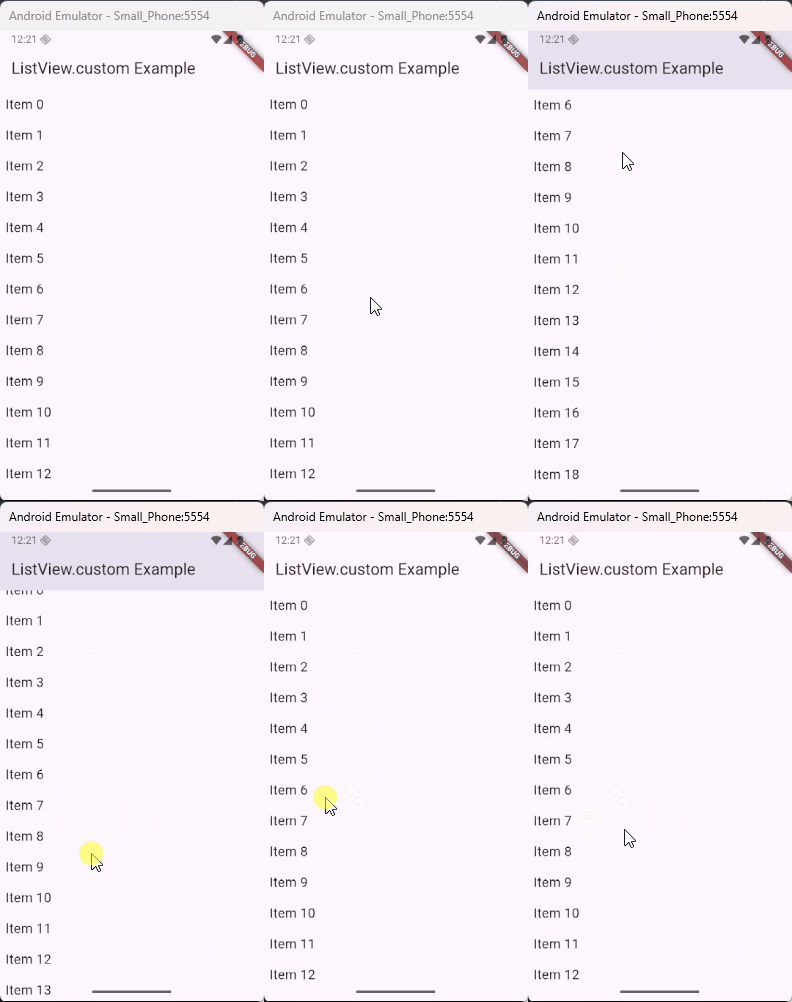
The ListView.custom is more advanced and can be useful when you want to handle complex or custom list item creation that doesn’t fit into the simpler ListView constructors.
Customizing List Items
You can customize the appearance of the items in your list. For example, you can wrap each item in a Container or use a ListTile widget to make it look like a clickable item.
Here’s an example of using ListTile:
import 'package:flutter/material.dart';

void main() {
  runApp(const MyApp());
}

class MyApp extends StatelessWidget {
  const MyApp({super.key});

  @override
  Widget build(BuildContext context) {
    return MaterialApp(
      home: Scaffold(
        // Ensure Scaffold is used here
        appBar: AppBar(title: Text('Shopping List')),
        body: Padding(padding: const EdgeInsets.all(16.0), child: FruitList()),
      ),
    );
  }
}

class FruitList extends StatelessWidget {
  const FruitList({super.key});

  @override
  Widget build(BuildContext context) {
    return ListView(
      children: <Widget>[
        ListTile(
          title: Text(
            'Apple',
            style: TextStyle(fontSize: 18, fontWeight: FontWeight.bold),
          ),
          subtitle: Text('A sweet and crunchy fruit.'),
          leading: Icon(Icons.star, color: Colors.green),
          trailing: Icon(Icons.shopping_cart),
          onTap: () {
            // Handle tap event (e.g., add to cart)
            ScaffoldMessenger.of(context).showSnackBar(
              SnackBar(content: Text('Added Apple to your cart!')),
            );
          },
        ),
        ListTile(
          title: Text(
            'Banana',
            style: TextStyle(fontSize: 18, fontWeight: FontWeight.bold),
          ),
          subtitle: Text('A rich source of potassium.'),
          leading: Icon(Icons.star, color: Colors.yellow),
          trailing: Icon(Icons.shopping_cart),
          onTap: () {
            // Handle tap event (e.g., add to cart)
            ScaffoldMessenger.of(context).showSnackBar(
              SnackBar(content: Text('Added Banana to your cart!')),
            );
          },
        ),
        ListTile(
          title: Text(
            'Cherry',
            style: TextStyle(fontSize: 18, fontWeight: FontWeight.bold),
          ),
          subtitle: Text('Sweet and tart, perfect for snacking.'),
          leading: Icon(Icons.star, color: Colors.red),
          trailing: Icon(Icons.shopping_cart),
          onTap: () {
            // Handle tap event (e.g., add to cart)
            ScaffoldMessenger.of(context).showSnackBar(
              SnackBar(content: Text('Added Cherry to your cart!')),
            );
          },
        ),
        ListTile(
          title: Text(
            'Mango',
            style: TextStyle(fontSize: 18, fontWeight: FontWeight.bold),
          ),
          subtitle: Text('A tropical fruit, rich in flavor.'),
          leading: Icon(Icons.star, color: Colors.orange),
          trailing: Icon(Icons.shopping_cart),
          onTap: () {
            // Handle tap event (e.g., add to cart)
            ScaffoldMessenger.of(context).showSnackBar(
              SnackBar(content: Text('Added Mango to your cart!')),
            );
          },
        ),
      ],
    );
  }
}
In this example, each list item is represented by a ListTile, which provides a clean and structured layout for displaying the item. The ListTile widget includes a title, a subtitle, a leading icon, and a trailing icon, making it perfect for displaying information like fruits or any other items in a list. Additionally, when the user taps on a list item, a SnackBar is shown with a message indicating that the item has been added to the cart.
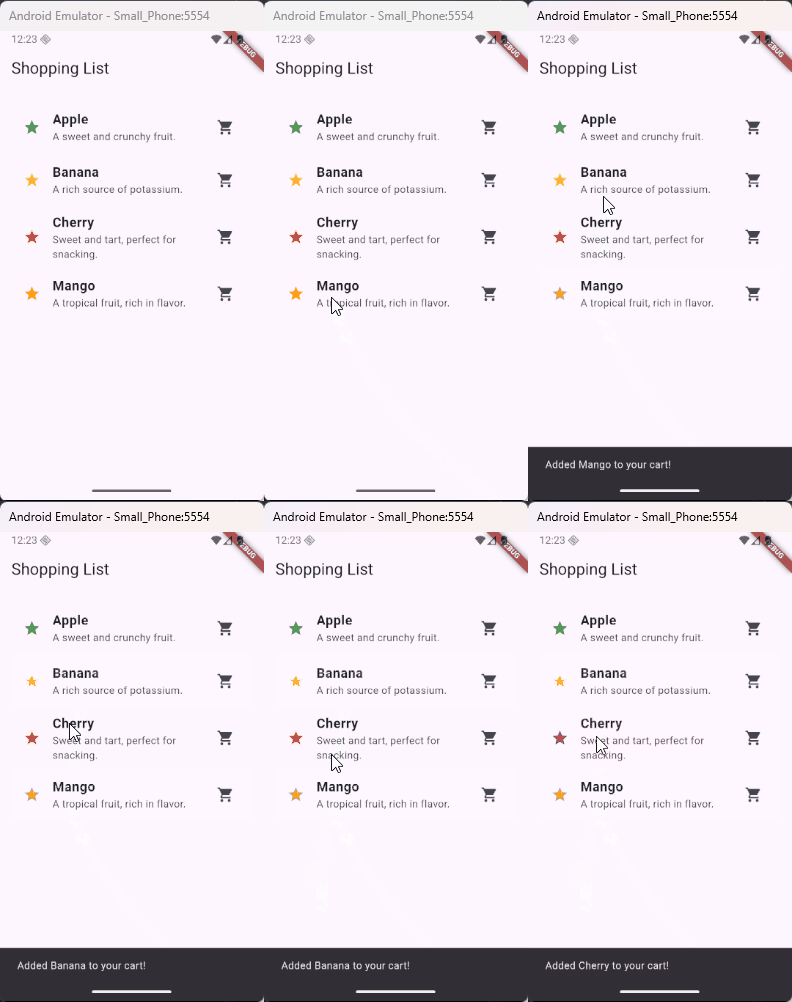
This layout is very useful for displaying lists of data in a visually appealing and functional way. You can easily customize the icons, text style, and actions for each item.
Handling ListView Scroll and Overflow
By default, ListView handles scrolling automatically. If you have more items than can fit on the screen, the list will scroll vertically so that users can see all the items.
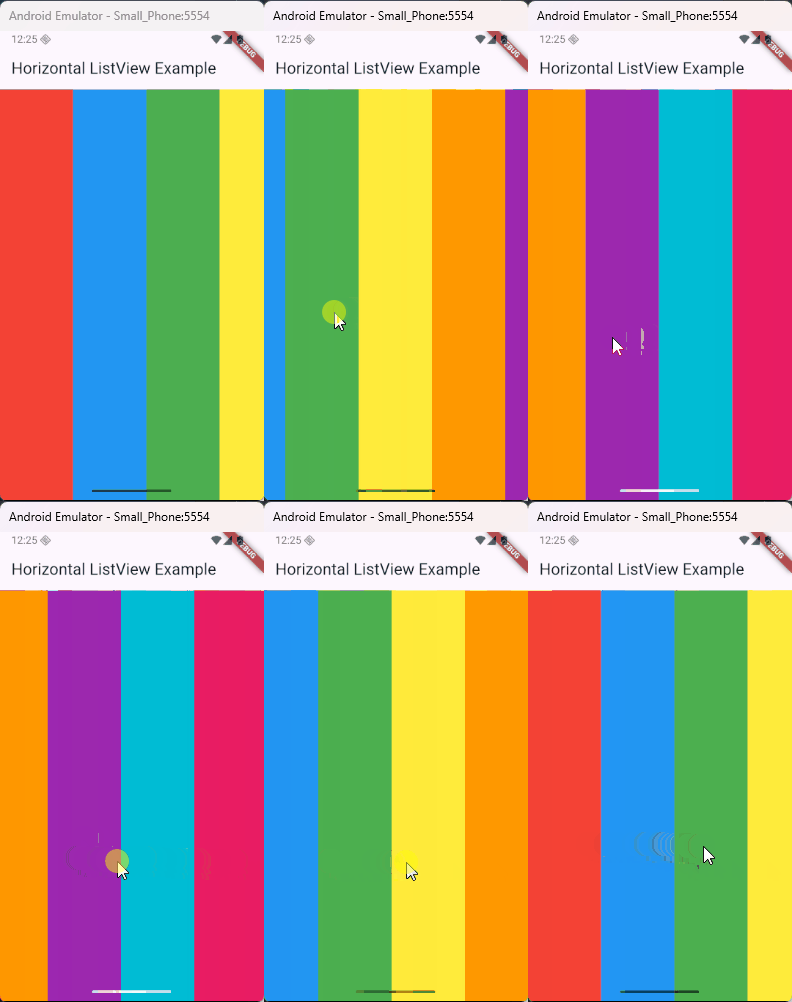
If you want to make your list scroll horizontally, you can change the scroll direction like this:
import 'package:flutter/material.dart';

void main() {
  runApp(const MyApp());
}

class MyApp extends StatelessWidget {
  const MyApp({super.key});

  @override
  Widget build(BuildContext context) {
    return MaterialApp(
      home: Scaffold(
        appBar: AppBar(title: Text('Horizontal ListView Example')),
        body: Center(
          child: ListView(
            scrollDirection: Axis.horizontal,
            children: <Widget>[
              Container(width: 100, color: Colors.red),
              Container(width: 100, color: Colors.blue),
              Container(width: 100, color: Colors.green),
              Container(width: 100, color: Colors.yellow),
              Container(width: 100, color: Colors.orange),
              Container(width: 100, color: Colors.purple),
              Container(width: 100, color: Colors.cyan),
              Container(width: 100, color: Colors.pink),
            ],
          ),
        ),
      ),
    );
  }
}
In this example, the ListView is set to scroll horizontally. Each Container has a fixed width and a different background color, creating a colorful horizontal scrollable list. You can adjust the width or colors to match the look and feel you want.
Performance Optimization
If your list has a lot of items (hundreds or even thousands), ListView.builder is the best choice because it only loads the items that are visible. This makes your app faster and more memory-efficient.
When creating large lists, using ListView.builder is a great way to prevent your app from slowing down or crashing due to memory overload.
Use Cases for ListView
The ListView widget is used in many apps to display lists of information. Some common use cases include:
- Chats or messages: Showing a list of messages in a chat app.
- Contacts: Displaying a list of contacts in your phone book.
- To-do lists: Allowing users to see and check off tasks.
- Image galleries: Displaying a collection of images that users can scroll through.
Conclusion
The ListView widget is a powerful tool in Flutter that makes it easy to display a scrollable list of items. Whether you need a simple vertical list, a list with separators, or a custom layout, ListView has you covered.
By using the different types of ListView—such as ListView.builder, ListView.separated, and ListView.custom—you can create efficient and stylish lists for your apps. And by customizing each item, you can make the list look exactly how you want.
So, next time you need to display a list in your Flutter app, give ListView a try and experiment with the different options it offers!
