The HTML Canvas is a powerful tool that allows developers to draw graphics dynamically on a webpage using JavaScript. Among the most fundamental shapes you can create on a canvas are lines and paths. Lines form the simplest connection between two points, while paths are sequences of lines and curves that combine to create more complex shapes and drawings. Understanding how to draw lines and paths is the foundation for creating intricate graphics, animations, and even games.

with hands-on learning.
get the skills and confidence to land your next move.
Paths on the canvas work by defining points and connecting them in specific orders. This process involves several core methods such as moveTo(), which sets the starting point, and lineTo(), which draws a line to a new point. These commands build a path that can then be either stroked (outlined) or filled (colored inside). Mastering these basics allows you to create everything from simple shapes to detailed drawings.
Setting Up the Canvas
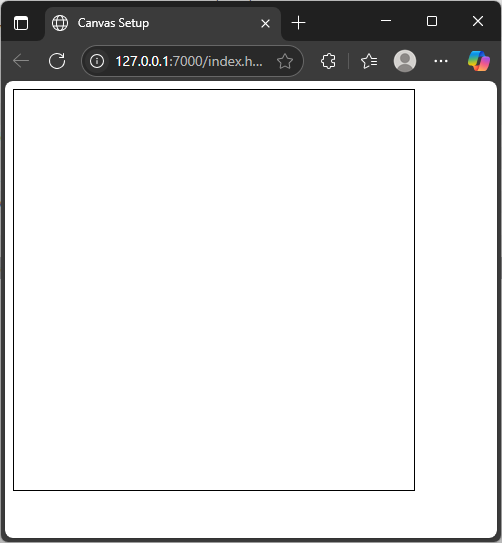
Before drawing anything, you need an HTML canvas element in your document and a way to access its 2D rendering context via JavaScript. The 2D context provides the methods for drawing lines, shapes, and images.
Here is a minimal setup to create a canvas with a 400 by 400 pixel area:
<!DOCTYPE html>
<html lang="en">
<head>
  <meta charset="UTF-8" />
  <title>Canvas Setup</title>
</head>
<body>

  <canvas id="myCanvas" width="400" height="400" style="border:1px solid black;"></canvas>

  <script>

    const canvas = document.getElementById('myCanvas');
    const ctx = canvas.getContext('2d');

  </script>

</body>
</html>In this example, the <canvas> tag defines the drawing area. We access it using getElementById() and then call getContext('2d') to get the drawing context, stored in the ctx variable. This context is what you use to issue all drawing commands.
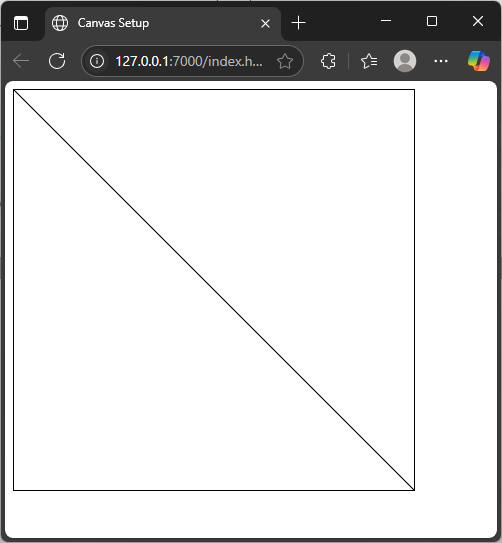
Drawing a Simple Straight Line
Once you have the canvas and context ready, drawing a line is straightforward. You start by telling the context where you want to begin the line with moveTo(x, y). Then, you draw a line to a new point using lineTo(x, y). To make the line visible, you call stroke(), which outlines the path.
Below is an example of drawing a diagonal line from the top-left corner to the bottom-right corner of the canvas:
<!DOCTYPE html>
<html lang="en">
<head>
  <meta charset="UTF-8" />
  <title>Canvas | Drawing</title>
</head>
<body>

  <canvas id="lineCanvas" width="400" height="400" style="border:1px solid black;"></canvas>

  <script>

    const canvas = document.getElementById('lineCanvas');
    const ctx = canvas.getContext('2d');

    ctx.beginPath();         // Start a new path
    ctx.moveTo(0, 0);        // Move to the top-left corner
    ctx.lineTo(400, 400);    // Draw line to bottom-right corner
    ctx.stroke();            // Render the line

  </script>

</body>
</html>Here, beginPath() clears any previous paths and begins a fresh one. Without it, lines would connect unintentionally. The moveTo() sets the starting point at (0,0), which is the canvas top-left. The lineTo() sets the endpoint at (400, 400), bottom-right. Calling stroke() draws the line on the canvas.
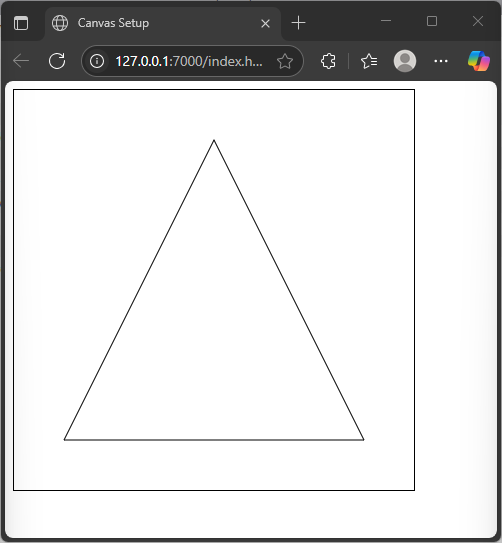
Drawing Multiple Connected Lines (Paths)
To create shapes, you connect multiple points with lineTo() calls. When all points are connected, you can close the shape by calling closePath(), which draws a final line back to the start.
For example, here is how to draw a simple triangle:
<!DOCTYPE html>
<html lang="en">
<head>
  <meta charset="UTF-8" />
  <title>Canvas | Drawing</title>
</head>
<body>

  <canvas id="triangleCanvas" width="400" height="400" style="border:1px solid black;"></canvas>

  <script>

    const canvas = document.getElementById('triangleCanvas');
    const ctx = canvas.getContext('2d');

    ctx.beginPath();               // Begin a new path
    ctx.moveTo(200, 50);           // Start at top center
    ctx.lineTo(350, 350);          // Draw line to bottom-right
    ctx.lineTo(50, 350);           // Draw line to bottom-left
    ctx.closePath();               // Connect back to start point
    ctx.stroke();                  // Outline the triangle

  </script>

</body>
</html>This example starts at (200, 50), the triangle’s top vertex. The next two lineTo() commands draw the sides down to the base points. closePath() completes the triangle by connecting the last point back to the first. Finally, stroke() outlines the shape.
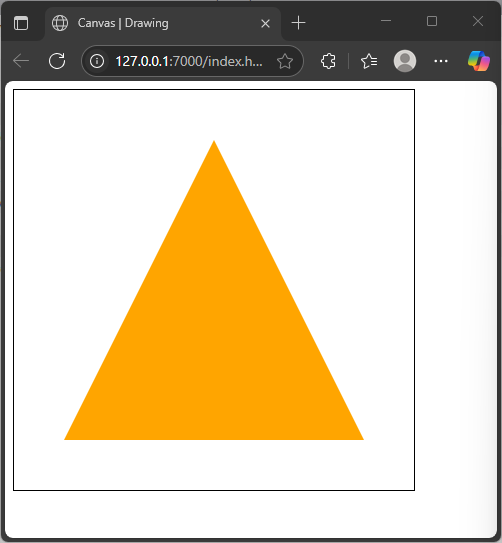
Filling Closed Paths
While stroking outlines shapes, you can fill the inside area with color using the fill() method. This gives your drawings a solid appearance.
Let’s fill the triangle from the previous example with a warm orange color:
<!DOCTYPE html>
<html lang="en">
<head>
  <meta charset="UTF-8" />
  <title>Canvas | Drawing</title>
</head>
<body>

  <canvas id="filledTriangle" width="400" height="400" style="border:1px solid black;"></canvas>

  <script>

    const canvas = document.getElementById('filledTriangle');
    const ctx = canvas.getContext('2d');

    ctx.beginPath();
    ctx.moveTo(200, 50);
    ctx.lineTo(350, 350);
    ctx.lineTo(50, 350);
    ctx.closePath();

    ctx.fillStyle = 'orange';  // Set fill color
    ctx.fill();                // Fill the shape

  </script>

</body>
</html>After defining the triangle path, we set the fillStyle to 'orange' and call fill(). The triangle is filled completely with orange. You can still use stroke() after fill if you want an outline on the filled shape.
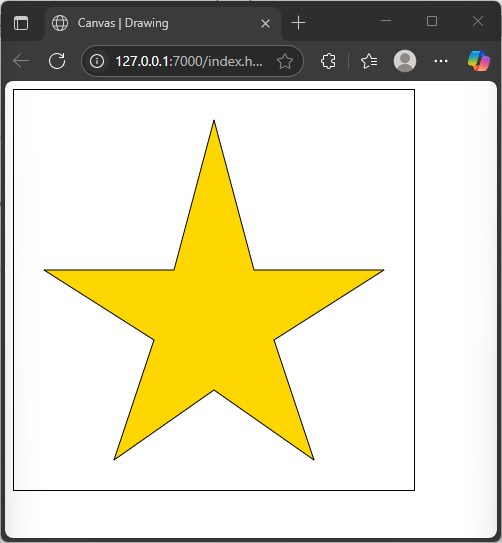
Drawing Complex Shapes with Paths
Paths can connect many points, allowing you to create complex polygons. For example, a star shape is formed by connecting points in a certain order.
Here is a star shape drawn with lines and filled with gold:
<!DOCTYPE html>
<html lang="en">
<head>
  <meta charset="UTF-8" />
  <title>Canvas | Drawing</title>
</head>
<body>

  <canvas id="starCanvas" width="400" height="400" style="border:1px solid black;"></canvas>

  <script>

    const canvas = document.getElementById('starCanvas');
    const ctx = canvas.getContext('2d');

    ctx.beginPath();
    ctx.moveTo(200, 30);
    ctx.lineTo(240, 180);
    ctx.lineTo(370, 180);
    ctx.lineTo(260, 250);
    ctx.lineTo(300, 370);
    ctx.lineTo(200, 300);
    ctx.lineTo(100, 370);
    ctx.lineTo(140, 250);
    ctx.lineTo(30, 180);
    ctx.lineTo(160, 180);
    ctx.closePath();

    ctx.fillStyle = 'gold';
    ctx.fill();
    ctx.stroke();

  </script>

</body>
</html>This star is built by carefully connecting ten points. Using closePath() ensures the shape is fully enclosed. Setting fillStyle to 'gold' and calling fill() fills the star with color, while stroke() draws its outline.
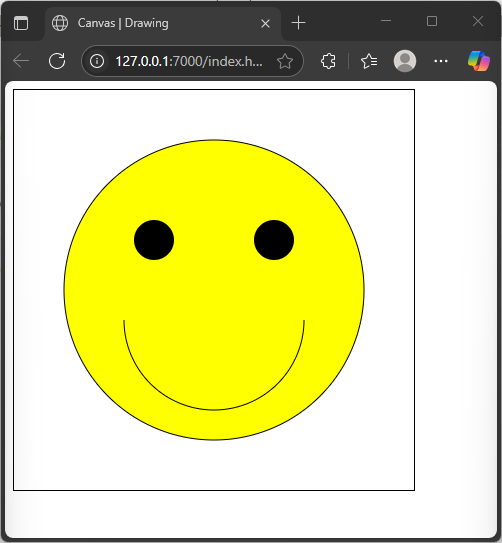
Using arc() and Paths to Create Curves
Paths are not limited to straight lines. You can use the arc() method to draw curves and circles as part of your paths. This lets you create rounded shapes or combine arcs with lines for interesting designs.
For example, here is a smiley face composed of a circle and two eyes using arcs and lines:
<!DOCTYPE html>
<html lang="en">
<head>
  <meta charset="UTF-8" />
  <title>Canvas | Drawing</title>
</head>
<body>

  <canvas id="smileyCanvas" width="400" height="400" style="border:1px solid black;"></canvas>

  <script>

    const canvas = document.getElementById('smileyCanvas');
    const ctx = canvas.getContext('2d');

    // Face circle
    ctx.beginPath();
    ctx.arc(200, 200, 150, 0, Math.PI * 2); // Full circle
    ctx.fillStyle = 'yellow';
    ctx.fill();
    ctx.stroke();

    // Left eye
    ctx.beginPath();
    ctx.arc(140, 150, 20, 0, Math.PI * 2);
    ctx.fillStyle = 'black';
    ctx.fill();

    // Right eye
    ctx.beginPath();
    ctx.arc(260, 150, 20, 0, Math.PI * 2);
    ctx.fill();

    // Mouth (arc)
    ctx.beginPath();
    ctx.arc(200, 230, 90, 0, Math.PI); // Half circle (smile)
    ctx.stroke();

  </script>

</body>
</html>The arc() method takes parameters for center coordinates, radius, start and end angles (in radians). Here, a large yellow circle is drawn for the face, smaller black circles for eyes, and a half-circle for the smile. Multiple paths are used to keep shapes separate.
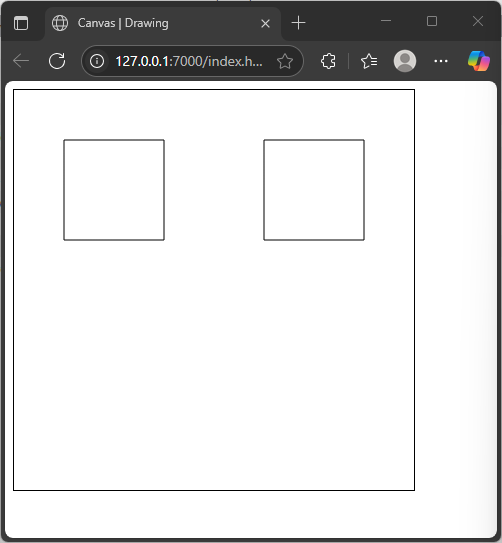
Drawing Paths with Multiple Subpaths
A single path can contain several disconnected shapes by starting new subpaths with moveTo(). This is useful for drawing multiple objects in one go.
For instance, drawing two squares separately on the same canvas:
<!DOCTYPE html>
<html lang="en">
<head>
  <meta charset="UTF-8" />
  <title>Canvas | Drawing</title>
</head>
<body>

  <canvas id="multiSquareCanvas" width="400" height="400" style="border:1px solid black;"></canvas>

  <script>

    const canvas = document.getElementById('multiSquareCanvas');
    const ctx = canvas.getContext('2d');

    ctx.beginPath();

    // First square
    ctx.moveTo(50, 50);
    ctx.lineTo(150, 50);
    ctx.lineTo(150, 150);
    ctx.lineTo(50, 150);
    ctx.closePath();

    // Second square
    ctx.moveTo(250, 50);
    ctx.lineTo(350, 50);
    ctx.lineTo(350, 150);
    ctx.lineTo(250, 150);
    ctx.closePath();

    ctx.stroke();

  </script>

</body>
</html>Here, after closing the first square path, moveTo() moves to a new starting position for the second square. Both shapes are stroked together with one stroke() call.
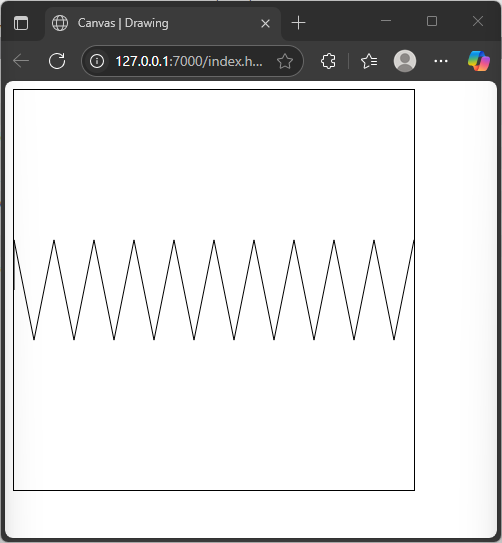
Creating Dynamic Paths with Loops
You can use JavaScript loops to create patterns made of lines and paths. This lets you build zigzags, grids, or repetitive shapes without manually coding every point.
Below is an example drawing a zigzag line using a loop:
<!DOCTYPE html>
<html lang="en">
<head>
  <meta charset="UTF-8" />
  <title>Canvas | Drawing</title>
</head>
<body>

  <canvas id="zigzagCanvas" width="400" height="400" style="border:1px solid black;"></canvas>

  <script>

    const canvas = document.getElementById('zigzagCanvas');
    const ctx = canvas.getContext('2d');

    ctx.beginPath();
    ctx.moveTo(0, 200);

    const step = 20;

    for (let x = 0; x <= 400; x += step) {
      let y = (x / step) % 2 === 0 ? 150 : 250;
      ctx.lineTo(x, y);
    }

    ctx.stroke();

  </script>

</body>
</html>This code moves horizontally in steps of 20 pixels. The y coordinate toggles between 150 and 250, creating peaks and valleys. The resulting zigzag line animates the concept of dynamic path creation.
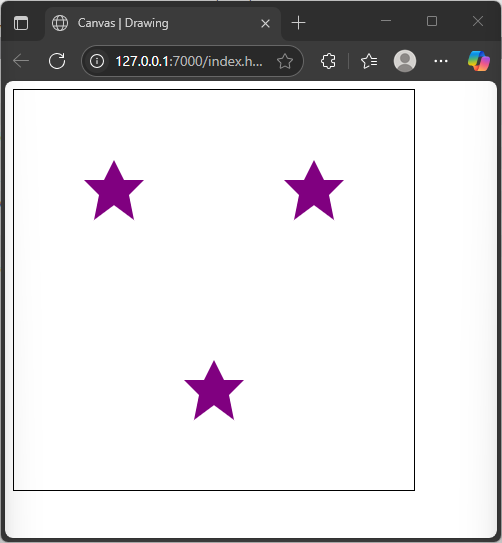
Using Path2D Objects for Reusable Paths
The Path2D interface allows you to define a path once and reuse it multiple times, which can simplify code when you want to draw the same shape repeatedly.
Here is an example of creating a star path and drawing it multiple times:
<!DOCTYPE html>
<html lang="en">
<head>
  <meta charset="UTF-8" />
  <title>Canvas | Drawing</title>
</head>
<body>

  <canvas id="reusablePathCanvas" width="400" height="400" style="border:1px solid black;"></canvas>

  <script>

    const canvas = document.getElementById('reusablePathCanvas');
    const ctx = canvas.getContext('2d');

    // Create a Path2D star shape
    const star = new Path2D();
    star.moveTo(0, -30);
    star.lineTo(10, -10);
    star.lineTo(30, -10);
    star.lineTo(15, 5);
    star.lineTo(20, 30);
    star.lineTo(0, 15);
    star.lineTo(-20, 30);
    star.lineTo(-15, 5);
    star.lineTo(-30, -10);
    star.lineTo(-10, -10);
    star.closePath();

    // Draw stars at different positions
    ctx.fillStyle = 'purple';

    ctx.save();          // Save current state
    ctx.translate(100, 100); // Move origin
    ctx.fill(star);      // Draw star
    ctx.restore();       // Restore state

    ctx.save();
    ctx.translate(300, 100);
    ctx.fill(star);
    ctx.restore();

    ctx.save();
    ctx.translate(200, 300);
    ctx.fill(star);
    ctx.restore();

  </script>

</body>
</html>We define the star shape once as a Path2D object. Then, by translating the drawing origin, we reuse the same star shape at multiple canvas positions. This reduces repetition and keeps the code clean.
Conclusion
Drawing lines and paths on the HTML Canvas is the cornerstone of creating custom graphics with JavaScript. By understanding and using methods like moveTo(), lineTo(), closePath(), and arc(), you can create simple lines, polygons, curves, and complex shapes. The ability to fill or stroke these paths opens up a wide range of visual possibilities.
Experimenting with loops and Path2D objects further empowers you to create dynamic and reusable graphics. The basics covered here lay the groundwork for deeper exploration into animation, interactivity, and advanced canvas art.
References
- MDN Web Docs: CanvasRenderingContext2D API
- MDN Web Docs: Path2D API
- HTML Living Standard: Canvas