When it comes to building rich and interactive user interfaces (UI) in Java applications, JavaFX has proven to be a powerful and versatile framework. One of the key layout managers provided by JavaFX is the AnchorPane. The AnchorPane allows developers to create flexible and responsive UIs by anchoring UI components to specific positions within the container. In this article, we will explore the concepts of the JavaFX AnchorPane and provide comprehensive code examples to demonstrate its usage.

with hands-on learning.
get the skills and confidence to land your next move.
Understanding the AnchorPane
The AnchorPane is a layout manager in JavaFX that allows developers to place UI components within a container by specifying their positions relative to the edges of the container. Each UI component (node) added to an AnchorPane can be anchored to one or more edges of the pane, ensuring that the component remains at a fixed distance from those edges as the container’s size changes.
This positioning behavior is particularly useful for creating resizable and responsive UIs, as components remain proportionally positioned based on their anchoring. As the container is resized, the anchored components adjust their positions accordingly, maintaining their relative distances from the specified edges.
Anchoring UI Elements
To anchor UI elements within an AnchorPane, you specify the anchor constraints for each element using the AnchorPane.set…Anchor… methods. There are four types of anchors: top, right, bottom, and left. Each anchor is set using the corresponding method: setTopAnchor(node, value), setRightAnchor(node, value), setBottomAnchor(node, value), and setLeftAnchor(node, value).
Here’s a basic example of anchoring UI elements within an AnchorPane:
import javafx.application.Application;
import javafx.scene.Scene;
import javafx.scene.control.Button;
import javafx.scene.layout.*;
import javafx.stage.Stage;

public class Main extends Application {

    private final AnchorPane parent = new AnchorPane();

    @Override
    public void start(Stage stage) throws Exception {
        this.setupStage(stage);
    }

    @Override
    public void init() throws Exception {
        super.init();
        this.buildUI();
    }

    private void buildUI() {

        Button topLeftButton = new Button("Top Left");
        Button bottomRightButton = new Button("Bottom Right");

        // Anchoring elements
        AnchorPane.setTopAnchor(topLeftButton, 10.0);
        AnchorPane.setLeftAnchor(topLeftButton, 10.0);

        AnchorPane.setBottomAnchor(bottomRightButton, 10.0);
        AnchorPane.setRightAnchor(bottomRightButton, 10.0);

        this.parent.getChildren().addAll(topLeftButton, bottomRightButton);

    }

    private void setupStage(Stage stage) {

        Scene scene = new Scene(this.parent, 640, 480);

        // Set the stage title
        stage.setTitle("JavaFX AnchorPane: Anchoring Your UI");

        // Set the stage scene
        stage.setScene(scene);

        // Center the stage on the screen
        stage.centerOnScreen();

        // Show the stage on the screen
        stage.show();

    }

}
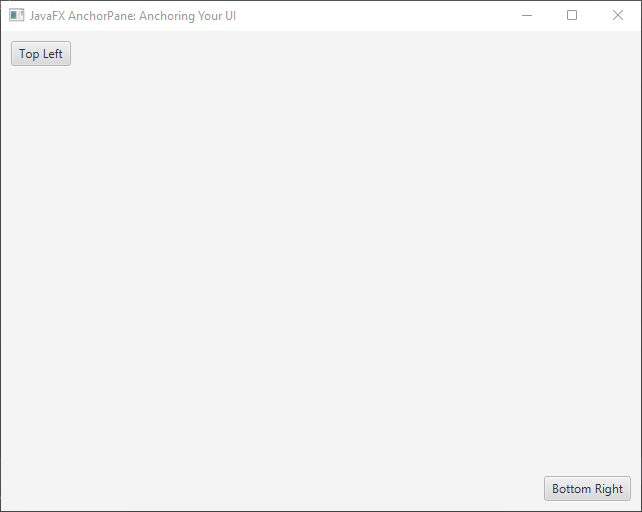
In this example, we create an AnchorPane and add two buttons to it. We anchor the “Top Left” button 10.0px to the top and left edges of the AnchorPane, and the “Bottom Right” button 10.0px to the bottom and right edges.

Responsive Design with AnchorPane
One of the significant advantages of using the AnchorPane is its ability to create responsive UIs. By anchoring nodes to different edges and corners of the container, you can ensure that your UI components adjust their positions as the window size changes.
import javafx.application.Application;
import javafx.scene.Scene;
import javafx.scene.control.Button;
import javafx.scene.layout.*;
import javafx.stage.Stage;

public class Main extends Application {

    private final AnchorPane parent = new AnchorPane();

    @Override
    public void start(Stage stage) throws Exception {
        this.setupStage(stage);
    }

    @Override
    public void init() throws Exception {
        super.init();
        this.buildUI();
    }

    private void buildUI() {

        Button resizableButton = new Button("Resizable");

        // Anchor the button to all four edges, creating a resizable behavior
        AnchorPane.setTopAnchor(resizableButton, 20.0);
        AnchorPane.setRightAnchor(resizableButton, 20.0);
        AnchorPane.setBottomAnchor(resizableButton, 20.0);
        AnchorPane.setLeftAnchor(resizableButton, 20.0);

        this.parent.getChildren().addAll(resizableButton);

    }

    private void setupStage(Stage stage) {

        Scene scene = new Scene(this.parent, 640, 480);

        // Set the stage title
        stage.setTitle("JavaFX AnchorPane: Anchoring Your UI");

        // Set the stage scene
        stage.setScene(scene);

        // Center the stage on the screen
        stage.centerOnScreen();

        // Show the stage on the screen
        stage.show();

    }

}
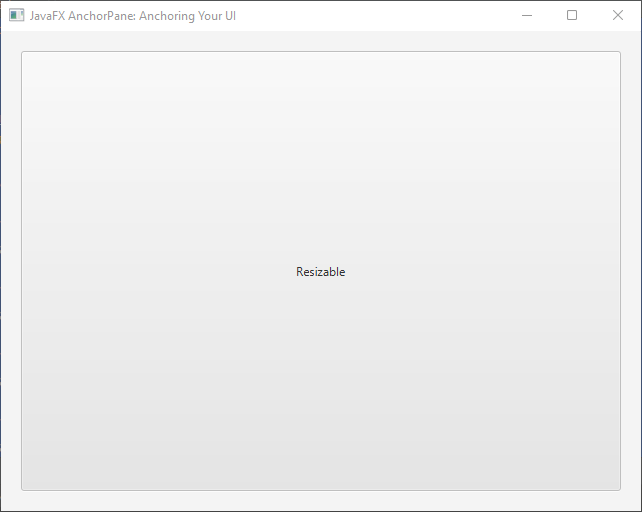
In this example, the resizableButton is anchored to all four edges of the AnchorPane, creating a resizable behavior where the button maintains a constant distance from all edges as the container is resized.

Clearing Constraints
Constraints in the AnchorPane are used to define the positioning of UI elements relative to the edges of the container or other elements. However, there are scenarios where you might want to clear these constraints to adjust the layout dynamically. For instance, if you’re building an interface that changes based on user interactions, such as resizing a window, clearing constraints becomes crucial to achieve a seamless user experience.
Clearing All Constraints for a Node
To clear all constraints for a specific node in the AnchorPane, you can use the AnchorPane.clearConstraints(Node node) method. Here’s an example of how to use it:
import javafx.application.Application;
import javafx.scene.Scene;
import javafx.scene.control.Button;
import javafx.scene.layout.*;
import javafx.stage.Stage;

public class Main extends Application {

    private final AnchorPane parent = new AnchorPane();

    @Override
    public void start(Stage stage) throws Exception {
        this.setupStage(stage);
    }

    @Override
    public void init() throws Exception {
        super.init();
        this.buildUI();
    }

    private void buildUI() {

        Button button = new Button("Click Me!");

        AnchorPane.setTopAnchor(button, 50.0);
        AnchorPane.setLeftAnchor(button, 100.0);

        Button clearButton = new Button("Clear Constraints");

        // Set action for clear constraints button
        clearButton.setOnAction(event -> AnchorPane.clearConstraints(button));

        this.parent.getChildren().addAll(button, clearButton);

    }

    private void setupStage(Stage stage) {

        Scene scene = new Scene(this.parent, 640, 480);

        // Set the stage title
        stage.setTitle("JavaFX AnchorPane: Anchoring Your UI");

        // Set the stage scene
        stage.setScene(scene);

        // Center the stage on the screen
        stage.centerOnScreen();

        // Show the stage on the screen
        stage.show();

    }

}
In this example, a button is initially anchored to the top and left edges of the AnchorPane. However, when you click the “Clear Constraints” button, the constraints are cleared, allowing the anchored button to move freely within the pane.
Clearing Specific Constraints
Sometimes, you might only want to clear specific constraints (e.g., only vertical or horizontal constraints) while keeping others intact. To achieve this, you can set the specific constraint to null. Here’s how you can clear vertical constraints while keeping horizontal constraints:
import javafx.application.Application;
import javafx.scene.Scene;
import javafx.scene.control.Button;
import javafx.scene.layout.*;
import javafx.stage.Stage;

public class Main extends Application {

    private final AnchorPane parent = new AnchorPane();

    @Override
    public void start(Stage stage) throws Exception {
        this.setupStage(stage);
    }

    @Override
    public void init() throws Exception {
        super.init();
        this.buildUI();
    }

    private void buildUI() {

        Button button = new Button("Click Me!");

        AnchorPane.setTopAnchor(button, 50.0);
        AnchorPane.setLeftAnchor(button, 100.0);

        Button clearButton = new Button("Clear Constraints");

        // Set action for clear Constraints button
        clearButton.setOnAction(event -> {

			// Clear Top and Bottom anchors
            AnchorPane.setTopAnchor(button, null);
            AnchorPane.setBottomAnchor(button, null);

        });

        this.parent.getChildren().addAll(button, clearButton);

    }

    private void setupStage(Stage stage) {

        Scene scene = new Scene(this.parent, 640, 480);

        // Set the stage title
        stage.setTitle("JavaFX AnchorPane: Anchoring Your UI");

        // Set the stage scene
        stage.setScene(scene);

        // Center the stage on the screen
        stage.centerOnScreen();

        // Show the stage on the screen
        stage.show();

    }

}
By selectively clearing constraints, you can create UIs that respond to user interactions in a controlled and intuitive manner. This technique enhances the user experience and gives you the flexibility to design layouts that adapt to various scenarios. Experiment with clearing specific constraints to fine-tune the positioning and responsiveness of your JavaFX applications.
Creating a FAB (Floating Action Button)
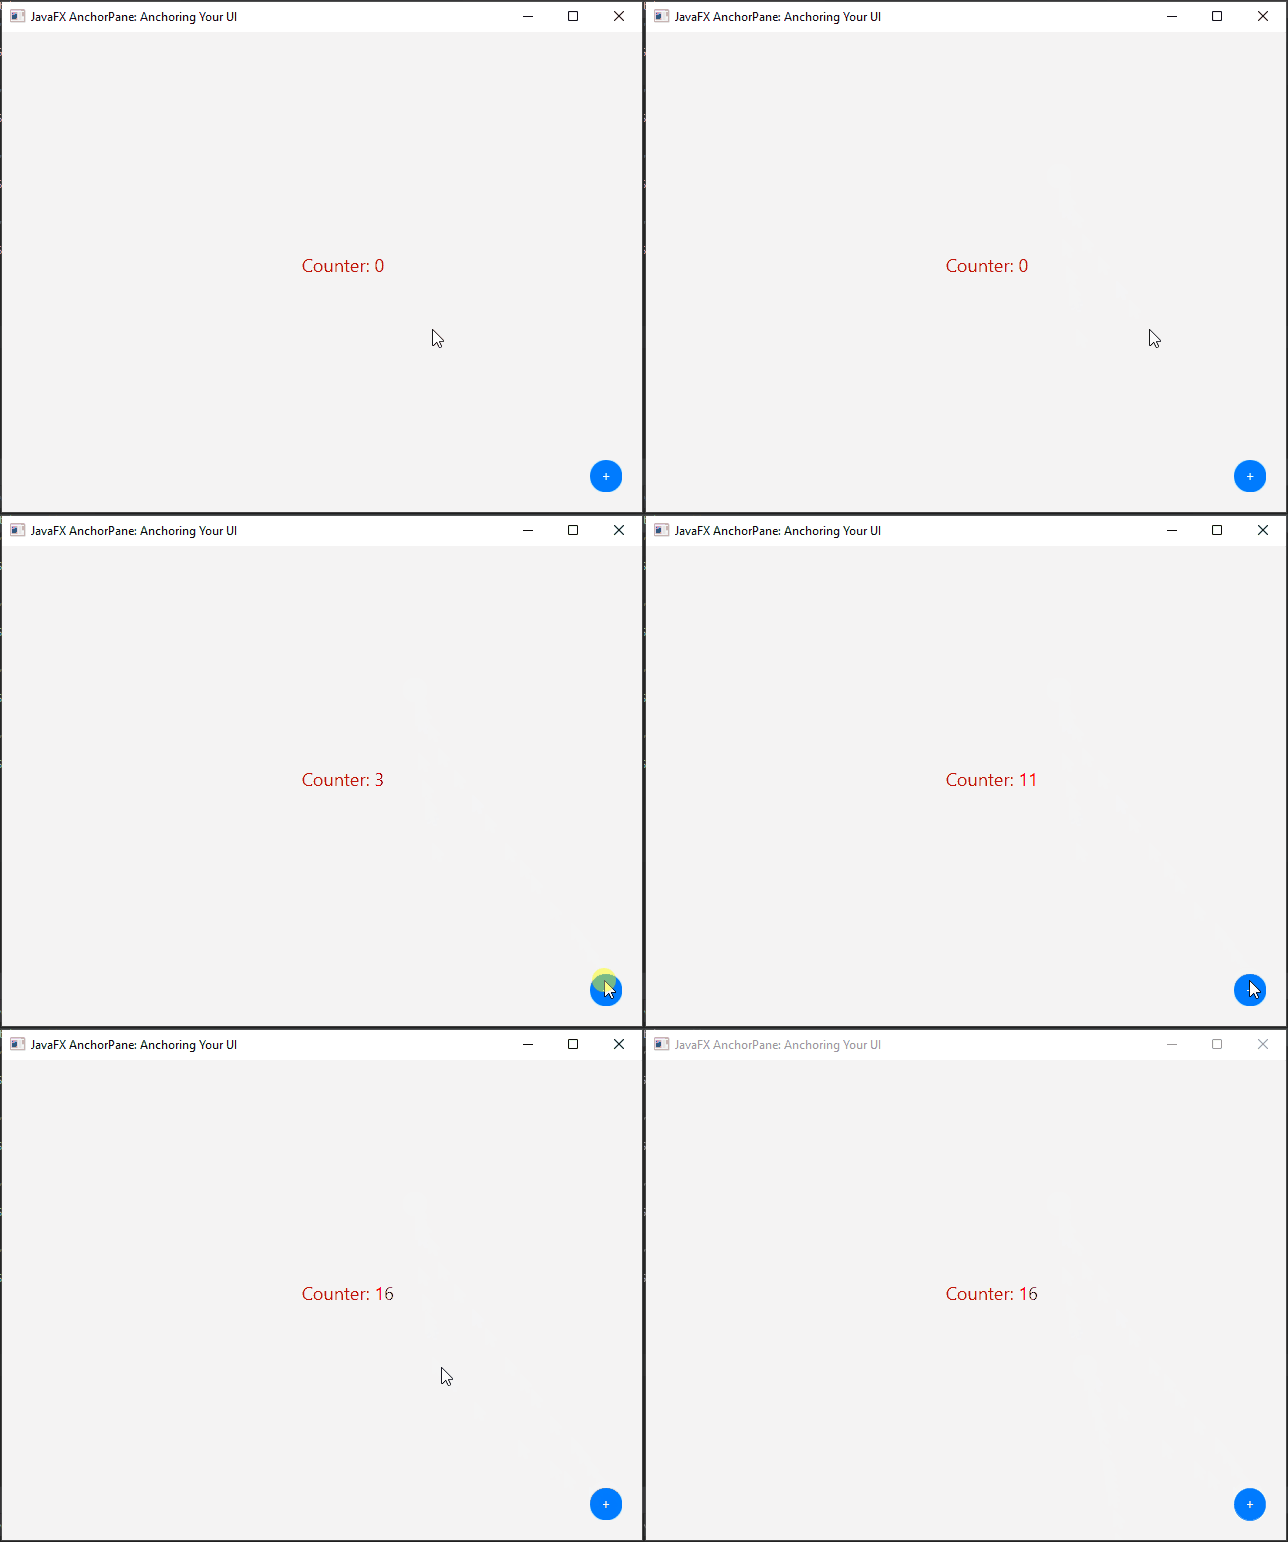
Creating a Floating Action Button (FAB) is a common design element used to provide quick access to primary actions in a user interface. In JavaFX, you can easily create a FAB using the AnchorPane layout manager along with other UI components. Let’s walk through the process of creating a simple FAB with an example:
import javafx.application.Application;
import javafx.scene.Scene;
import javafx.scene.control.Button;
import javafx.scene.control.Label;
import javafx.scene.layout.*;
import javafx.stage.Stage;

public class Main extends Application {

    private final AnchorPane parent = new AnchorPane();

    @Override
    public void start(Stage stage) throws Exception {
        this.setupStage(stage);
    }

    @Override
    public void init() throws Exception {
        super.init();
        this.buildUI();
    }

    private void buildUI() {

        Button fabButton = new Button("+");

        fabButton.getStyleClass().add("fab-button");

        AnchorPane.setBottomAnchor(fabButton, 20.0);
        AnchorPane.setRightAnchor(fabButton, 20.0);

        Label counter = new Label("Counter: 0");

        counter.setStyle("-fx-font-size: 18px; -fx-text-fill: #f00");

        AnchorPane.setTopAnchor(counter, 220.0);
        AnchorPane.setLeftAnchor(counter, 300.0);

        fabButton.setOnAction(actionEvent -> {

            // Update counter Label
            int value= Integer.parseInt(counter.getText().split(" ")[1]);
            counter.setText("Counter: " + (value + 1));

        });

        this.parent.getChildren().addAll(counter, fabButton);

    }

    private void setupStage(Stage stage) {

        Scene scene = new Scene(this.parent, 640, 480);

        // Load CSS for styling
        scene.getStylesheets().add("styles.css");

        // Set the stage title
        stage.setTitle("JavaFX AnchorPane: Anchoring Your UI");

        // Set the stage scene
        stage.setScene(scene);

        // Center the stage on the screen
        stage.centerOnScreen();

        // Show the stage on the screen
        stage.show();

    }

}
In this example, we create a simple FAB labeled “+” using a Button component. The FAB is styled using a CSS class (fab-button), which we’ll define in an external stylesheet for a cleaner separation of concerns. The FAB is anchored to the bottom-right corner of the window using the AnchorPane constraints.
Now, let’s create the CSS stylesheet (styles.css) to style the FAB:
/* styles.css */

.fab-button {
    -fx-background-color: #007bff; /* Change to your desired background color */
    -fx-text-fill: white;
    -fx-font-size: 14px;
    -fx-shape: "M16 0 A16 16 0 1 0 32 16 A16 16 0 0 0 16 0"; /* Circular shape path */
    -fx-min-width: 32px;
    -fx-min-height: 32px;
    -fx-pref-width: 32px;
    -fx-pref-height: 32px;
}
The -fx-shape property uses SVG path commands to create a circular shape. It starts with the M command to move to the starting point, followed by the A command for creating an elliptical arc. The parameters of the A command define the radii, rotation, flags, and ending point of the arc, creating a perfect circle.

Conclusion
The AnchorPane in JavaFX provides a powerful way to create dynamic and responsive user interfaces. By anchoring nodes within the container, you can ensure that they maintain their relative positions as the container is resized. This makes it easier to develop UIs that adapt to various screen sizes and orientations, enhancing the user experience. Experiment with the AnchorPane and its anchoring constraints to create flexible and visually appealing JavaFX applications.
Sources:
I hope you found this code informative and useful. If you would like to receive more content, please consider subscribing to our newsletter!


