Graphical User Interfaces (GUIs) are an essential part of modern software applications, enabling users to interact with programs through intuitive visual elements. Python, a versatile and popular programming language, offers several libraries for creating GUIs, with PyQt being one of the most powerful and widely used options. Among the many widgets that PyQt provides, the QLineEdit, a input widget stands out as a fundamental tool for accepting and displaying user input.

with hands-on learning.
get the skills and confidence to land your next move.
What is PyQt QLineEdit?
The PyQt QLineEdit widget is a single-line text input field that allows users to enter and edit plain text. It is often used for capturing user input, such as names, passwords, search queries, or any other textual information.
Key Features of QLineEdit
- Input Validation: It supports input validation to ensure that the user enters data in a specific format or meets certain criteria.
- Echo Mode: The widget can display different content types, such as normal text, password characters, or no display at all, to protect sensitive information.
- Keyboard Shortcuts: It provides keyboard shortcuts for common actions like cutting, copying, pasting, and undoing.
- Signals and Slots: The QLineEdit emits signals when the text is changed, allowing you to connect it to custom functions (slots) for further processing.
Getting Started
To get started with PyQt and the QLineEdit widget, you first need to have PyQt installed. You can install it using pip:
pip install PyQt6
Basic QLineEdit
Let’s start with a simple example to demonstrate how to create and use a QLineEdit widget:
import sys

from PyQt6.QtCore import Qt
from PyQt6.QtWidgets import QApplication, QMainWindow, QPushButton, QVBoxLayout, QWidget, QLineEdit


class AppWindow(QMainWindow):

    def __init__(self, title, width, height, left=100, top=100):
        super().__init__()

        self.setWindowTitle(title)

        # Set the window location and size
        self.setGeometry(left, top, width, height)

        self.initUI()

    def initUI(self):

        # Create a central widget and set it as the main window's central widget
        central_widget = QWidget(self)
        self.setCentralWidget(central_widget)

        # Create a QVBoxLayout for the central widget
        layout = QVBoxLayout()

        # Create a QLineEdit instance
        line_edit = QLineEdit(self)

        # Set some initial text
        line_edit.setText("Type something here...")

        # Add the QLineEdit to the QVBoxLayout
        layout.addWidget(line_edit)

        # Center QVBoxLayout content
        layout.setAlignment(Qt.AlignmentFlag.AlignCenter)

        # Set the layout for the central widget
        central_widget.setLayout(layout)

    def center(self):

        # Get the geometry of the screen
        screen = QApplication.primaryScreen().size()

        # Calculate the center point of the screen
        x = (screen.width() - self.width()) // 2
        y = (screen.height() - self.height()) // 2

        # Move the window to the center
        self.move(x, y)


if __name__ == "__main__":
    app = QApplication(sys.argv)

    # Create new app window with title, and dimensions
    window = AppWindow("The PyQt QLineEdit: A Input Widget", 640, 480)

    # Center app window on screen
    window.center()

    # show app window on screen
    window.show()

    sys.exit(app.exec())
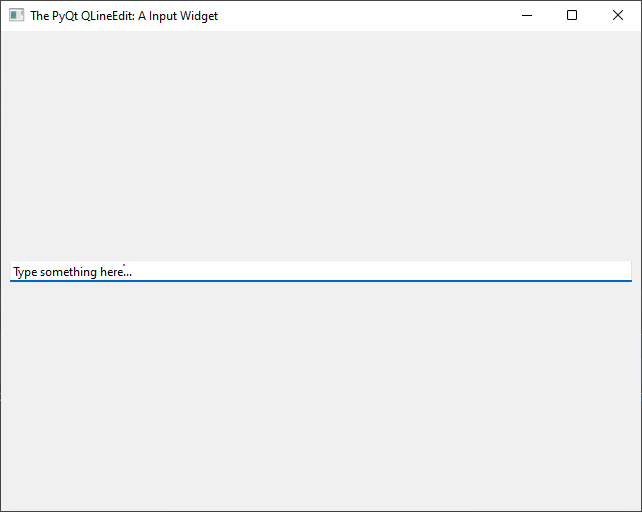
When you run this code, you will see a simple window containing a QLineEdit with the initial text “Type something here…”. You can click on the QLineEdit and start typing to replace the initial text.
Signals and Slots
One of the powerful features of the QLineEdit widget is its ability to work with signals and slots. Signals are events emitted by widgets, and slots are methods that respond to these events. For example, the QLineEdit emits a signal called textChanged whenever the text inside it changes.
Let’s modify the previous example to add a label that updates in real-time with the text entered into the QLineEdit:
import sys

from PyQt6.QtCore import Qt
from PyQt6.QtWidgets import QApplication, QMainWindow, QVBoxLayout, QWidget, QLineEdit, QLabel


class AppWindow(QMainWindow):

    def __init__(self, title, width, height, left=100, top=100):
        super().__init__()

        self.setWindowTitle(title)

        # Set the window location and size
        self.setGeometry(left, top, width, height)

        self.initUI()

    def initUI(self):
        # Create a central widget and set it as the main window's central widget
        central_widget = QWidget(self)
        self.setCentralWidget(central_widget)

        # Create a QVBoxLayout for the central widget
        layout = QVBoxLayout()

        # Create a QLineEdit instance
        self.line_edit = QLineEdit(self)

        # Set some initial text
        self.line_edit.setText("Type something here...")

        # Create a QLabel instance
        self.label = QLabel(self.line_edit.text())

        # Add the QLineEdit to the QVBoxLayout
        layout.addWidget(self.line_edit)
        layout.addWidget(self.label)

        # Connect the textChanged signal to the update_label slot
        self.line_edit.textChanged.connect(self.update_label)

        # Center QVBoxLayout content
        layout.setAlignment(Qt.AlignmentFlag.AlignCenter)

        # Set the layout for the central widget
        central_widget.setLayout(layout)

    def update_label(self):
        text = self.line_edit.text()
        self.label.setText(text)

    def center(self):
        # Get the geometry of the screen
        screen = QApplication.primaryScreen().size()

        # Calculate the center point of the screen
        x = (screen.width() - self.width()) // 2
        y = (screen.height() - self.height()) // 2

        # Move the window to the center
        self.move(x, y)


if __name__ == "__main__":
    app = QApplication(sys.argv)

    # Create new app window with title, and dimensions
    window = AppWindow("The PyQt QLineEdit: A Input Widget", 640, 480)

    # Center app window on screen
    window.center()

    # show app window on screen
    window.show()

    sys.exit(app.exec())
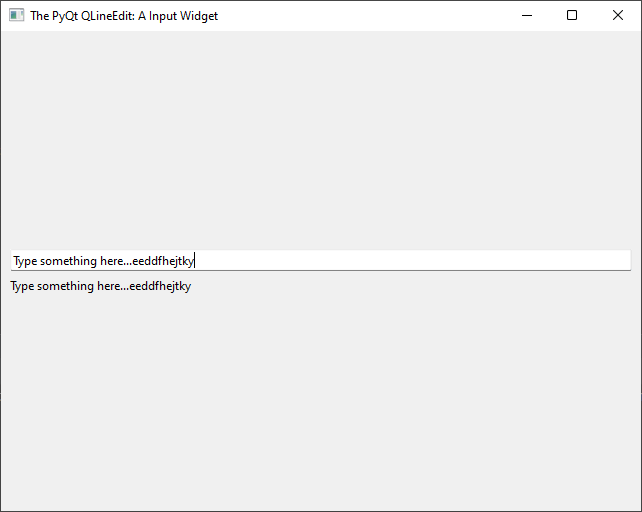
Now, when you type something in the QLineEdit, the label below it will update instantly with the entered text.
Validation
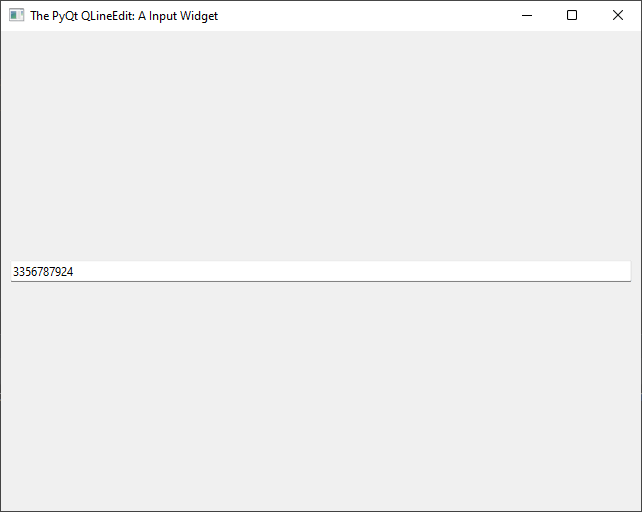
The QLineEdit widget provides built-in methods for text validation, allowing you to control what the user can input. For instance, you can limit the input to a specific length, allow only numeric input, or even use regular expressions for custom validation.
Here’s an example that restricts the QLineEdit to only accept integers:
import sys

from PyQt6.QtCore import Qt
from PyQt6.QtGui import QIntValidator
from PyQt6.QtWidgets import QApplication, QMainWindow, QVBoxLayout, QWidget, QLineEdit, QLabel


class AppWindow(QMainWindow):

    def __init__(self, title, width, height, left=100, top=100):
        super().__init__()

        self.setWindowTitle(title)

        # Set the window location and size
        self.setGeometry(left, top, width, height)

        self.initUI()

    def initUI(self):
        # Create a central widget and set it as the main window's central widget
        central_widget = QWidget(self)
        self.setCentralWidget(central_widget)

        # Create a QVBoxLayout for the central widget
        layout = QVBoxLayout()

        # Create a QLineEdit instance
        line_edit = QLineEdit(self)

        # Allow only integer input
        line_edit.setValidator(QIntValidator())

        # Add the QLineEdit to the QVBoxLayout
        layout.addWidget(line_edit)

        # Center QVBoxLayout content
        layout.setAlignment(Qt.AlignmentFlag.AlignCenter)

        # Set the layout for the central widget
        central_widget.setLayout(layout)

    def center(self):
        # Get the geometry of the screen
        screen = QApplication.primaryScreen().size()

        # Calculate the center point of the screen
        x = (screen.width() - self.width()) // 2
        y = (screen.height() - self.height()) // 2

        # Move the window to the center
        self.move(x, y)


if __name__ == "__main__":
    app = QApplication(sys.argv)

    # Create new app window with title, and dimensions
    window = AppWindow("The PyQt QLineEdit: A Input Widget", 640, 480)

    # Center app window on screen
    window.center()

    # show app window on screen
    window.show()

    sys.exit(app.exec())
With this code, the user will only be able to input valid integer values into the QLineEdit.
Echo Mode (Password Input)
The echo mode in the PyQt QLineEdit widget determines how the entered text is displayed. It is particularly useful when handling sensitive information like passwords or PINs, where the actual characters should be masked to prevent them from being visible to others. The echo mode can be set using the setEchoMode() method, which takes a constant value from the QLineEdit.EchoMode enumeration.
The QLineEdit.EchoMode enumeration provides the following options for echo mode:
- QLineEdit.EchoMode.Normal: The default mode. The entered text is displayed as-is.
- QLineEdit.EchoMode.NoEcho: The entered text is not displayed at all. This mode is commonly used for password inputs.
- QLineEdit.EchoMode.Password: The entered text is replaced by asterisks or bullets to mask the characters. This is also typically used for password inputs.
Here’s a code example that demonstrates how to use the echo mode to create a password input field:
import sys

from PyQt6.QtCore import Qt
from PyQt6.QtWidgets import QApplication, QMainWindow, QVBoxLayout, QWidget, QLineEdit


class AppWindow(QMainWindow):

    def __init__(self, title, width, height, left=100, top=100):
        super().__init__()

        self.setWindowTitle(title)

        # Set the window location and size
        self.setGeometry(left, top, width, height)

        self.initUI()

    def initUI(self):
        # Create a central widget and set it as the main window's central widget
        central_widget = QWidget(self)
        self.setCentralWidget(central_widget)

        # Create a QVBoxLayout for the central widget
        layout = QVBoxLayout()

        # Create a QLineEdit instance
        line_edit = QLineEdit(self)

        # Set the echo mode to Password
        line_edit.setEchoMode(QLineEdit.EchoMode.Password)

        # Add the QLineEdit to the QVBoxLayout
        layout.addWidget(line_edit)

        # Center QVBoxLayout content
        layout.setAlignment(Qt.AlignmentFlag.AlignCenter)

        # Set the layout for the central widget
        central_widget.setLayout(layout)

    def center(self):
        # Get the geometry of the screen
        screen = QApplication.primaryScreen().size()

        # Calculate the center point of the screen
        x = (screen.width() - self.width()) // 2
        y = (screen.height() - self.height()) // 2

        # Move the window to the center
        self.move(x, y)


if __name__ == "__main__":
    app = QApplication(sys.argv)

    # Create new app window with title, and dimensions
    window = AppWindow("The PyQt QLineEdit: A Input Widget", 640, 480)

    # Center app window on screen
    window.center()

    # show app window on screen
    window.show()

    sys.exit(app.exec())
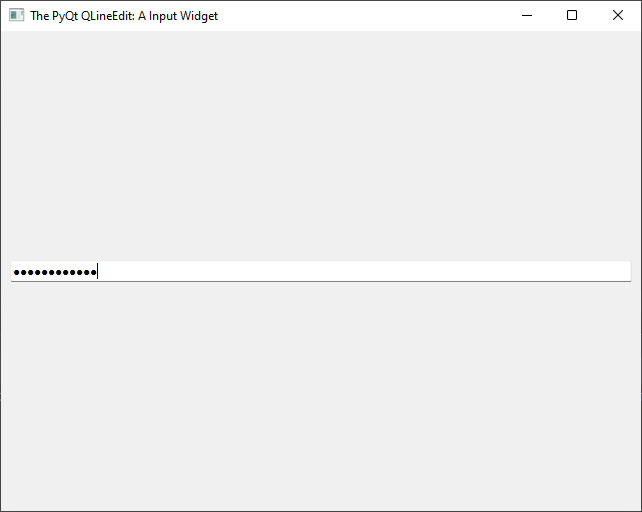
In this example, the setEchoMode() method is used to set the echo mode of the QLineEdit widget to QLineEdit.EchoMode.Password. As the user types in the input field, the entered text is replaced by asterisks or bullets to mask the characters. This way, sensitive information remains masked and secure.
Conclusion
The PyQt QLineEdit widget is a powerful tool for capturing user input in Python GUI applications. In this article, we explored its basic usage, signals, slots, and validation features. The QLineEdit is highly customizable and can be used in various scenarios to handle text input effectively. By leveraging the flexibility and functionality of the QLineEdit, you can create interactive and user-friendly applications that cater to your specific needs.
I hope you found this article informative and useful. If you would like to receive more content, please consider subscribing to our newsletter!
