JavaFX is a powerful framework for building interactive and visually appealing user interfaces. One of the many features that JavaFX offers is the Glow Effect, which can be used to add a subtle or dramatic highlight to UI elements. In this article, we will explore the JavaFX Glow Effect and demonstrate how to use it to enhance your application’s visual appeal.

with hands-on learning.
get the skills and confidence to land your next move.
What is the JavaFX Glow Effect?
The Glow Effect is a visual effect that simulates the illumination or radiance of an object. It gives the appearance of an outer glow around the edges of an element, making it appear as though it is emitting light. The intensity of this glow can be adjusted, allowing you to control how much an element appears to shine.
The Glow Effect is controlled by a parameter known as the Glow Level, which can take values between 0.0 and 1.0. A Glow Level of 0.0 means no glow, while a Glow Level of 1.0 represents the maximum glow intensity. This parameter can be dynamically adjusted to create visually stunning and interactive user interfaces.
Creating a GlowEffectExample Application
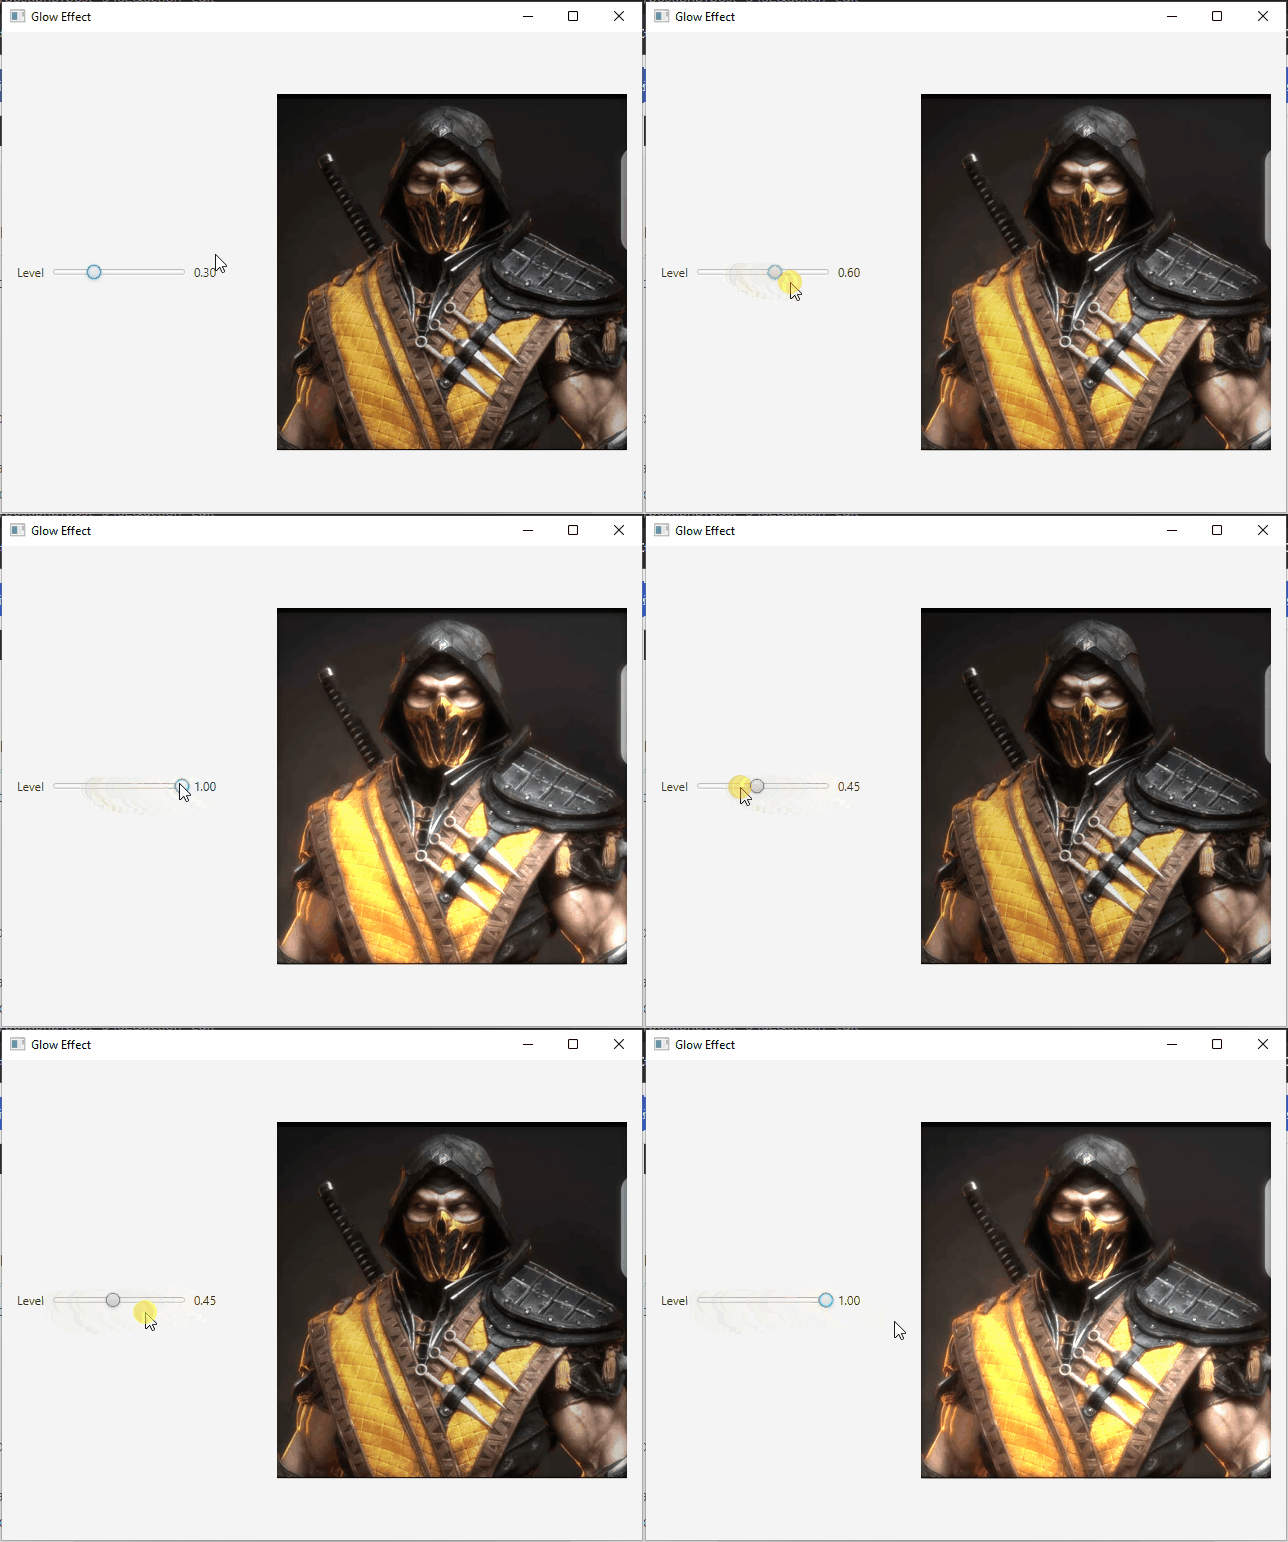
To better understand how the JavaFX Glow Effect works, we will create a simple example application that demonstrates its usage. In this application, we’ll load an image and apply the Glow Effect to it, allowing us to control the Glow Level with a slider.
Here’s the code for the example application:
import javafx.application.Application;
import javafx.geometry.Insets;
import javafx.geometry.Pos;
import javafx.scene.Scene;
import javafx.scene.control.Label;
import javafx.scene.control.Slider;
import javafx.scene.effect.Glow;
import javafx.scene.image.Image;
import javafx.scene.image.ImageView;
import javafx.scene.layout.BorderPane;
import javafx.scene.layout.HBox;
import javafx.stage.Stage;
import javafx.util.Builder;

public class GlowEffectExampleApp extends Application {

    private static final double WIDTH = 640;
    private static final double HEIGHT = 480;

    /* The parent layout manager */
    private final BorderPane parent = new BorderPane();

    @Override
    public void start(Stage stage) throws Exception {

        Scene scene = new Scene(this.parent, WIDTH, HEIGHT);

        // Sets the stage title
        stage.setTitle("Glow Effect");

        // Set the stage scene
        stage.setScene(scene);

        // Center stage on screen
        stage.centerOnScreen();

        // Show stage on screen
        stage.show();

    }

    @Override
    public void init() throws Exception {
        super.init();

        Image image = new Image("scorpion.jpg");

        ImageView imageView = new ImageView(image);
        imageView.setPreserveRatio(true);
        imageView.setFitWidth(350);

        // Create the Slider to adjust the Glow level
        Slider sliderLevel = new Slider(0, 1, 0.3);

        // Create the Glow Effect, and bind its level property to the slider value property
        Glow glow = new Glow();
        glow.levelProperty().bind(sliderLevel.valueProperty());

        // Apply the Glow Effect to the ImageView
        imageView.setEffect(glow);

        /* Add the ImageView to the BorderPane right region */
        this.parent.setRight(imageView);
        BorderPane.setAlignment(imageView, Pos.CENTER);
        BorderPane.setMargin(imageView, new Insets(15));

        /* Create, and add the Level Panel to the BorderPane left region */
        HBox levelPanel = (new LabeledValueSlider(sliderLevel, "Level")).build();
        levelPanel.setPadding(new Insets(15.0));

        this.parent.setLeft(levelPanel);

    }

    static class LabeledValueSlider implements Builder<HBox> {

        private final Slider slider;
        private final String label;

        public LabeledValueSlider(Slider slider, String label) {
            this.slider = slider;
            this.label = label;
        }

        @Override
        public HBox build() {

            Label value = new Label();
            value.setMinWidth(30);

            // Format the slider value with two decimal places
            value.textProperty().bind(this.slider.valueProperty().asString("%.2f"));

            Label lblLabel = new Label(this.label);

            // Create the HBox to arrange UI components
            HBox container = new HBox(5, lblLabel, this.slider, value);
            container.setAlignment(Pos.CENTER);

            return container;

        }

    }

}
The example code creates a JavaFX application with a user interface that allows you to control the Glow Effect applied to an image. It’s worth noting that the Glow effect has a level property, which can range from 0.0 to 1.0. This property controls the intensity of the glow, with 0.0 representing no glow and 1.0 representing the maximum glow.
Conclusion
The JavaFX Glow Effect is a powerful tool for enhancing the visual appeal of your JavaFX applications. With just a few lines of code, you can add a captivating glow to your UI elements, making your application more engaging and user-friendly. By understanding the Glow Level and its range from 0.0 to 1.0, you can fine-tune the glow effect to perfectly suit your application’s design. Start experimenting with the Glow Effect in your JavaFX projects and see how it can elevate your user interface to the next level!
I hope you found this article informative and useful. If you would like to receive more content, please consider subscribing to our newsletter.
