Images can bring your app to life and make it more engaging. Sometimes, you may want to display images that come from the internet rather than using local assets. Whether it’s a photo from a website, a user’s profile picture, or an image fetched from an API, displaying internet images in Flutter is simple and straightforward.

with hands-on learning.
get the skills and confidence to land your next move.
In this article, we’ll walk through how to display images pulled from the internet in your Flutter app.
What Are Internet Images?
Internet images are images fetched from an online source, such as a website or server, instead of being stored locally within your app. These images are retrieved from URLs (web addresses) while the app is running and can be displayed just like any other image.
For instance, in a social media app, the user’s profile picture could be pulled from a server. This ensures that the app always shows the latest image, even if the user updates their photo.
Setting Up the Project
Before you can display images from the internet, a few setup steps are required.
Install Necessary Packages
Flutter provides built-in support for displaying images from the internet using the Image.network() widget. However, if you want advanced features like caching, the cached_network_image package is a great option.
Add the following packages to your pubspec.yaml file:
dependencies:
  flutter:
    sdk: flutter
  cached_network_image: ^3.4.1
Afterward, run the following command to install the packages:
flutter pub getThis will allow you to use these tools in your project.
Setting Up Permissions (for Android and iOS)
Your app needs permission to access the internet to fetch images.
- For Android, add the following line to your
AndroidManifest.xmlfile:
<uses-permission android:name="android.permission.INTERNET" />- For iOS, open
Info.plistand add this permission:
<key>NSAppTransportSecurity</key>
<dict>
  <key>NSAllowsArbitraryLoads</key>
  <true/>
</dict>
These permissions ensure your app can fetch images from the internet.
Displaying an Internet Image
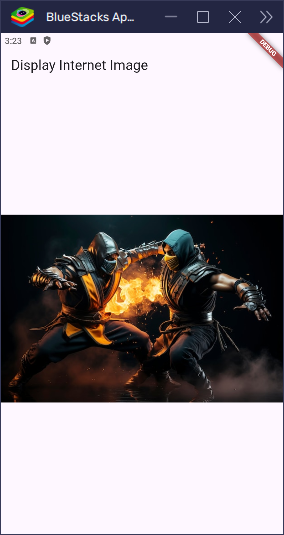
Displaying an image from the internet in Flutter is straightforward using the Image.network() widget. This widget fetches the image from a URL and displays it in your app.
Here’s an example demonstrating how to display an image from the web:
import 'package:flutter/material.dart';

void main() {
  runApp(const MyApp());
}

class MyApp extends StatelessWidget {
  const MyApp({super.key});

  @override
  Widget build(BuildContext context) {
    return MaterialApp(
      title: 'Internet Image Example',
      home: Scaffold(
        appBar: AppBar(title: const Text('Display Internet Image')),
        body: const Center(child: NetworkImageExample()),
      ),
    );
  }
}

class NetworkImageExample extends StatelessWidget {
  const NetworkImageExample({super.key});

  @override
  Widget build(BuildContext context) {
    return Image.network(
      'https://img.freepik.com/free-photo/dark-style-ninja-naruto_23-2151278783.jpg',
      loadingBuilder: (context, child, loadingProgress) {
        if (loadingProgress == null) {
          return child; // Image has finished loading
        } else {
          return Center(
            child: CircularProgressIndicator(
              value:
                  loadingProgress.expectedTotalBytes != null
                      ? loadingProgress.cumulativeBytesLoaded /
                          (loadingProgress.expectedTotalBytes ?? 1)
                      : null,
            ),
          );
        }
      },
      errorBuilder: (context, error, stackTrace) {
        return const Text('Failed to load image');
      },
    );
  }
}
What’s Happening?
Image.network(): This is the main widget that fetches and displays the image from the URL you provide.loadingBuilder: This allows you to show a loading spinner while the image is being fetched. Once the image is ready, the actual image will be displayed.errorBuilder: If the image cannot be loaded (for example, due to a network issue or invalid URL), an error message will be shown instead.

This method makes it easy to display images fetched from the web, providing a smooth experience for your users.
Real-World Example: Displaying an Image from the Internet
Let’s build a simple Flutter app that loads and displays an image from a URL. This is great for showing things like profile pictures, product images, or any dynamic content from the web.
Step 1: Create the App
We’ll use the built-in Image.network() widget to fetch and display an image.
import 'package:flutter/material.dart';

void main() {
  runApp(const MyApp());
}

class MyApp extends StatelessWidget {
  const MyApp({super.key});

  @override
  Widget build(BuildContext context) {
    return MaterialApp(
      title: 'Internet Image Example',
      home: Scaffold(
        appBar: AppBar(
          title: const Text('Internet Image Example'),
        ),
        body: const Center(
          child: NetworkImageWidget(),
        ),
      ),
    );
  }
}

class NetworkImageWidget extends StatelessWidget {
  const NetworkImageWidget({super.key});

  @override
  Widget build(BuildContext context) {
    return Image.network(
      'https://img.freepik.com/free-photo/dark-style-ninja-naruto_23-2151278783.jpg',
      loadingBuilder: (context, child, loadingProgress) {
        if (loadingProgress == null) return child;
        return const Center(child: CircularProgressIndicator());
      },
      errorBuilder: (context, error, stackTrace) {
        return const Text('Failed to load image');
      },
    );
  }
}
Step 2: Handle Loading and Errors
To improve the user experience, show a loading spinner while the image loads, and display a message if something goes wrong.
loadingBuildershows aCircularProgressIndicatorwhile loading.errorBuilderhandles broken URLs or no internet.
Using a Fallback Image
If the image fails to load, you can also show a local placeholder instead:
Image.network(
  'https://img.freepik.com/free-photo/dark-style-ninja-naruto_23-2151278783.jpg',
  errorBuilder: (context, error, stackTrace) {
    return Image.asset('assets/placeholder.png');
  },
)
This keeps your app looking clean and avoids showing broken image icons.
Caching Internet Images
Downloading the same image every time can slow down your app and waste data. To fix that, you can cache internet images—this means saving a copy locally so it loads faster the next time.
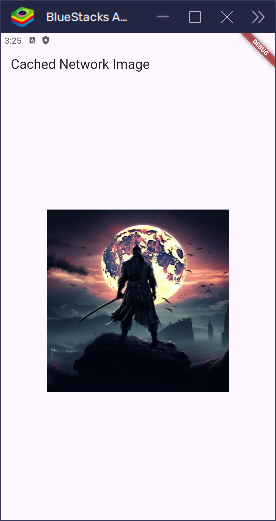
The easiest way to do this in Flutter is with the cached_network_image package.
import 'package:flutter/material.dart';
import 'package:cached_network_image/cached_network_image.dart';

void main() {
  runApp(const MyApp());
}

class MyApp extends StatelessWidget {
  const MyApp({super.key});

  @override
  Widget build(BuildContext context) {
    return MaterialApp(
      title: 'Cached Image Example',
      home: Scaffold(
        appBar: AppBar(
          title: const Text('Cached Network Image'),
        ),
        body: const Center(
          child: CachedImageWidget(),
        ),
      ),
    );
  }
}

class CachedImageWidget extends StatelessWidget {
  const CachedImageWidget({super.key});

  @override
  Widget build(BuildContext context) {
    return CachedNetworkImage(
      imageUrl: 'https://img.freepik.com/free-photo/full-shot-ninja-wearing-equipment_23-2150960979.jpg',
      placeholder: (context, url) => const CircularProgressIndicator(),
      errorWidget: (context, url, error) => const Icon(Icons.error),
      width: 300,
      height: 300,
      fit: BoxFit.cover,
    );
  }
}
This widget automatically handles caching behind the scenes. It shows a loading spinner while fetching the image and displays an error icon if the image fails to load.

With caching, your app becomes faster, smoother, and more efficient—especially when working with lots of images.
Best Practices for Internet Images
To keep your app fast and reliable when displaying images from the internet, follow these tips:
- Optimize Image Sizes: Use compressed or resized images to reduce loading time and save data.
- Handle Network Issues: Always check if the user has an internet connection. If not, show a friendly message or a fallback UI.
- Use Caching: Cached images load faster and reduce repeated downloads, making your app feel snappy and efficient.
Conclusion
Displaying images from the internet in Flutter is easy with the Image.network() widget. It’s great for loading photos from APIs, user profiles, or any online source.
By adding placeholders, caching, and proper error handling, your app will stay smooth and user-friendly—even on slow or unstable connections.
With these tools and tips, you’re ready to build beautiful, image-rich Flutter apps!


