Flutter is a special tool that helps people make mobile apps for Android and iPhones. Before putting an app on a real phone, developers test it using an emulator. An emulator is like a phone inside your computer. It shows how the app will look and work without using a real phone.
In this guide, we will learn how to set up an emulator in Android Studio and run a Flutter app on it.
Installing the Necessary Tools
Before running a Flutter app on an emulator, you need to install some important software.
Install Flutter SDK
Flutter is the main tool used to build and run mobile apps. To install it:
- Go to https://flutter.dev and download Flutter for your computer (Windows, macOS, or Linux).
- Follow the steps on the website to install it.
After installing, open Command Prompt (Windows) or Terminal (Mac/Linux) and type:
flutter doctorThis will check if Flutter is installed correctly and tell you if anything is missing.
Install Android Studio
Android Studio is a program that helps you build apps. It also includes the emulator, which lets you test your apps on a virtual phone. To install:
- Visit https://developer.android.com/studio.
- Download and install Android Studio.
- During installation, make sure to install Android SDK, Emulator, and Virtual Device Manager.
Once installed, you’re ready to create an emulator inside Android Studio!
Setting Up an Emulator in Android Studio
An emulator is like a virtual phone inside your computer. Follow these steps to create and start one.
Step 1: Open Android Studio
- Open Android Studio on your computer.
Step 2: Open Device Manager
- On the right side of Android Studio, find and click on Device Manager.
Step 3: Create a New Emulator
- Click the Create Device (big plus sign ➕).
- Choose a phone model (like Pixel 6 or Nexus 5).
- Click Next.
Step 4: Download and Select a System Image
- Pick an Android version (like Android 12 or Android 13).
- If it’s not installed yet, click Download and wait for it to finish.
- Click Next after choosing the system image.
Step 5: Configure and Start the Emulator
- You can adjust settings like RAM, storage, and screen size if needed.
- Click Finish to create the emulator.
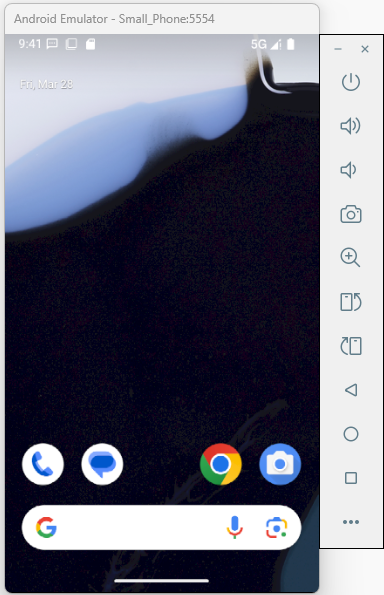
- In Device Manager, click the play button ▶️ next to your emulator to start it.
Now, your emulator will open, and you’ll see a virtual Android phone on your screen.
Running a Flutter App in Android Studio
Now that your emulator is running, let’s open a Flutter app and see it in action!
Step 1: Open a Flutter Project in Android Studio
- Open Android Studio.
- Click Open to open an existing Flutter project, or create a new one by going to:
- File > New > New Flutter Project
- Choose Flutter Application, then click Next.
- Enter a project name, select the Flutter SDK path, and click Finish.
Step 2: Select the Emulator in Android Studio
- Make sure your emulator is running.
- At the top of Android Studio, find the device dropdown and select the emulator you created.
Step 3: Run the Flutter App
- Click the Run ▶️ button in the top toolbar.
- Android Studio will build your app and launch it on the emulator.
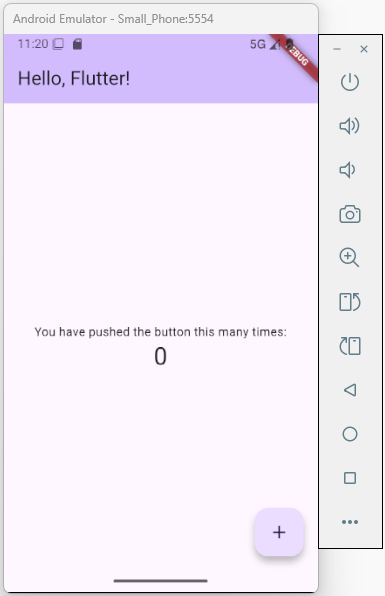
- After a few seconds, you should see a simple counter app on the screen.
Step 4: Use Hot Reload for Instant Updates
Flutter has a great feature called hot reload, which lets you see changes instantly without restarting the app.
Try this:
- Open lib/main.dart in Android Studio.
- Find this line:
home: MyHomePage(title: 'Flutter Demo Home Page'),- Change
'Flutter Demo Home Page'to'Hello, Flutter!'. - Click Hot Reload ⚡ in the toolbar (or press Shift + R).
Your app will update immediately without restarting. Pretty cool, right?
Optimizing Emulator Performance
Sometimes, emulators can be a little slow. Here are some tips to make the emulator run faster:
1. Adjust Emulator Settings
- Increase the RAM to 2GB or more for better performance.
- Use x86 system images instead of ARM-based ones, as they run faster on your computer.
2. Reduce Lag
- Close other programs to free up memory for the emulator.
- If the emulator is still slow, you might want to try testing on a real phone instead.
By following these steps, you can make your emulator work faster and more smoothly!
Conclusion
Great job. You’ve successfully set up an emulator and run a Flutter app in Android Studio. Emulators are a useful way to test your app without needing a real phone.
Now you can start making changes to your app and see the updates instantly with hot reload. This feature makes building apps faster and more enjoyable.
Keep exploring and enjoy creating amazing apps with Flutter.