Imagine you’re building an awesome mobile app with Flutter, but there’s just one problem—you don’t have an Android phone to test it on! What do you do? That’s where BlueStacks saves the day!
BlueStacks is like a virtual Android phone that runs right on your computer. It lets you install and test apps just like a real device, but without the hassle of buying a phone or dealing with a slow Android emulator.
In this guide, I’ll show you how to run your Flutter apps on BlueStacks using Android Studio. It’s quick, simple, and you’ll be testing your app in no time!
Installing and Setting Up BlueStacks
Before we can run our Flutter app, we need to install BlueStacks. Think of it like setting up a brand-new phone before using it for the first time!
Step 1: Download and Install BlueStacks
- Visit the BlueStacks website and download the latest version.
- Install it on your computer like any other program.
- Open BlueStacks and let it load up.
Step 2: Enable Android Debug Bridge (ADB)
To connect BlueStacks with Android Studio and run your Flutter app, we need to enable Android Debug Bridge (ADB):
1. Open BlueStacks Settings (click the gear icon).

2. Navigate to the Advanced tab.
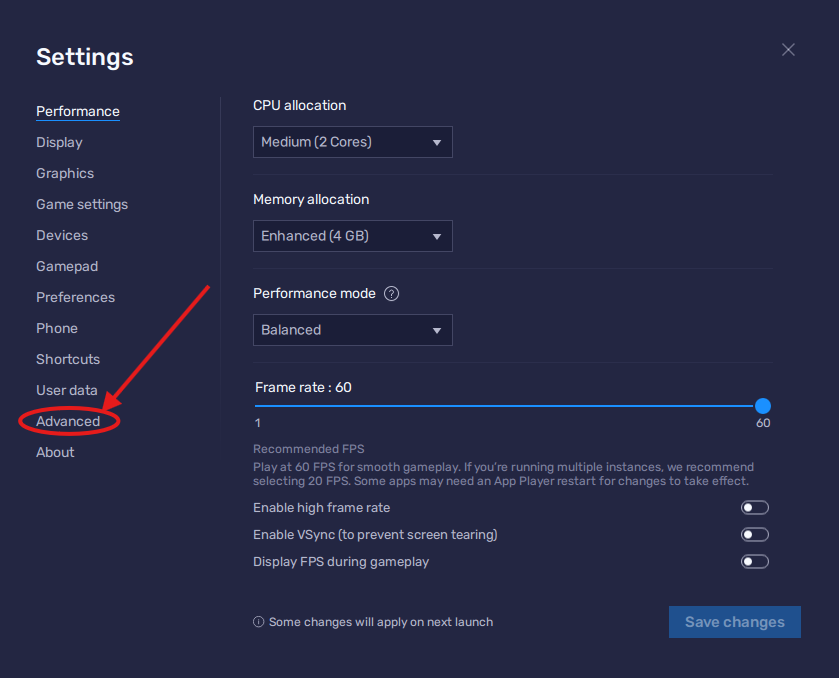
3. Find Android Debug Bridge (ADB) and switch it on.
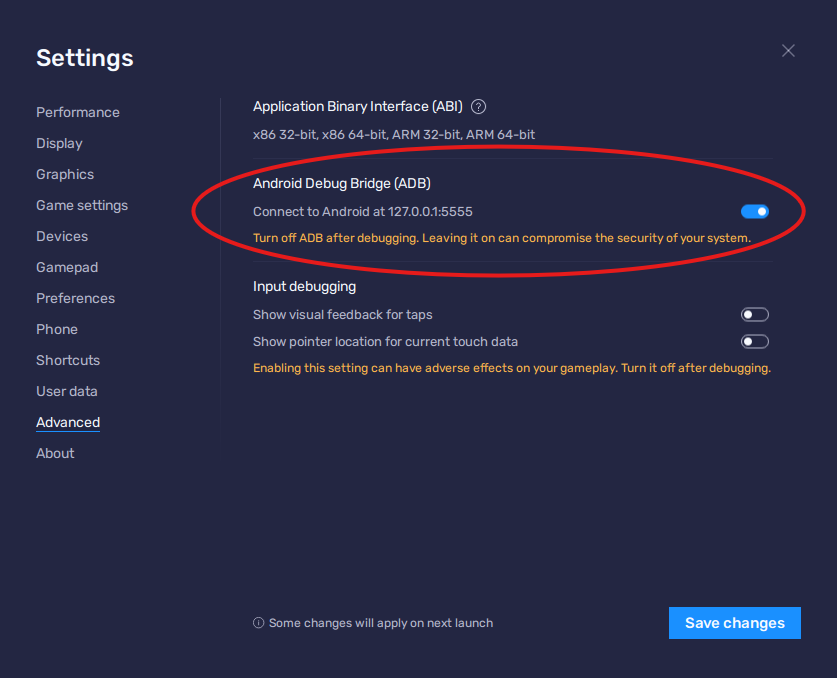
That’s it! BlueStacks is now ready to communicate with Android Studio, just like a real Android device.
Setting Up Android Studio to Use BlueStacks
Now that BlueStacks is set up, we need to make sure Android Studio recognizes it. The good news? Android Studio is smart — it usually detects BlueStacks automatically!
Steps to Connect BlueStacks with Android Studio
- Open Android Studio on your computer.
- Load your Flutter project.
- Click on Device Manager (usually in the top-right corner).
- Look for a device name that matches the one set in BlueStacks (it won’t say “BlueStacks” but will show the assigned device name).
If you see a connected device, awesome! That means Android Studio is ready to run your app on BlueStacks.
No Auto-Connect? Here’s the Easy Fix
If it doesn’t connect automatically, don’t worry! You can easily connect it yourself. Just open your terminal and run this command:
adb connect 127.0.0.1:5555Make sure to replace the address with the one shown in your device’s Settings > Advanced screen.
Also, I’m assuming you have adb added to your system’s path. If not, you’ll need to either go to the folder where adb is installed or use the full path to run it.
For example:
/path/to/adb connect 127.0.0.1:5555Just replace /path/to/adb with the actual location on your computer.
Running a Flutter App on BlueStacks
Now comes the fun part — running your Flutter app!
- In Android Studio, find the device selector in the top toolbar.
- Select the device name assigned in BlueStacks (it won’t say “BlueStacks” directly).
- Click the Run button (the green play icon).
- Wait a few seconds, and your Flutter app will launch inside BlueStacks — just like on a real phone!
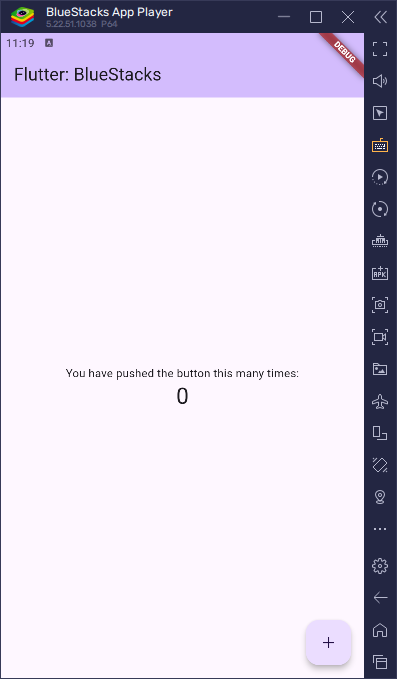
Now you can interact with your app, test features, and even debug issues if something isn’t working right.
Advantages and Limitations
Why Use BlueStacks?
- No need for a real phone – You can test apps without buying an Android device.
- Easier than a traditional emulator – BlueStacks is often faster and smoother than built-in Android emulators.
- Simple setup – Just install, enable android debug bridge, and you’re ready to go!
Any Downsides?
- Not exactly like a real phone – Some features (like sensors) may not work.
- Might be slower on some computers – BlueStacks needs a decent PC to run well.
Conclusion
And that’s it! You’ve just learned how to run Flutter apps on BlueStacks, turning your computer into a virtual Android phone. This is a super handy way to test your apps without needing a physical device.
Now, it’s your turn! Try running your own Flutter project on BlueStacks and see it in action.