Have you ever flipped a light switch to turn a lamp on or off? Or turned a volume knob to make the music louder or softer? That’s about state—something that can change. In Flutter, when you want part of your app to change over time, you use a stateful widget.
Learn C Programming For Free on Windows
A beginner-friendly course that teaches real C programming using a Windows compiler. Learn arrays, pointers, functions, and file handling step by step with practical lessons.
Start Learning C ProgrammingIn this article, we’ll explore what stateful widgets are and how they can make your app interactive, just like how a volume knob controls sound or a light switch changes the lighting.
What Is a Stateful Widget?
Imagine a chalkboard. You can write on it, erase it, and draw again. That’s like a stateful widget—it lets you change what’s on the screen, just like how you can update what’s written on the chalkboard.
A stateless widget, on the other hand, is like a photo. Once it’s taken, it stays the same and doesn’t change.
What Is State?
In simple words, state is the current condition of something. When something changes—like a switch being turned on or off—that’s a change in state.
Meet setState()
In Flutter, when we want to change something on the screen, we use a special function called setState(). It’s like telling Flutter, “Hey, something has changed! Please update the screen!”
This function lets you modify the widget’s state and automatically redraw the UI to reflect those changes.
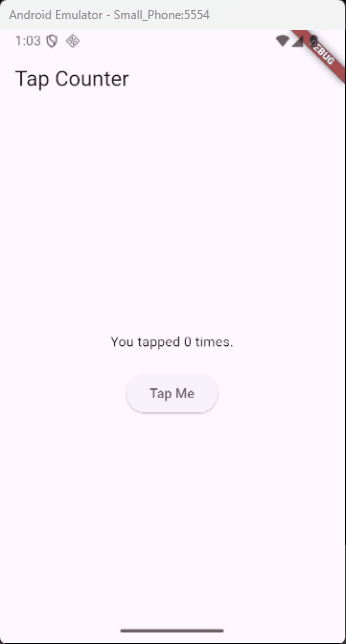
Example 1: A Counter App
Let’s create a simple app that counts how many times a button is pressed.
import 'package:flutter/material.dart';

void main() {
  runApp(MyApp());
}

class MyApp extends StatelessWidget {
  const MyApp({super.key});

  @override
  Widget build(BuildContext context) {
    return MaterialApp(home: CounterPage());
  }
}

class CounterPage extends StatefulWidget {
  const CounterPage({super.key});

  @override
  CounterPageState createState() => CounterPageState();
}

class CounterPageState extends State<CounterPage> {
  int count = 0;

  void addOne() {
    setState(() {
      count++;
    });
  }

  @override
  Widget build(BuildContext context) {
    return Scaffold(
      appBar: AppBar(title: Text('Tap Counter')),
      body: Center(
        child: Column(
          mainAxisAlignment: MainAxisAlignment.center,
          children: [
            Text('You tapped $count times.'),
            SizedBox(height: 20),
            ElevatedButton(onPressed: addOne, child: Text('Tap Me')),
          ],
        ),
      ),
    );
  }
}
In this app, every time you press the button, the number on the screen increases. This is a great example of how state changes in a StatefulWidget. The setState() function updates the count, and Flutter rebuilds the widget to show the new number.
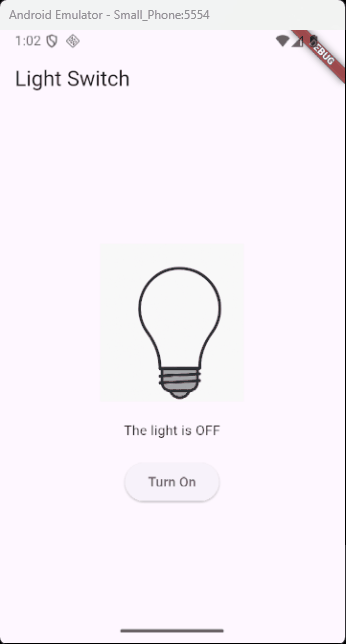
Example 2: A Light Switch
Now, let’s create a simple app where you can turn a light bulb on and off by changing the image and text on the screen.
import 'package:flutter/material.dart';

void main() {
  runApp(MyApp());
}

class MyApp extends StatelessWidget {
  const MyApp({super.key});

  @override
  Widget build(BuildContext context) {
    return MaterialApp(home: LightSwitch());
  }
}

class LightSwitch extends StatefulWidget {
  const LightSwitch({super.key});

  @override
  LightSwitchState createState() => LightSwitchState();
}

class LightSwitchState extends State<LightSwitch> {
  bool isOn = false; // This keeps track of the light's state (on or off)

  void toggleLight() {
    setState(() {
      isOn = !isOn; // Changes the light's state when the button is pressed
    });
  }

  @override
  Widget build(BuildContext context) {
    return Scaffold(
      appBar: AppBar(title: Text('Light Switch')),
      body: Center(
        child: Column(
          mainAxisAlignment: MainAxisAlignment.center,
          children: [
            Image.asset(
              isOn
                  ? 'assets/light_on.png'
                  : 'assets/light_off.png', // Switch the image based on the light's state
              width: 150,
            ),
            SizedBox(height: 20),
            Text(
              isOn ? 'The light is ON' : 'The light is OFF',
            ), // Update text based on the light's state
            SizedBox(height: 20),
            ElevatedButton(
              onPressed:
                  toggleLight, // Call toggleLight() when the button is pressed
              child: Text(
                isOn ? 'Turn Off' : 'Turn On',
              ), // Update button text based on the light's state
            ),
          ],
        ),
      ),
    );
  }
}- This app displays an image of a light bulb that can either be “on” or “off”.
- Each time you press the button, it calls
toggleLight(), which changes the state of the light by flipping theisOnvariable. - The
setState()function tells Flutter to rebuild the widget, showing the updated light image and text.
What You Need:
- Two images in your assets folder:
light_on.png(for when the light is on)light_off.png(for when the light is off)
- Update your
pubspec.yamlfile to include the assets:
flutter:
  assets:
    - assets/light_on.png
- assets/light_off.png- Run
flutter pub getto fetch the assets.
This example shows how to create a simple light switch app that toggles between two states—on and off. When you press the button, the app switches between showing a light bulb that’s “on” and one that’s “off”. This is done using a StatefulWidget so that the state of the light can change when the user interacts with the app.
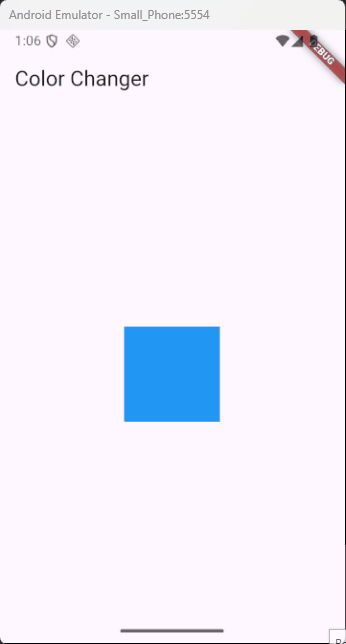
Example 3: Color Changer
Let’s build an app with a box that changes color every time you tap on it.
import 'package:flutter/material.dart';

void main() {
  runApp(MyApp());
}

class MyApp extends StatelessWidget {
  const MyApp({super.key});

  @override
  Widget build(BuildContext context) {
    return MaterialApp(
      title: 'Color Changer',
      home: Scaffold(
        appBar: AppBar(title: Text('Color Changer')),
        body: Center(child: ColorChanger()),
      ),
    );
  }
}

class ColorChanger extends StatefulWidget {
  const ColorChanger({super.key});

  @override
  ColorChangerState createState() => ColorChangerState();
}

class ColorChangerState extends State<ColorChanger> {
  Color boxColor = Colors.blue; // Initial color is blue

  void changeColor() {
    setState(() {
      // Change color between blue and red every time the box is tapped
      boxColor = boxColor == Colors.blue ? Colors.red : Colors.blue;
    });
  }

  @override
  Widget build(BuildContext context) {
    return GestureDetector(
      onTap: changeColor, // Change the color when tapped
      child: Container(
        width: 100,
        height: 100,
        color: boxColor, // The color of the box changes here
      ),
    );
  }
}- A square box is shown at the center of the screen.
- The box is initially blue.
- When you tap the box, the color toggles between blue and red.
- This happens because the
setState()method is called, updating theboxColorvariable and triggering the UI to rebuild with the new color.
What’s Happening:
- State Change: Each tap changes the state (color) of the box.
- setState(): It tells Flutter to update the widget’s appearance by rebuilding the widget with the new color.
This is a simple example of how state in a Flutter app can change and update the UI based on user interaction.
When to Use Stateful Widgets
Stateful widgets are ideal when you want something on the screen to change based on user interaction. Here are some good examples of when to use them:
- Scoreboards: Track and update scores in real-time.
- Toggle Buttons: For switches or buttons that turn on and off.
- Changing Colors or Images: Display different colors or images when an action happens.
- Interactive Games: Games that update with each action or event.
- Form Validation or Typing Feedback: Show real-time updates while a user is typing or filling out a form.
Conclusion
Stateful widgets are the key to making your Flutter app interactive and dynamic. Whether it’s updating a score, toggling a switch, or changing a color, stateful widgets let you reflect those changes immediately on the screen.
Now, it’s your turn! Try building something interactive. Maybe a quiz app that shows new questions with each tap, or a color picker that changes the background color as you select different options.