Python Tkinter is a powerful library for creating graphical user interfaces (GUI). Among its various widgets, the Text widget is a versatile and essential component for displaying and editing multiline text. In this article, we will walk you through the process of creating a Text widget in Python Tkinter.

with hands-on learning.
get the skills and confidence to land your next move.
Creating a Basic Text Widget
Let’s create a simple text widget with some initial text in it:
import tkinter as tk


class PyFrame(tk.Tk):

    def __init__(self, width, height):
        super().__init__()

        self.width = width
        self.height = height

        self.geometry(f"{self.width}x{self.height}")

    def center_on_screen(self):
        left = (self.winfo_screenwidth() - self.width) // 2
        top = (self.winfo_screenheight() - self.height) // 2

        self.geometry(f"{self.width}x{self.height}+{left}+{top}")


if __name__ == '__main__':
    # Create the main application window
    root = PyFrame(640, 480)
    root.title("How to Create a Text Widget in Python Tkinter")

    # center window on the screen
    root.center_on_screen()

    # Create the text widget
    text_widget = tk.Text(root, wrap=tk.WORD)
    text_widget.pack(fill=tk.BOTH, expand=True)

    initial_text = "Welcome to the Text Widget!\nFeel free to type here."
    text_widget.insert(tk.END, initial_text)

    # Run the main event loop
    root.mainloop()
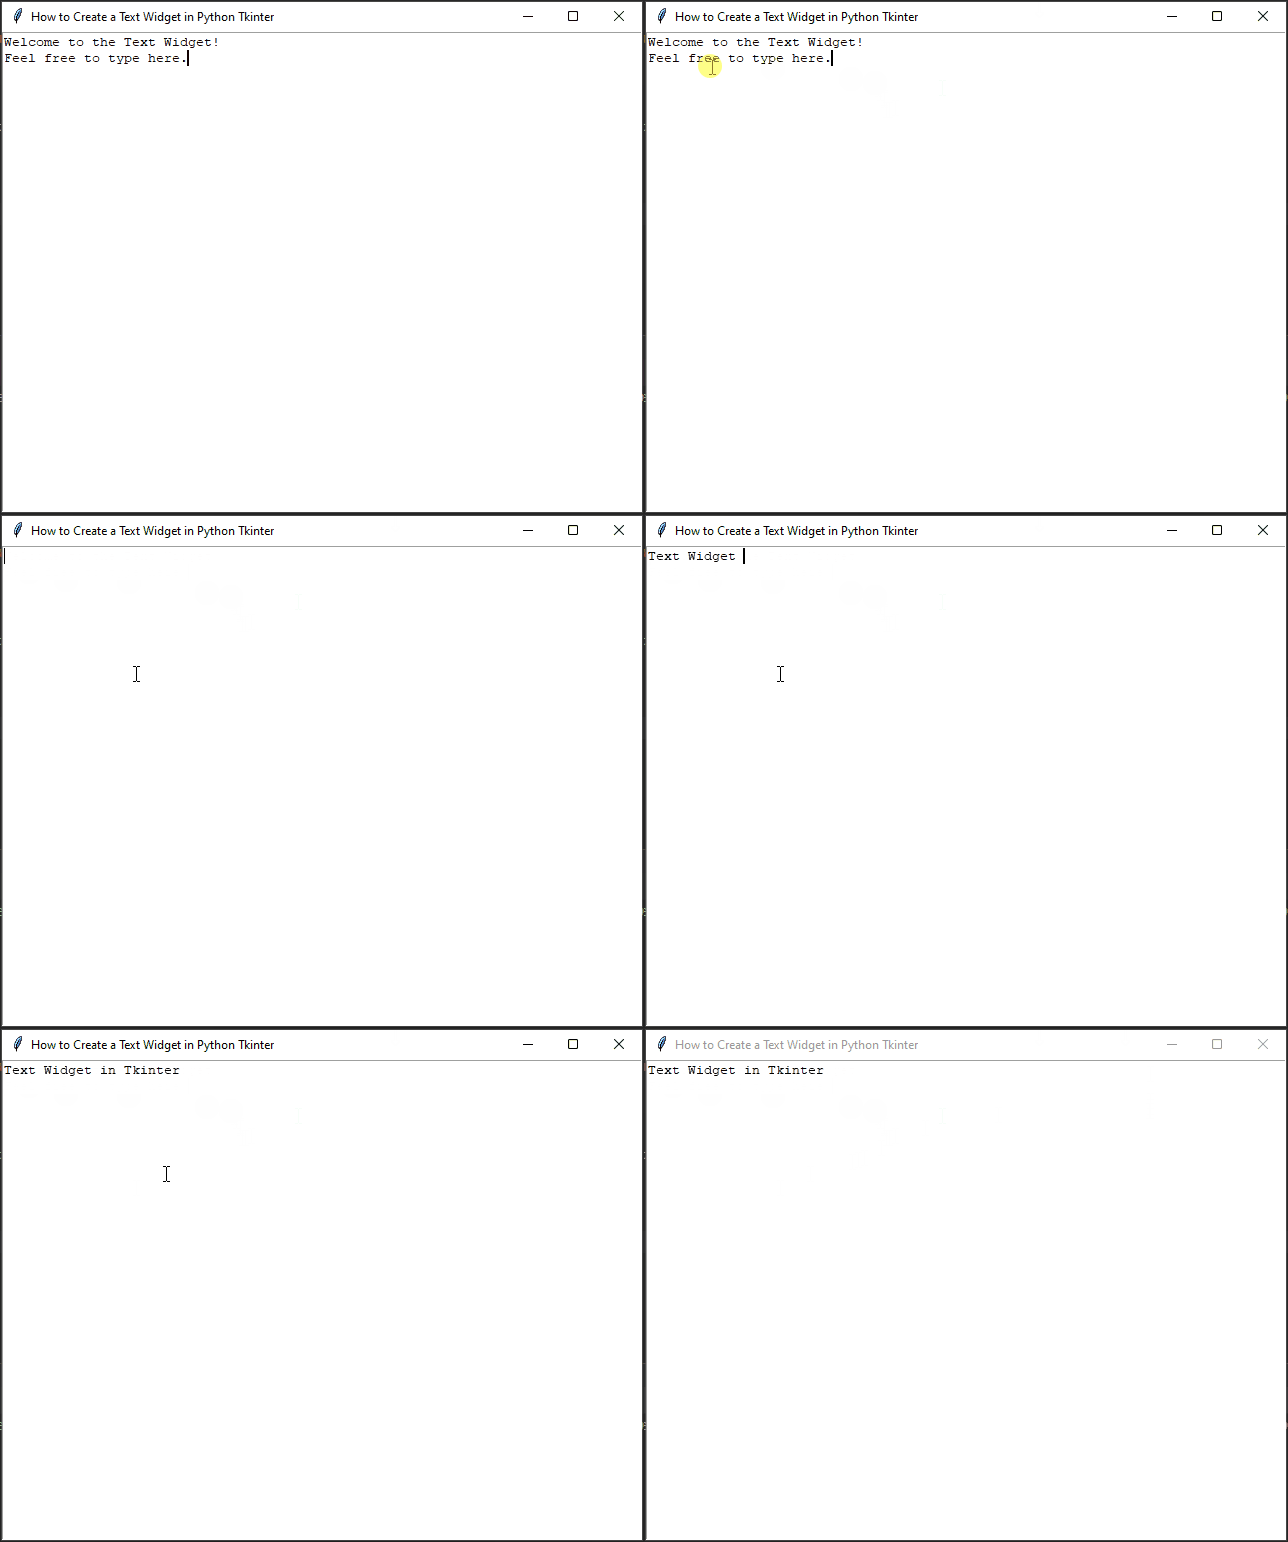
In this example, we create a basic Tkinter window with a text widget inside it. The wrap=tk.WORD parameter ensures that the text wraps to the next line when it reaches the widget’s boundary. The fill=tk.BOTH, expand=True properties make the widget resize automatically as the window size changes.
Adding Scrolling Functionality
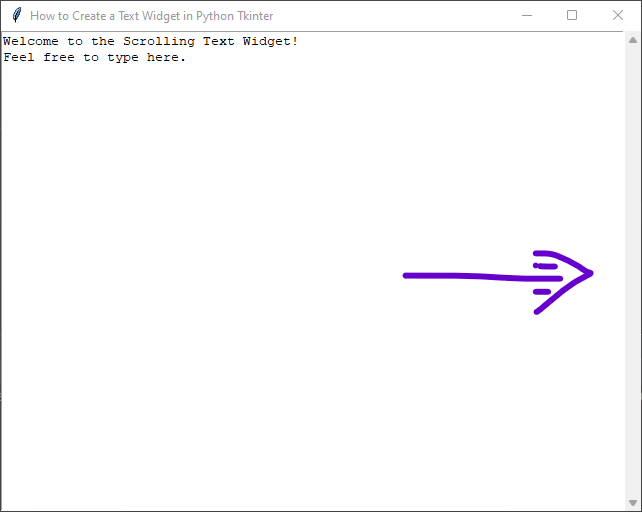
If the text exceeds the visible area of the widget, we’ll need to add scrolling functionality to make it accessible. We can use the ScrolledText widget provided by Tkinter to achieve this:
import tkinter as tk
from tkinter import scrolledtext


class PyFrame(tk.Tk):

    def __init__(self, width, height):
        super().__init__()

        self.width = width
        self.height = height

        self.geometry(f"{self.width}x{self.height}")

    def center_on_screen(self):
        left = (self.winfo_screenwidth() - self.width) // 2
        top = (self.winfo_screenheight() - self.height) // 2

        self.geometry(f"{self.width}x{self.height}+{left}+{top}")


if __name__ == '__main__':
    # Create the main application window
    root = PyFrame(640, 480)
    root.title("How to Create a Text Widget in Python Tkinter")

    # center window on the screen
    root.center_on_screen()

    # Create the ScrolledText widget
    text_widget = scrolledtext.ScrolledText(root, wrap=tk.WORD)
    text_widget.pack(fill=tk.BOTH, expand=True)

    initial_text = "Welcome to the Scrolling Text Widget!\nFeel free to type here."
    text_widget.insert(tk.END, initial_text)

    # Run the main event loop
    root.mainloop()
By using the ScrolledText widget, the text widget automatically gains scrolling functionality when needed, making it more user-friendly.
Adding Text Highlighting
Text highlighting can be useful for indicating specific portions of the text or for implementing search functionalities. To add text highlighting, we can use the tag_configure() and tag_add() methods:
import tkinter as tk
from tkinter import scrolledtext


class PyFrame(tk.Tk):

    def __init__(self, width, height):
        super().__init__()

        self.width = width
        self.height = height

        self.geometry(f"{self.width}x{self.height}")

    def center_on_screen(self):
        left = (self.winfo_screenwidth() - self.width) // 2
        top = (self.winfo_screenheight() - self.height) // 2

        self.geometry(f"{self.width}x{self.height}+{left}+{top}")


if __name__ == '__main__':
    # Create the main application window
    root = PyFrame(640, 480)
    root.title("How to Create a Text Widget in Python Tkinter")

    # center window on the screen
    root.center_on_screen()

    # Create the ScrolledText widget
    text_widget = scrolledtext.ScrolledText(root, wrap=tk.WORD)
    text_widget.pack(fill=tk.BOTH, expand=True)

    initial_text = "Welcome to the Highlighting Text Widget!\nFeel free to type here."
    text_widget.insert(tk.END, initial_text)

    # Define a tag for highlighting
    text_widget.tag_configure("highlight", background="yellow")

    # Add highlighting to specific text
    text_widget.tag_add("highlight", "1.0", "1.7")

    # Run the main event loop
    root.mainloop()
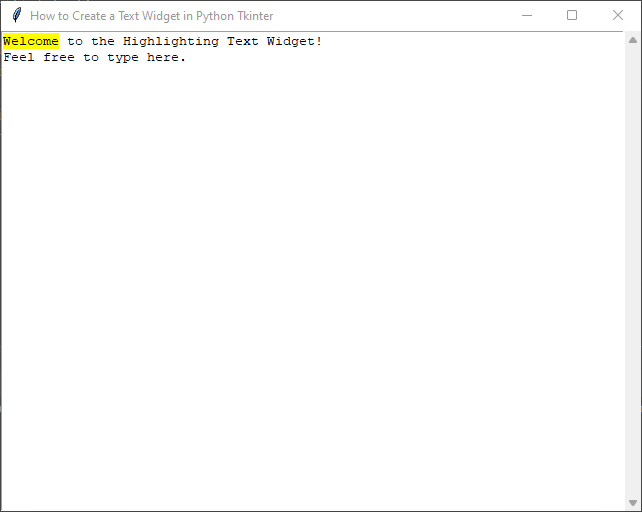
In this example, we’ve created a tag called “highlight” with a yellow background color. We then applied this tag to the text from the character at position 1.0 (line 1, character 0) to 1.7 (line 1, character 7).
Binding Events to the Text Widget
We can also bind events to the text widget, allowing us to respond to user interactions. Let’s see how to capture a keypress event:
import tkinter as tk
from tkinter import scrolledtext


class PyFrame(tk.Tk):

    def __init__(self, width, height):
        super().__init__()

        self.width = width
        self.height = height

        self.geometry(f"{self.width}x{self.height}")

    def center_on_screen(self):
        left = (self.winfo_screenwidth() - self.width) // 2
        top = (self.winfo_screenheight() - self.height) // 2

        self.geometry(f"{self.width}x{self.height}+{left}+{top}")


def on_keypress(event):
    print("Key Pressed:", event.char)


if __name__ == '__main__':
    # Create the main application window
    root = PyFrame(640, 480)
    root.title("How to Create a Text Widget in Python Tkinter")

    # center window on the screen
    root.center_on_screen()

    # Create the ScrolledText widget
    text_widget = scrolledtext.ScrolledText(root, wrap=tk.WORD)
    text_widget.pack(fill=tk.BOTH, expand=True)

    initial_text = "Welcome to the Event Text Widget!\nTry typing something!"
    text_widget.insert(tk.END, initial_text)

    # Bind the keypress event to the text widget
    text_widget.bind("<Key>", on_keypress)

    # Run the main event loop
    root.mainloop()
In this example, we’ve bound the on_keypress function to the event. When the user presses any key while the text widget has focus, the function will be called, and the pressed key will be printed to the console.
Modifying Text in the Widget
You can modify the text in the widget programmatically as well. Let’s create a button that will append some text to the existing content in the widget:
import tkinter as tk
from tkinter import scrolledtext


class PyFrame(tk.Tk):

    def __init__(self, width, height):
        super().__init__()

        self.width = width
        self.height = height

        self.geometry(f"{self.width}x{self.height}")

    def center_on_screen(self):
        left = (self.winfo_screenwidth() - self.width) // 2
        top = (self.winfo_screenheight() - self.height) // 2

        self.geometry(f"{self.width}x{self.height}+{left}+{top}")


def append_text():
    new_text = "\nThanks for using our Text Widget Example!"
    text_widget.insert(tk.END, new_text)


if __name__ == '__main__':
    # Create the main application window
    root = PyFrame(640, 480)
    root.title("How to Create a Text Widget in Python Tkinter")

    # center window on the screen
    root.center_on_screen()

    # Create the ScrolledText widget
    text_widget = scrolledtext.ScrolledText(root, wrap=tk.WORD)
    text_widget.pack(fill=tk.BOTH, expand=True)

    initial_text = "Welcome to the Event Text Widget!\nTry typing something!"
    text_widget.insert(tk.END, initial_text)

    append_text_button = tk.Button(root, text="Append Text", command=append_text)
    append_text_button.pack()

    # Run the main event loop
    root.mainloop()
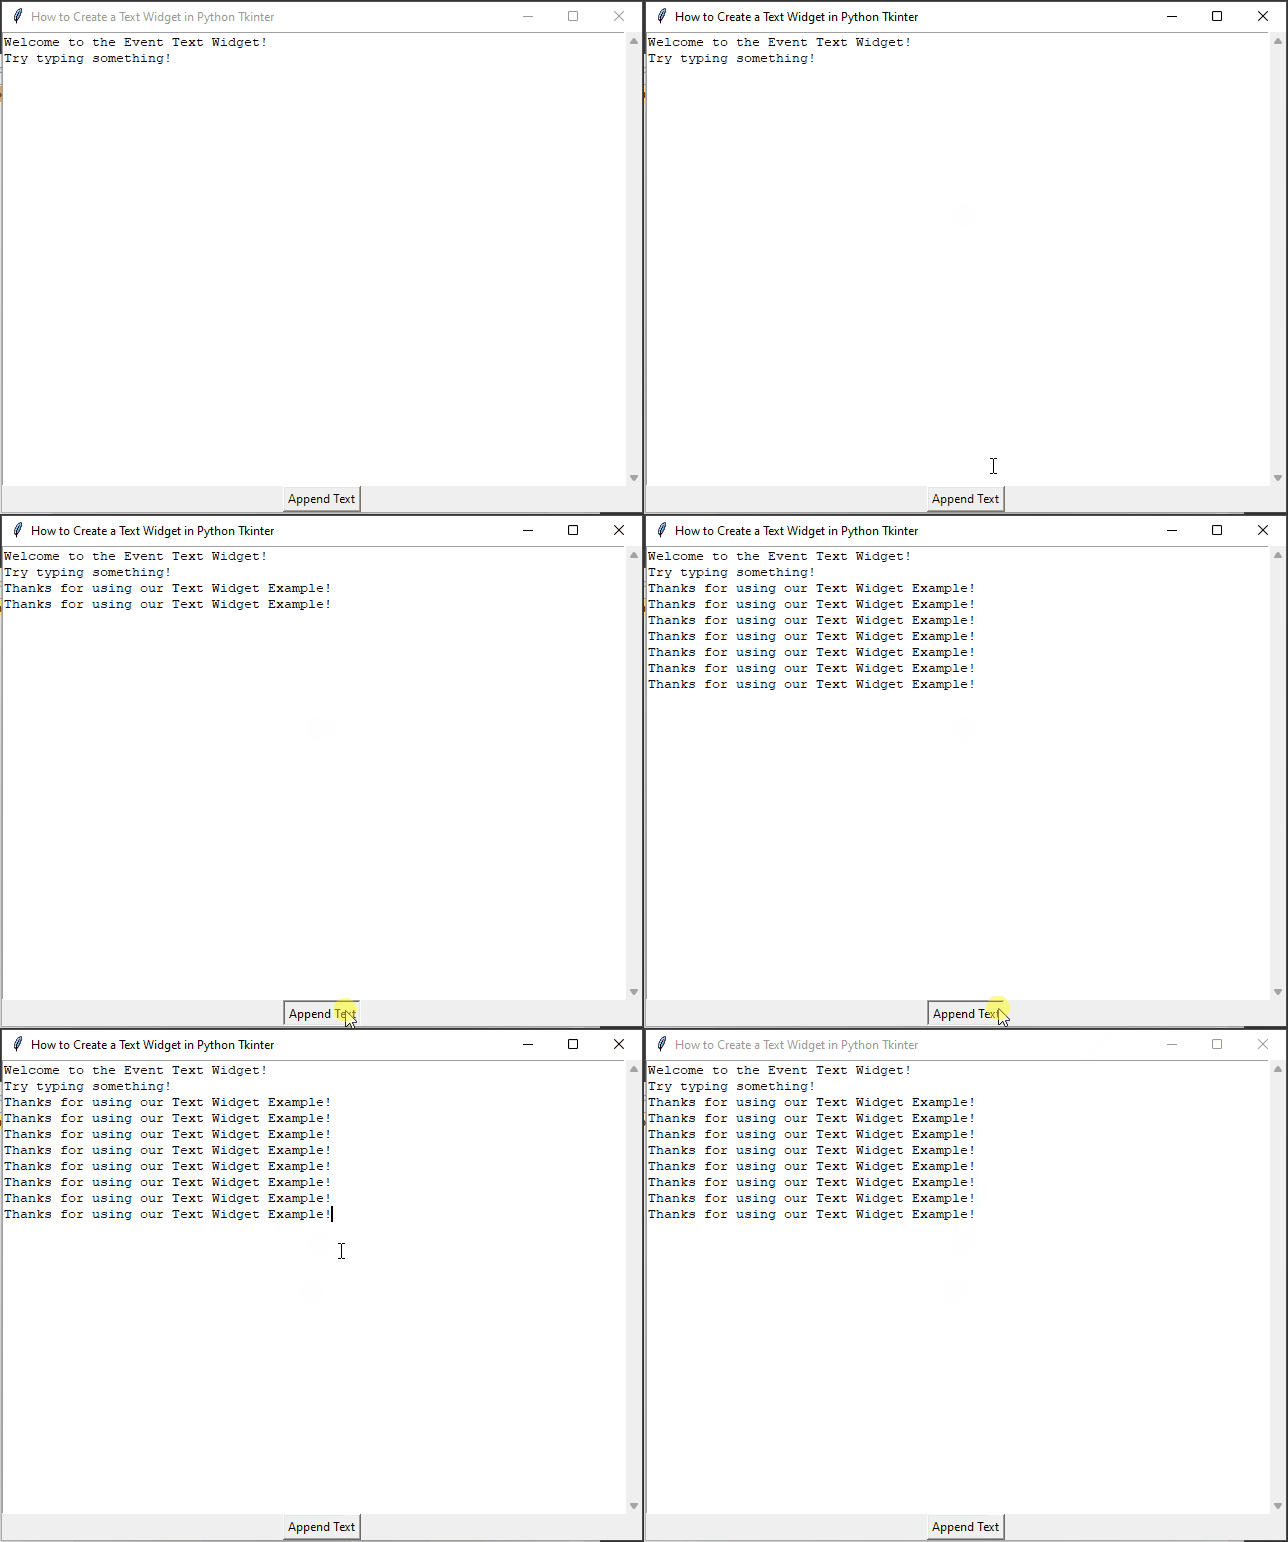
When you run this script and click the “Append Text” button, it will add the new text at the end of the existing text.
Getting Text from the Widget
In many cases, you might want to extract the text the user enters in the Text widget. Here’s how you can do that:
import tkinter as tk
from tkinter import scrolledtext


class PyFrame(tk.Tk):

    def __init__(self, width, height):
        super().__init__()

        self.width = width
        self.height = height

        self.geometry(f"{self.width}x{self.height}")

    def center_on_screen(self):
        left = (self.winfo_screenwidth() - self.width) // 2
        top = (self.winfo_screenheight() - self.height) // 2

        self.geometry(f"{self.width}x{self.height}+{left}+{top}")


def get_text():
    user_text = text_widget.get("1.0", tk.END)
    print(user_text)


if __name__ == '__main__':
    # Create the main application window
    root = PyFrame(640, 480)
    root.title("How to Create a Text Widget in Python Tkinter")

    # center window on the screen
    root.center_on_screen()

    # Create the ScrolledText widget
    text_widget = scrolledtext.ScrolledText(root, wrap=tk.WORD)
    text_widget.pack(fill=tk.BOTH, expand=True)

    initial_text = "Welcome to the Event Text Widget!\nTry typing something!"
    text_widget.insert(tk.END, initial_text)

    # Add a button to retrieve the text
    retrieve_button = tk.Button(root, text="Get Text", command=get_text)
    retrieve_button.pack()

    # Run the main event loop
    root.mainloop()
We’ve added a new function get_text() that extracts the entire content of the Text widget using text_widget.get(“1.0”, tk.END). The “1.0” refers to the starting position (line 1, character 0), and tk.END represents the end of the widget.
Additionally, we’ve created a button that calls the get_text() function when clicked. The extracted text will be printed to the console.
Customizing the Text Widget
The text widget can be further customized by changing its appearance and functionality. You can modify its font, colors, size, and even make it read-only. Here’s an example of how to set a custom font, change the text and background colors, and make the widget read-only:
import tkinter as tk
from tkinter import scrolledtext


class PyFrame(tk.Tk):

    def __init__(self, width, height):
        super().__init__()

        self.width = width
        self.height = height

        self.geometry(f"{self.width}x{self.height}")

    def center_on_screen(self):
        left = (self.winfo_screenwidth() - self.width) // 2
        top = (self.winfo_screenheight() - self.height) // 2

        self.geometry(f"{self.width}x{self.height}+{left}+{top}")


if __name__ == '__main__':
    # Create the main application window
    root = PyFrame(640, 480)
    root.title("How to Create a Text Widget in Python Tkinter")

    # center window on the screen
    root.center_on_screen()

    # Set a custom font for the text widget
    custom_font = ("Arial", 12)

    # Create the ScrolledText widget
    text_widget = scrolledtext.ScrolledText(root, wrap=tk.WORD, font=custom_font, fg="blue", bg="yellow")
    text_widget.pack(fill=tk.BOTH, expand=True)

    initial_text = "This is a read-only text widget.\nYou cannot edit this content."
    text_widget.insert(tk.END, initial_text)

    # Make the text widget read-only
    text_widget.config(state=tk.DISABLED)

    # Run the main event loop
    root.mainloop()
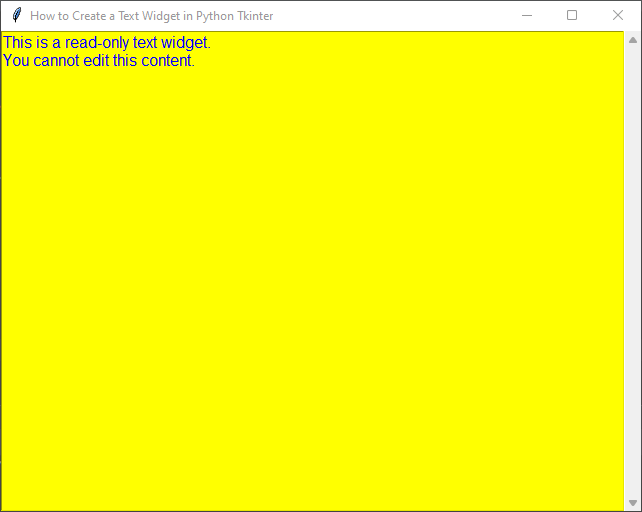
In this code, we use the font parameter to set a custom font for the text widget. We define a tuple custom_font with the desired font family and size, and we pass it to the Text constructor. Additionally, we use the config() method to set the state of the text widget to tk.DISABLED, making it read-only. The insert() method is used to insert initial text, just like in previous examples.
Creating a Simple Text Editor
Now, let’s take it a step further and create a simple text editor using Tkinter and the text widget. This text editor will have some basic functionalities like open, save, and cut, copy, paste.
import tkinter as tk
from tkinter import filedialog
from tkinter import messagebox
from tkinter import scrolledtext


class PyFrame(tk.Tk):

    def __init__(self, width, height):
        super().__init__()

        self.width = width
        self.height = height

        self.geometry(f"{self.width}x{self.height}")

    def center_on_screen(self):
        left = (self.winfo_screenwidth() - self.width) // 2
        top = (self.winfo_screenheight() - self.height) // 2

        self.geometry(f"{self.width}x{self.height}+{left}+{top}")


def open_file():
    file_path = filedialog.askopenfilename(filetypes=[("Text files", "*.txt"), ("All files", "*.*")])
    if file_path:
        with open(file_path, "r") as file:
            text_widget.delete(1.0, "end")
            text_widget.insert("end", file.read())


def save_file():
    file_path = filedialog.asksaveasfilename(defaultextension=".txt",
                                             filetypes=[("Text files", "*.txt"), ("All files", "*.*")])
    if file_path:
        with open(file_path, "w") as file:
            file.write(text_widget.get(1.0, "end-1c"))

        messagebox.showinfo("Info", "File saved successfully.")


def cut():
    text_widget.event_generate("<<Cut>>")


def copy():
    text_widget.event_generate("<<Copy>>")


def paste():
    text_widget.event_generate("<<Paste>>")


if __name__ == '__main__':
    # Create the main application window
    root = PyFrame(640, 480)
    root.title("How to Create a Text Widget in Python Tkinter")

    # center window on the screen
    root.center_on_screen()

    # Set a custom font for the text widget
    custom_font = ("Arial", 12)

    # Create the ScrolledText widget
    text_widget = scrolledtext.ScrolledText(root, wrap=tk.WORD)
    text_widget.pack(fill=tk.BOTH, expand=True)

    # Create a menu bar
    menu_bar = tk.Menu(root)
    root.config(menu=menu_bar)

    # File menu
    file_menu = tk.Menu(menu_bar, tearoff=False)
    menu_bar.add_cascade(label="File", menu=file_menu)
    file_menu.add_command(label="Open", command=open_file)
    file_menu.add_command(label="Save", command=save_file)
    file_menu.add_separator()
    file_menu.add_command(label="Exit", command=root.quit)

    # Edit menu
    edit_menu = tk.Menu(menu_bar, tearoff=False)
    menu_bar.add_cascade(label="Edit", menu=edit_menu)
    edit_menu.add_command(label="Cut", command=cut)
    edit_menu.add_command(label="Copy", command=copy)
    edit_menu.add_command(label="Paste", command=paste)

    # Run the main event loop
    root.mainloop()
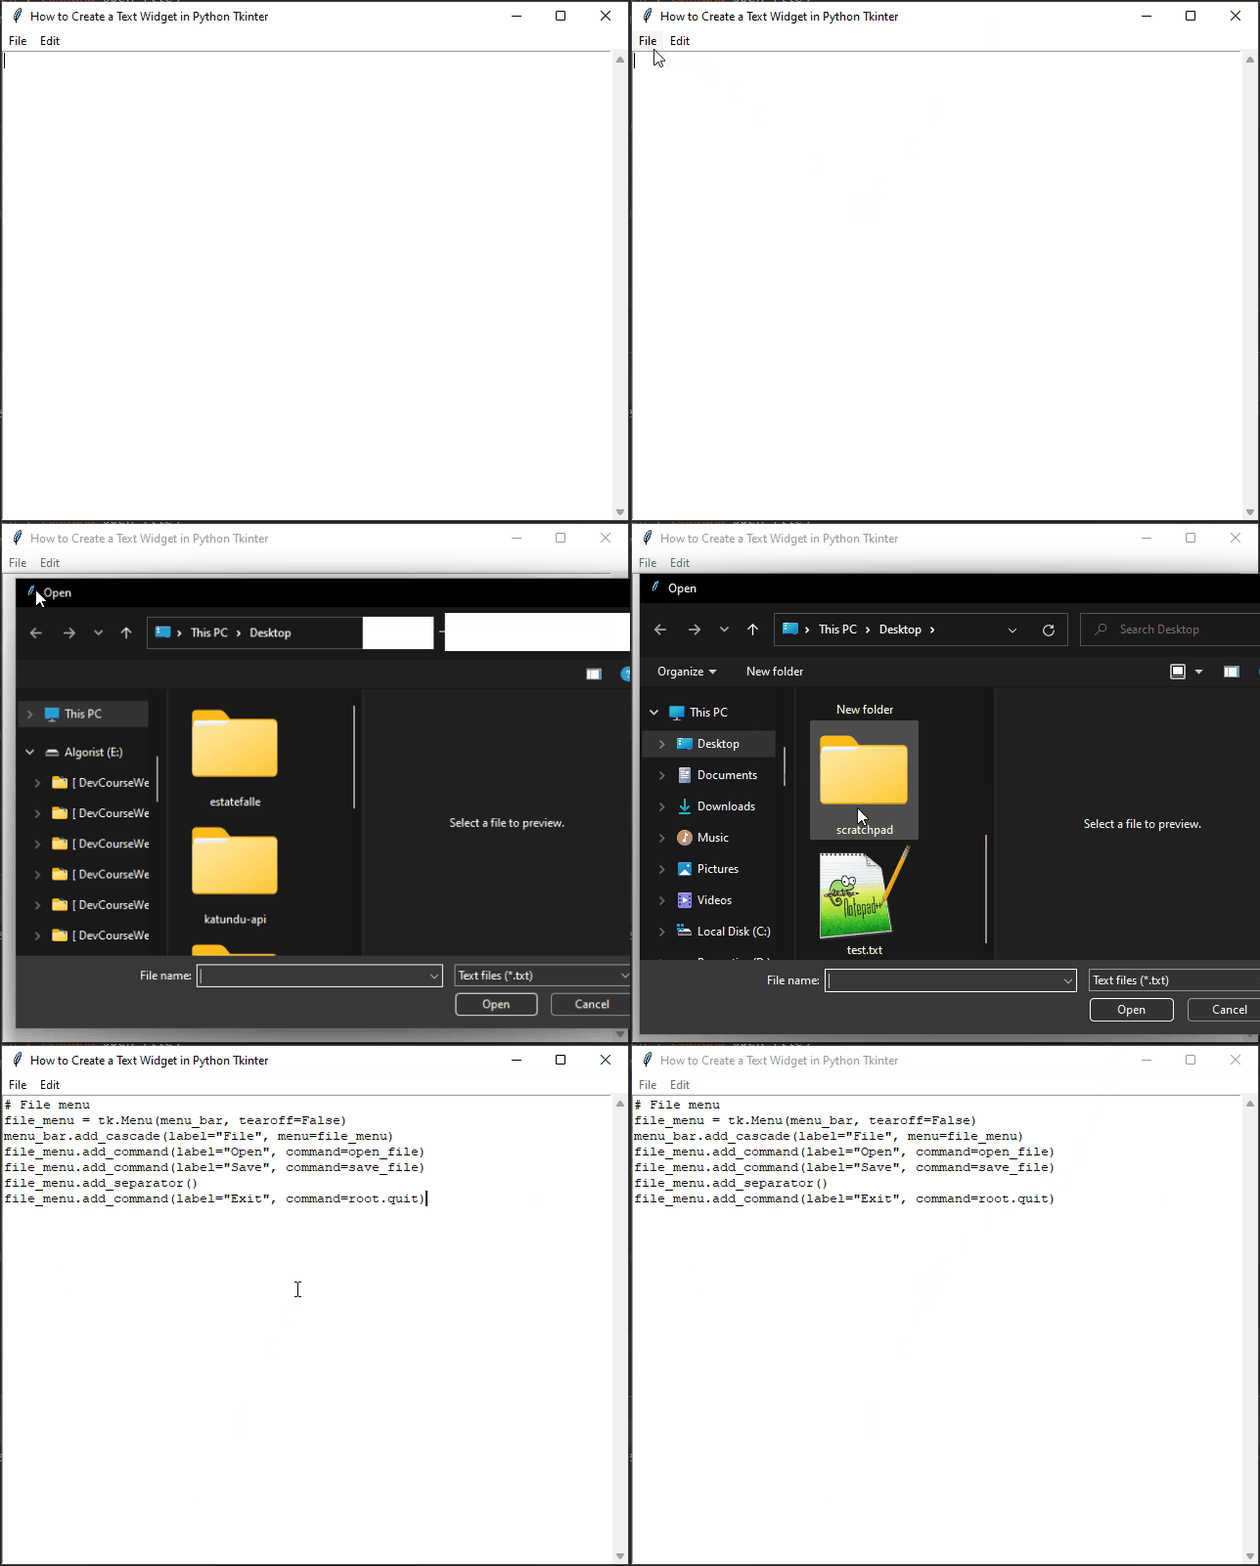
In this full example, we’ve added a menu bar with options to open, save, and perform cut, copy, and paste operations. The open_file and save_file functions use the filedialog module to interact with the file system. The cut, copy, and paste functions use the event_generate method to trigger the respective events.
Save the code above in a Python file, run it, and you’ll have a simple text editor with basic file handling and text manipulation capabilities.
Conclusion
In this article, we covered how to create a Text widget in Python Tkinter and explored some basic operations such as text entry, editing, scrolling functionality, text highlighting, event binding, retrieving user-entered text, and customizing its appearance and behavior. The Text widget is an essential component for handling multiline text, and you can further customize it by using various configuration options available in Tkinter.
Remember, Tkinter offers many more features and widgets that you can explore to create even more sophisticated GUIs.
I hope you found this code informative and useful. If you would like to receive more content, please consider subscribing to our newsletter!
