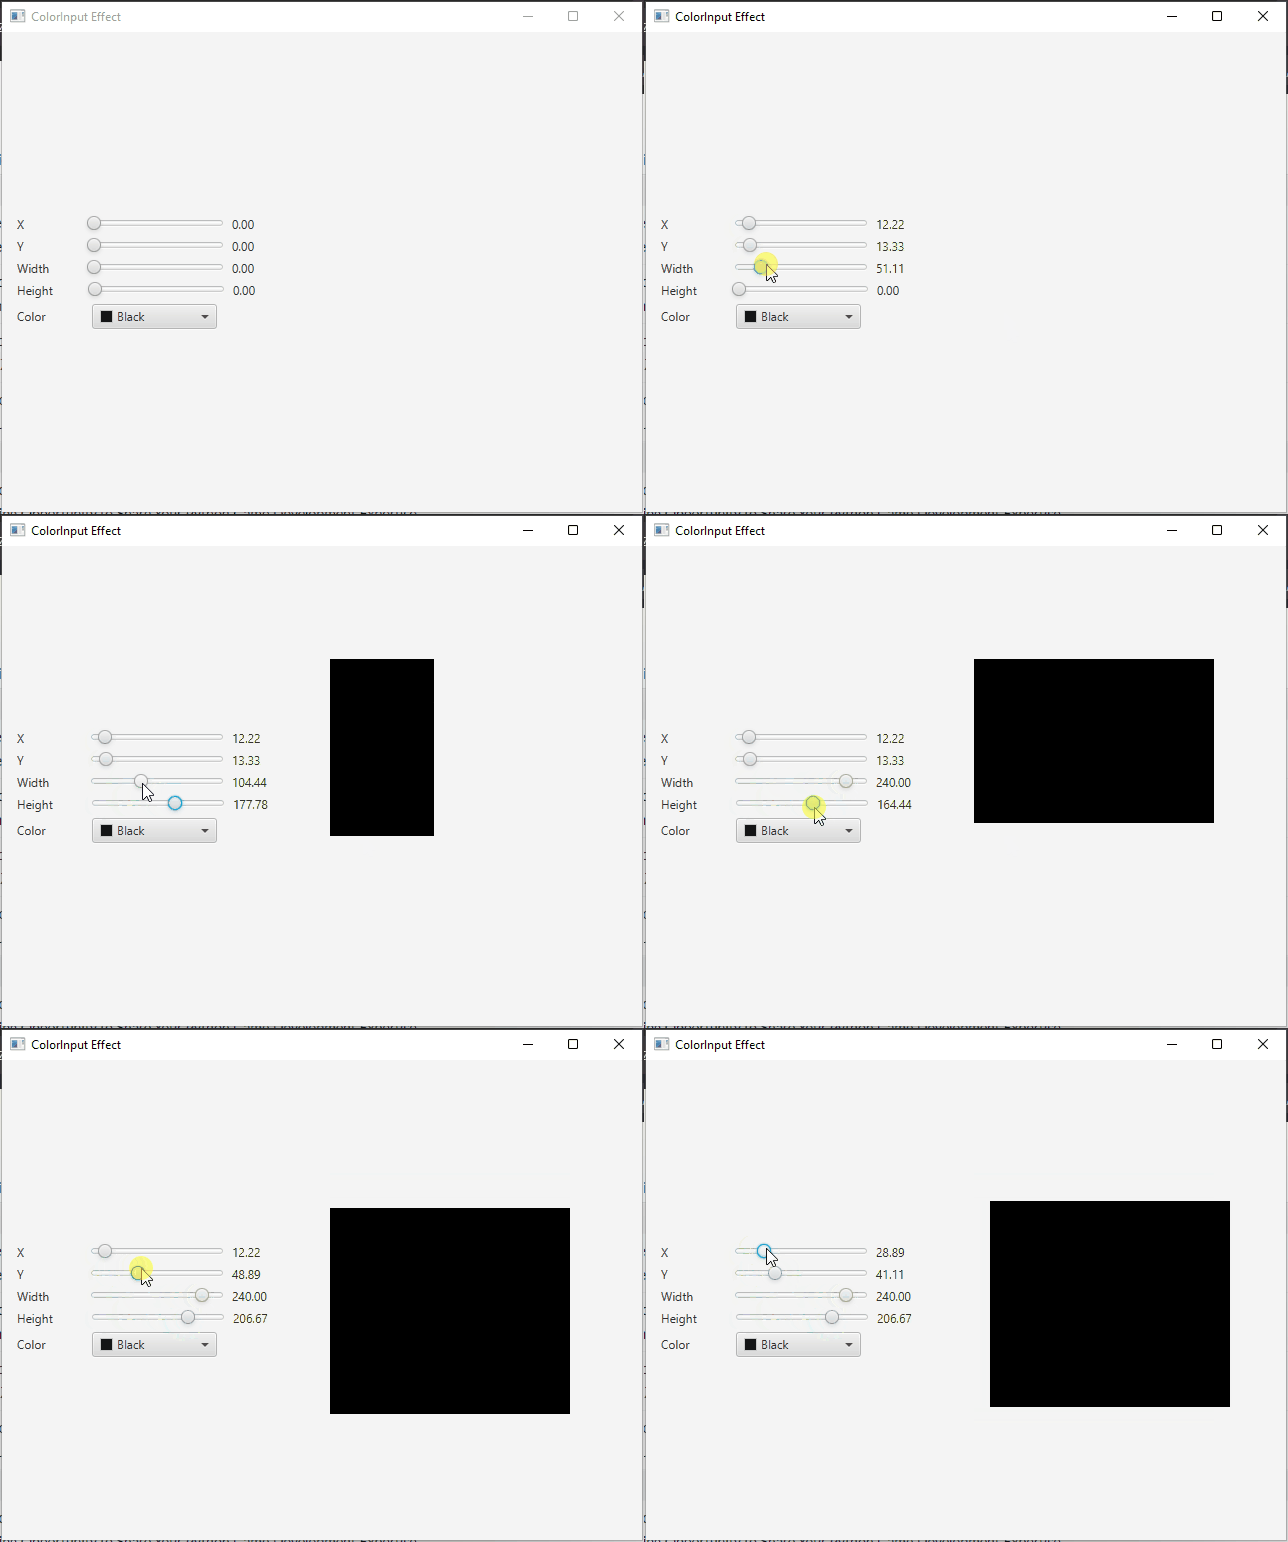
When it comes to enhancing the visual appeal of your JavaFX applications, effects play a vital role. JavaFX offers a rich set of effects to add that extra touch to your user interface elements, and one such effect is the ColorInput Effect. In this article, we will explore the ColorInput Effect, understand its purpose, and explore a practical example of how to apply it in your JavaFX applications.

with hands-on learning.
get the skills and confidence to land your next move.
What is the ColorInput Effect?
The ColorInput Effect in JavaFX is a unique effect that differs from the others in a significant way. When applied to any JavaFX node, it displays only a rectangular box filled with a color, rather than the actual content of the node itself. This can be compared to drawing a rectangle and filling it with color, but it is implemented as an effect, making it a versatile tool for enhancing your UI.
The primary use of the ColorInput Effect is to serve as an input for other effects. By defining a color-filled rectangle with this effect, you can then apply other effects to this rectangle. This allows you to create various visual effects, such as applying blurs or shadows to specific areas of your UI, all while maintaining the underlying structure of your application.
Example ColorInput Effect Application
To get a better understanding of how the ColorInput Effect works and how you can apply it, let’s walk through a practical example. We’ll create a simple JavaFX application that utilizes the ColorInput Effect to fill a rectangular region with a specified color.
import javafx.application.Application;
import javafx.geometry.Insets;
import javafx.geometry.Pos;
import javafx.scene.Scene;
import javafx.scene.effect.ColorInput;
import javafx.scene.layout.BorderPane;
import javafx.scene.shape.Rectangle;
import javafx.stage.Stage;

public class ColorInputEffectExampleApp extends Application {

    private static final double WIDTH = 640;
    private static final double HEIGHT = 480;

    /* The parent layout manager */
    private final BorderPane parent = new BorderPane();

    @Override
    public void start(Stage stage) throws Exception {

        Scene scene = new Scene(this.parent, WIDTH, HEIGHT);

        // Sets the stage title
        stage.setTitle("ColorInput Effect");

        // Set the stage scene
        stage.setScene(scene);

        // Center stage on screen
        stage.centerOnScreen();

        // Show stage on screen
        stage.show();

    }

    @Override
    public void init() throws Exception {
        super.init();

        // Create the ColorInputEffect
        ColorInput colorInput = new ColorInput();

        // Create a rectangle to apply the effect to
        Rectangle rectangle = new Rectangle(280, 280);

        // Apply the ColorInput Effect to the Rectangle
        rectangle.setEffect(colorInput);

        // Create the Control Panel for the ColorInput
        ColorInputControlPanel controlPanel = new ColorInputControlPanel(
                colorInput, rectangle.getWidth(), rectangle.getHeight()
        );

        /* Add the Rectangle to the BorderPane center region */
        this.parent.setCenter(rectangle);
        BorderPane.setAlignment(rectangle, Pos.CENTER_LEFT);
        BorderPane.setMargin(rectangle, new Insets(20));

        /* Add the ColorInputControlPanel to the BorderPane left region */
        this.parent.setLeft(controlPanel);
    }
}
In this example, we create a JavaFX application that showcases the ColorInput Effect. We start by defining a Rectangle object and applying the ColorInput Effect to it. The ColorInput Effect essentially turns the rectangle into a solid-colored box. The application also includes a control panel that allows you to adjust the color and position of the ColorInput Effect.
The ColorInput Control Panel
The ColorInput Effect can be customized to suit your specific needs. In the example, you can see how you can interactively control various parameters of the ColorInput Effect, such as its position, size, and color, using sliders and a color picker:
import javafx.beans.property.DoubleProperty;
import javafx.geometry.Insets;
import javafx.geometry.Pos;
import javafx.scene.control.ColorPicker;
import javafx.scene.control.Label;
import javafx.scene.control.Slider;
import javafx.scene.effect.ColorInput;
import javafx.scene.layout.HBox;
import javafx.scene.layout.VBox;
import javafx.scene.paint.Color;

public class ColorInputControlPanel extends VBox {

    public ColorInputControlPanel(ColorInput colorInput, double width, double height) {
        super(5);

        // Create the ColorPicker, and set BLACK as the default color
        ColorPicker colorPicker = new ColorPicker(Color.BLACK);

        // Create the HBox container to arrange the Label, and the ColorPicker
        HBox colorContainer = new HBox(
                13,
                new Label(String.format("%-15s", "Color")),
                colorPicker
        );

        colorContainer.setAlignment(Pos.CENTER_LEFT);

        // Bind the ColorInput paintProperty to the ColorPicker valueProperty
        colorInput.paintProperty().bind(colorPicker.valueProperty());

        // Create a VBox to arrange the Sliders, and the ColorPicker
        this.getChildren().addAll(
                this.createLabeledBoundSlider(colorInput.xProperty(),"X", width / 2),
                this.createLabeledBoundSlider(colorInput.yProperty(),"Y", height / 2),
                this.createLabeledBoundSlider(colorInput.widthProperty(), "Width", width),
                this.createLabeledBoundSlider(colorInput.heightProperty(),"Height", height),
                colorContainer
        );

        this.setAlignment(Pos.CENTER_LEFT);
        this.setPadding(new Insets(15));

    }

    private HBox createLabeledBoundSlider(DoubleProperty property, String label, double max) {

        // 0 min, and 0 default
        Slider slider = new Slider(0, max, 0);
        property.bind(slider.valueProperty());

        Label value = new Label();
        value.setMinWidth(50);

        // Format the slider value with two decimal places
        value.textProperty().bind(slider.valueProperty().asString("%.2f"));

        Label lblLabel = new Label(String.format("%-15s", label));
        lblLabel.setMinWidth(65);
        lblLabel.setAlignment(Pos.CENTER_LEFT);

        // Create the HBox to arrange UI components
        return new HBox(5, lblLabel, slider, value);

    }
}
The ColorInputControlPanel class provides a user-friendly interface for adjusting the properties of the ColorInput Effect. It binds the sliders and color picker to the respective properties of the ColorInput Effect, making it easy to manipulate the effect in real-time.

Conclusion
In this article, we’ve explored the JavaFX ColorInput Effect, a unique tool for filling a rectangular region with color while leaving the underlying content untouched. This effect is often used as input for other effects to create visually appealing UI elements. By providing an example application, we’ve demonstrated how to apply the ColorInput Effect and allow users to interact with it through a control panel. This functionality opens up a world of possibilities for enhancing your JavaFX applications with creative visual effects. Experiment with the ColorInput Effect and start adding that extra flair to your user interfaces in JavaFX.
I hope you found this article informative and useful. If you would like to receive more content, please consider subscribing to our newsletter.


