Images are a powerful medium for conveying information, emotions, and aesthetics. With JavaFX, a versatile and robust framework for building rich and interactive applications, you can take your image manipulation skills to the next level. One such technique is applying grayscale image filters, which can transform your colorful pictures into elegant monochromatic masterpieces.

with hands-on learning.
get the skills and confidence to land your next move.
In this article, we will explore JavaFX’s capabilities for grayscale image filtering, diving into the ColorAdjust class and manipulating individual pixels to achieve desired effects. By the end, you’ll have a deep understanding of how to create grayscale images and how to apply this technique to your own JavaFX projects.
The Power of Grayscale Images
Grayscale images, also known as black and white images, are a timeless and versatile medium in the world of visual arts. They hold a unique charm, often conveying a sense of nostalgia and simplicity. Grayscale images can be used to accentuate specific details, evoke particular moods, or even create a sense of timelessness in your visual content.
To work with grayscale images in JavaFX, we will make use of the ColorAdjust class and manipulate individual pixels. The ColorAdjust class provides an easy and efficient way to adjust various color properties of an image, and it is a fundamental tool for creating grayscale effects.
Using the ColorAdjust Class
The ColorAdjust class in JavaFX allows you to modify the colors of an image by adjusting its brightness, contrast, hue, and saturation. This class is an excellent starting point for creating grayscale effects. Here’s a basic example of how to apply grayscale using the ColorAdjust class:
import javafx.application.Application;
import javafx.scene.Scene;
import javafx.scene.effect.*;
import javafx.scene.image.Image;
import javafx.scene.image.ImageView;
import javafx.scene.layout.StackPane;
import javafx.stage.Stage;

public class ColorAdjustGrayscaleImageFilter extends Application {

    private static final double WIDTH = 640;
    private static final double HEIGHT = 480;

    /* The parent layout manager */
    private final StackPane parent = new StackPane();

    @Override
    public void start(Stage stage) throws Exception {

        Scene scene = new Scene(this.parent, WIDTH, HEIGHT);

        // Sets the stage title
        stage.setTitle("ColorAdjust Grayscale Image Filter");

        // Set the stage scene
        stage.setScene(scene);

        // Center stage on screen
        stage.centerOnScreen();

        // Show stage on screen
        stage.show();

    }

    @Override
    public void init() throws Exception {
        super.init();

        // Load the image
        Image image = new Image("scorpion.jpg");

        ImageView imageView = new ImageView(image);

        // Scaling the image proportionally
        imageView.setPreserveRatio(true);
        imageView.setFitWidth(400);

        ColorAdjust grayscale = new ColorAdjust();
        grayscale.setSaturation(-1.0);

        // Apply the ColorAdjust Effect to the ImageView
        imageView.setEffect(grayscale);

        /* Add the ImageView to the StackPane */
        this.parent.getChildren().addAll(imageView);

    }

}
In this example, we load an image, create an ImageView to display it, and then create a ColorAdjust object. By setting the saturation property to -1.0, we effectively remove color from the image, turning it into grayscale.
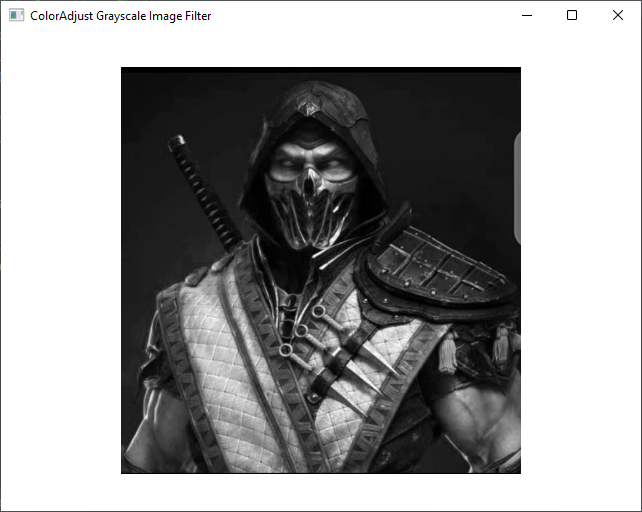
The ColorAdjust class is a quick and easy way to apply a grayscale filter to your images. However, if you want more control over the grayscale effect or wish to manipulate individual pixels, you’ll need to take a different approach.
Manipulating Individual Pixels
While using ColorAdjust is a straightforward way to achieve grayscale effects, you might want more fine-grained control over the process. To do this, you can manipulate individual pixels in the image.
To manipulate individual pixels in JavaFX, you need to use the PixelReader and PixelWriter classes. Here’s a basic example of how to convert an image to grayscale using this technique:
import javafx.application.Application;
import javafx.scene.Scene;
import javafx.scene.image.*;
import javafx.scene.layout.StackPane;
import javafx.scene.paint.Color;
import javafx.stage.Stage;

public class PixelManipulationGrayscaleImageFilter extends Application {

    private static final double WIDTH = 640;
    private static final double HEIGHT = 480;

    /* The parent layout manager */
    private final StackPane parent = new StackPane();

    @Override
    public void start(Stage stage) throws Exception {

        Scene scene = new Scene(this.parent, WIDTH, HEIGHT);

        // Sets the stage title
        stage.setTitle("Pixel Manipulation Grayscale Image Filter");

        // Set the stage scene
        stage.setScene(scene);

        // Center stage on screen
        stage.centerOnScreen();

        // Show stage on screen
        stage.show();

    }

    @Override
    public void init() throws Exception {
        super.init();

        // Load the image
        GrayscaleConverter converter = new GrayscaleConverter("scorpion.jpg");
        WritableImage image = converter.convert();

        ImageView imageView = new ImageView(image);

        // Scaling the image proportionally
        imageView.setPreserveRatio(true);
        imageView.setFitWidth(400);

        /* Add the ImageView to the StackPane */
        this.parent.getChildren().addAll(imageView);

    }

    static class GrayscaleConverter {

        // The resulting grayscale image
        private final WritableImage grayscaleImage;

        public GrayscaleConverter(String imagePath) {

            // Load the original image from the provided file path
            Image image = new Image(imagePath);

            // Get the width and height of the original image
            int width = (int) image.getWidth();
            int height = (int) image.getHeight();

            // Create the grayscale image using the provided methods
            this.grayscaleImage = createGrayscaleImage(image, width, height);
        }

        // Get the grayscale image
        public WritableImage convert() {
            return this.grayscaleImage;
        }

        // Create a grayscale image based on the original image
        private WritableImage createGrayscaleImage(Image image, int width, int height) {

            // Create a WritableImage to store the grayscale version
            WritableImage grayImage = new WritableImage(width, height);
            // Obtain a reader to read pixels from the original image
            PixelReader pixelReader = image.getPixelReader();

            // Obtain a writer to write pixels to the grayscale image
            PixelWriter pixelWriter = grayImage.getPixelWriter();

            // Iterate over each pixel in the original image
            for (int x = 0; x < width; x++) {
                for (int y = 0; y < height; y++) {

                    // Get the color of the current pixel
                    Color color = pixelReader.getColor(x, y);

                    // Calculate the grayscale color for the current pixel
                    Color grayColor = calculateGrayscaleColor(color);

                    // Write the grayscale color to the grayscale image
                    pixelWriter.setColor(x, y, grayColor);
                }
            }

            // Return the grayscale image
            return grayImage;

        }

        // Calculate a grayscale color based on the RGB values of the original color
        private Color calculateGrayscaleColor(Color color) {

            // Calculate the grayscale value by averaging the RGB components
            double grayscaleValue = (color.getRed() + color.getGreen() + color.getBlue()) / 3.0;

            // Create a grayscale color with the calculated value for all RGB components
            return Color.color(grayscaleValue, grayscaleValue, grayscaleValue);

        }

    }

}
In this example, we create a new image to store the grayscale version of the original. We then use a nested loop to iterate through all the pixels, calculating the grayscale value for each pixel and writing it to the new image using PixelWriter. This method provides fine control over the grayscale conversion process.
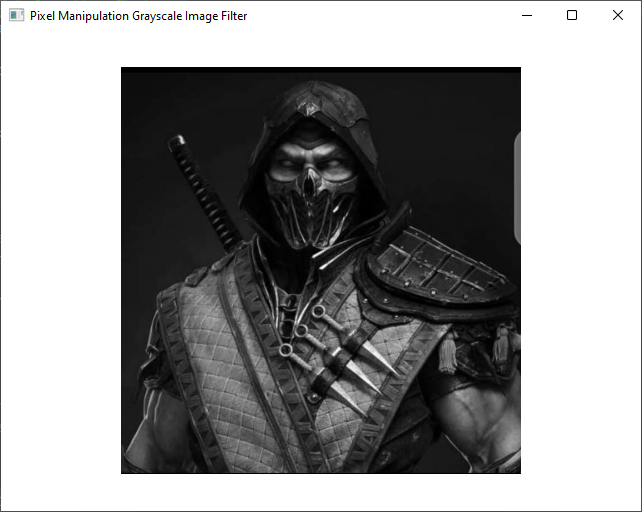
This pixel manipulation approach allows you to control the grayscale conversion precisely. You can also experiment with different algorithms to create unique grayscale effects.
Conclusion
Grayscale image filtering is a powerful technique that can enhance the visual appeal and storytelling of your images. In this article, we explored two methods for achieving grayscale effects in JavaFX: using the ColorAdjust class to adjust image properties and manipulating individual pixels for fine-grained control.
Whether you opt for the simplicity of ColorAdjust or the precision of pixel manipulation, JavaFX provides the tools you need to create stunning grayscale images. So, the next time you want to add a touch of elegance or nostalgia to your visual content, don’t hesitate to experiment with these techniques.
I hope you found this article informative and useful. If you would like to receive more content, please consider subscribing to our newsletter.
