User interfaces are an integral part of any software application. They play a pivotal role in how users perceive and interact with your software. To make your application visually appealing and intuitive, you often need to employ various graphical effects. One such effect that can add a touch of elegance and sophistication to your JavaFX applications is the Reflection Effect. In this article, we will explore the JavaFX Reflection Effect, its applications, and how to use it to create stunning user interfaces.

with hands-on learning.
get the skills and confidence to land your next move.
What is the Reflection Effect?
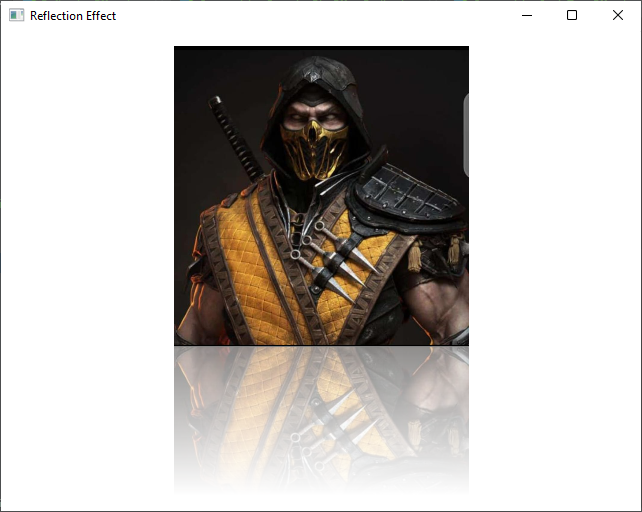
The reflection effect is a visual technique that mimics the reflection of an object on a shiny surface, such as glass or water. It adds depth and realism to your UI elements by creating a mirror-like reflection below the original object. This effect is widely used to make images and other graphical elements more engaging and attractive to users.
Applying the Reflection Effect
To apply the Reflection Effect, you need to create an instance of the Reflection class and set it as the effect of the node you want to reflect. Here’s a simple example of how to apply the reflection effect to an ImageView:
import javafx.application.Application;
import javafx.geometry.Insets;
import javafx.geometry.Pos;
import javafx.scene.Scene;
import javafx.scene.effect.Reflection;
import javafx.scene.image.Image;
import javafx.scene.image.ImageView;
import javafx.scene.layout.BorderPane;
import javafx.stage.Stage;

public class ReflectionEffect extends Application {

    private static final double WIDTH = 640;
    private static final double HEIGHT = 480;

    /* The parent layout manager */
    private final BorderPane parent = new BorderPane();

    @Override
    public void start(Stage stage) throws Exception {

        Scene scene = new Scene(this.parent, WIDTH, HEIGHT);

        // Sets the stage title
        stage.setTitle("Reflection Effect");

        // Set the stage scene
        stage.setScene(scene);

        // Center stage on screen
        stage.centerOnScreen();

        // Show stage on screen
        stage.show();

    }

    @Override
    public void init() throws Exception {
        super.init();

        Image image = new Image("scorpion.jpg");

        ImageView imageView = new ImageView(image);
        imageView.setPreserveRatio(true);
        imageView.setFitHeight(300);

        Reflection reflection = new Reflection();
        reflection.setFraction(0.5); // Adjust the reflection height

        // Apply the Reflection Effect to the ImageView
        imageView.setEffect(reflection);

        /* Add the ImageView to the BorderPane top region */
        this.parent.setTop(imageView);
        BorderPane.setAlignment(imageView, Pos.CENTER);
        BorderPane.setMargin(imageView, new Insets(15));

    }

}
In this example, we load an image, create a Reflection effect, and apply it to the image using imageView.setEffect(reflection). You can adjust the reflection.setFraction() value to control the height of the reflection.
Customizing the Reflection Effect
Customizing the JavaFX Reflection Effect allows you to fine-tune its appearance to meet your specific design requirements. The Reflection class provides several properties that can be adjusted individually to control the reflection’s characteristics.
setTopOffset(double offset)
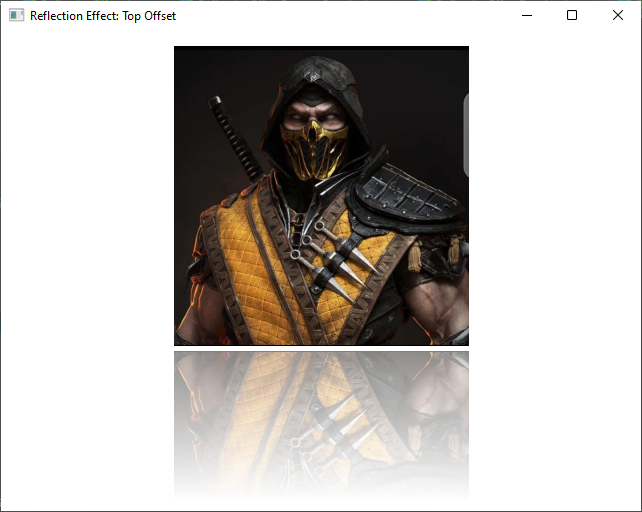
The setTopOffset method allows you to control the distance between the original Node and its reflection. It specifies the gap between the two elements. The greater the offset, the more pronounced the separation between the original content and its reflection.
import javafx.application.Application;
import javafx.geometry.Insets;
import javafx.geometry.Pos;
import javafx.scene.Scene;
import javafx.scene.effect.Reflection;
import javafx.scene.image.Image;
import javafx.scene.image.ImageView;
import javafx.scene.layout.BorderPane;
import javafx.stage.Stage;

public class ReflectionEffectTopOffset extends Application {

    private static final double WIDTH = 640;
    private static final double HEIGHT = 480;

    /* The parent layout manager */
    private final BorderPane parent = new BorderPane();

    @Override
    public void start(Stage stage) throws Exception {

        Scene scene = new Scene(this.parent, WIDTH, HEIGHT);

        // Sets the stage title
        stage.setTitle("Reflection Effect: Top Offset");

        // Set the stage scene
        stage.setScene(scene);

        // Center stage on screen
        stage.centerOnScreen();

        // Show stage on screen
        stage.show();

    }

    @Override
    public void init() throws Exception {
        super.init();

        Image image = new Image("scorpion.jpg");

        ImageView imageView = new ImageView(image);
        imageView.setPreserveRatio(true);
        imageView.setFitHeight(300);

        Reflection reflection = new Reflection();
        reflection.setFraction(0.5); // Adjust the reflection height

        reflection.setTopOffset(5); // Sets the offset to 5 pixels

        // Apply the Reflection Effect to the ImageView
        imageView.setEffect(reflection);

        /* Add the ImageView to the BorderPane top region */
        this.parent.setTop(imageView);
        BorderPane.setAlignment(imageView, Pos.CENTER);
        BorderPane.setMargin(imageView, new Insets(15));

    }

}
setFraction(double fraction)
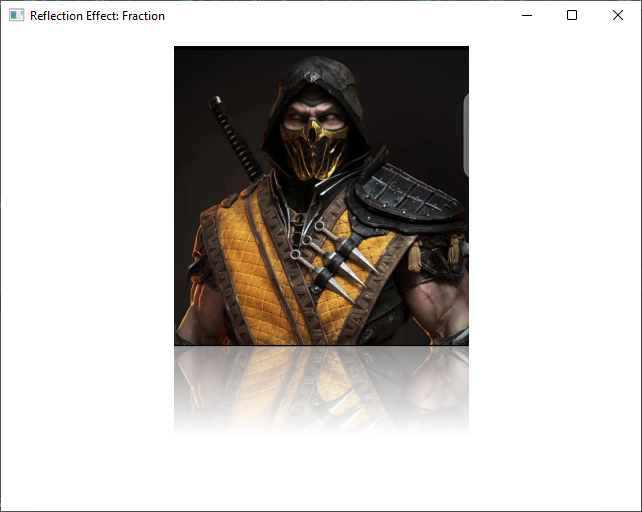
The setFraction method determines the fraction of the original Node that is visible in the reflection, measured from the bottom. This property lets you control how much of the content appears in the reflection. A fraction of 1 would display the entire content, while a fraction of 0.5 would show only half.
import javafx.application.Application;
import javafx.geometry.Insets;
import javafx.geometry.Pos;
import javafx.scene.Scene;
import javafx.scene.effect.Reflection;
import javafx.scene.image.Image;
import javafx.scene.image.ImageView;
import javafx.scene.layout.BorderPane;
import javafx.stage.Stage;

public class ReflectionEffectFraction extends Application {

    private static final double WIDTH = 640;
    private static final double HEIGHT = 480;

    /* The parent layout manager */
    private final BorderPane parent = new BorderPane();

    @Override
    public void start(Stage stage) throws Exception {

        Scene scene = new Scene(this.parent, WIDTH, HEIGHT);

        // Sets the stage title
        stage.setTitle("Reflection Effect: Fraction");

        // Set the stage scene
        stage.setScene(scene);

        // Center stage on screen
        stage.centerOnScreen();

        // Show stage on screen
        stage.show();

    }

    @Override
    public void init() throws Exception {
        super.init();

        Image image = new Image("scorpion.jpg");

        ImageView imageView = new ImageView(image);
        imageView.setPreserveRatio(true);
        imageView.setFitHeight(300);

        Reflection reflection = new Reflection();

        // Sets the fraction to 0.3 (30% of the content visible in the reflection)
        reflection.setFraction(0.3);

        // Apply the Reflection Effect to the ImageView
        imageView.setEffect(reflection);

        /* Add the ImageView to the BorderPane top region */
        this.parent.setTop(imageView);
        BorderPane.setAlignment(imageView, Pos.CENTER);
        BorderPane.setMargin(imageView, new Insets(15));

    }

}
setTopOpacity(double opacity)
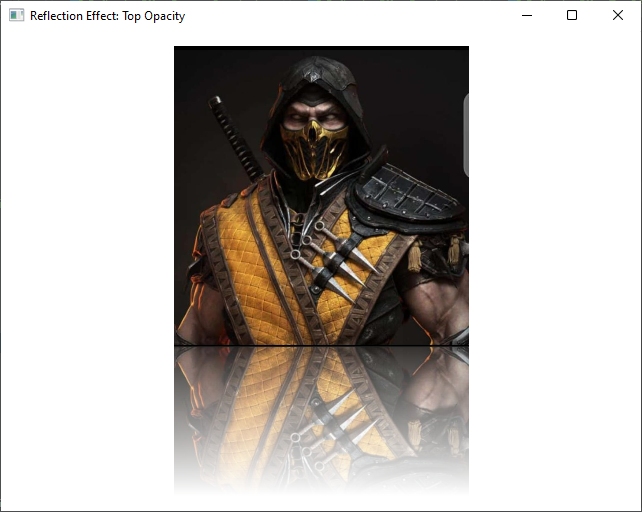
The setTopOpacity method allows you to adjust the opacity of the reflection at its top extreme. A higher opacity makes the top part of the reflection more visible, while a lower value makes it more transparent.
import javafx.application.Application;
import javafx.geometry.Insets;
import javafx.geometry.Pos;
import javafx.scene.Scene;
import javafx.scene.effect.Reflection;
import javafx.scene.image.Image;
import javafx.scene.image.ImageView;
import javafx.scene.layout.BorderPane;
import javafx.stage.Stage;

public class ReflectionEffectTopOpacity extends Application {

    private static final double WIDTH = 640;
    private static final double HEIGHT = 480;

    /* The parent layout manager */
    private final BorderPane parent = new BorderPane();

    @Override
    public void start(Stage stage) throws Exception {

        Scene scene = new Scene(this.parent, WIDTH, HEIGHT);

        // Sets the stage title
        stage.setTitle("Reflection Effect: Top Opacity");

        // Set the stage scene
        stage.setScene(scene);

        // Center stage on screen
        stage.centerOnScreen();

        // Show stage on screen
        stage.show();

    }

    @Override
    public void init() throws Exception {
        super.init();

        Image image = new Image("scorpion.jpg");

        ImageView imageView = new ImageView(image);
        imageView.setPreserveRatio(true);
        imageView.setFitHeight(300);

        Reflection reflection = new Reflection();
        reflection.setFraction(0.5); // Adjust the reflection height

        // Sets the top opacity to 0.9 (90% opacity at the top)
        reflection.setTopOpacity(0.9);

        // Apply the Reflection Effect to the ImageView
        imageView.setEffect(reflection);

        /* Add the ImageView to the BorderPane top region */
        this.parent.setTop(imageView);
        BorderPane.setAlignment(imageView, Pos.CENTER);
        BorderPane.setMargin(imageView, new Insets(15));

    }

}
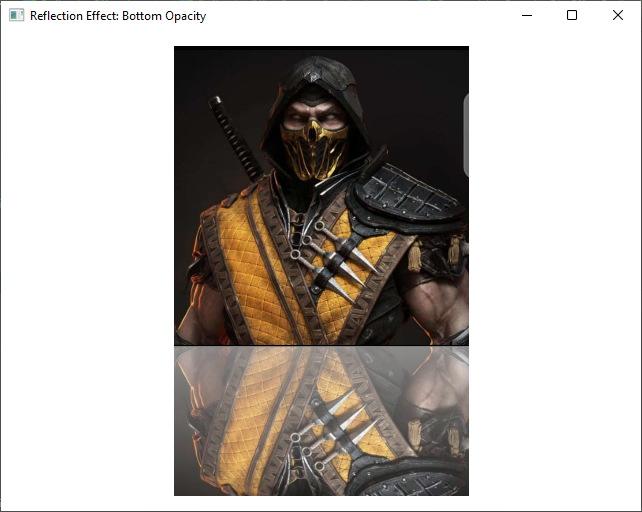
setBottomOpacity(double opacity)
The setBottomOpacity method is similar to setTopOpacity, but it controls the opacity at the bottom of the reflection. Adjusting this bottom opacity property allows you to make the reflection’s bottom part more or less visible.
import javafx.application.Application;
import javafx.geometry.Insets;
import javafx.geometry.Pos;
import javafx.scene.Scene;
import javafx.scene.effect.Reflection;
import javafx.scene.image.Image;
import javafx.scene.image.ImageView;
import javafx.scene.layout.BorderPane;
import javafx.stage.Stage;

public class ReflectionEffectBottomOpacity extends Application {

    private static final double WIDTH = 640;
    private static final double HEIGHT = 480;

    /* The parent layout manager */
    private final BorderPane parent = new BorderPane();

    @Override
    public void start(Stage stage) throws Exception {

        Scene scene = new Scene(this.parent, WIDTH, HEIGHT);

        // Sets the stage title
        stage.setTitle("Reflection Effect: Bottom Opacity");

        // Set the stage scene
        stage.setScene(scene);

        // Center stage on screen
        stage.centerOnScreen();

        // Show stage on screen
        stage.show();

    }

    @Override
    public void init() throws Exception {
        super.init();

        Image image = new Image("scorpion.jpg");

        ImageView imageView = new ImageView(image);
        imageView.setPreserveRatio(true);
        imageView.setFitHeight(300);

        Reflection reflection = new Reflection();
        reflection.setFraction(0.5); // Adjust the reflection height

        // Sets the bottom opacity to 0.9 (90% opacity at the bottom)
        reflection.setBottomOpacity(0.9);

        // Apply the Reflection Effect to the ImageView
        imageView.setEffect(reflection);

        /* Add the ImageView to the BorderPane top region */
        this.parent.setTop(imageView);
        BorderPane.setAlignment(imageView, Pos.CENTER);
        BorderPane.setMargin(imageView, new Insets(15));

    }

}
By manipulating these properties, you can create various reflection effects, from subtle and realistic to more pronounced and artistic, depending on your application’s design requirements.
Conclusion
Adding reflection effects to your JavaFX applications can significantly enhance the overall user experience. The JavaFX Reflection class offers an easy and effective way to achieve this visual effect. Whether you’re working with images, text, or other UI elements, you can create stunning reflections to captivate your users.
As you explore the world of JavaFX reflection effects, don’t hesitate to experiment and fine-tune the properties to match your design vision. With a little creativity, you can take your user interface to the next level.
I hope you found this article informative and useful. If you would like to receive more content, please consider subscribing to our newsletter.
