When it comes to developing modern and visually appealing applications, JavaFX has become a popular choice for developers. Its extensive library of graphical effects allows you to enhance the visual appeal of your user interface. In this article, we will explore one such effect – the SepiaTone effect. We’ll discuss what it is, how to use it, and provide some examples of how it can be applied to create stunning visual transformations in your JavaFX applications.

with hands-on learning.
get the skills and confidence to land your next move.
What is the SepiaTone Effect?
The SepiaTone effect is a common and timeless image filter that mimics the appearance of photographs developed on sepia-toned paper. It imparts a warm, brownish tint to an image, reminiscent of vintage photographs. This effect can add a touch of nostalgia and elegance to your images, making them look more artistic and unique. In JavaFX, applying the SepiaTone effect is a straightforward process, thanks to the built-in tools provided by the library.
Implementing the SepiaTone Effect
To apply the SepiaTone effect in JavaFX, you will need an image to work with. This could be an image loaded from a file, fetched from the web, or even dynamically generated within your application. We’ll use the ImageView class to display the image and apply the SepiaTone effect to it.
Here’s a code example that demonstrates how to apply the SepiaTone effect to an image:
import javafx.application.Application;
import javafx.scene.Scene;
import javafx.scene.effect.SepiaTone;
import javafx.scene.image.Image;
import javafx.scene.image.ImageView;
import javafx.scene.layout.BorderPane;
import javafx.stage.Stage;

public class SepiaToneImageFilter extends Application {

    private static final double WIDTH = 640;
    private static final double HEIGHT = 480;

    // Create the parent layout manager for the application
    private final BorderPane parent = new BorderPane();

    @Override
    public void start(Stage stage) throws Exception {

        // Create the main application scene
        Scene scene = new Scene(this.parent, WIDTH, HEIGHT);

        // Set the title for the application window
        stage.setTitle("SepiaTone Image Filter");

        // Set the scene for the stage
        stage.setScene(scene);

        // Center the stage on the screen
        stage.centerOnScreen();

        // Show the stage on the screen
        stage.show();
    }

    @Override
    public void init() throws Exception {
        super.init();

        Image image = new Image("scorpion.jpg");

        // Create an ImageView to display the loaded image
        ImageView imageView = new ImageView(image);
        imageView.setPreserveRatio(true);
        imageView.setFitWidth(400);

        // Apply the SepiaTone effect
        SepiaTone sepiaTone = new SepiaTone();
        imageView.setEffect(sepiaTone);

        // Add the ImageView to the center region of the BorderPane
        this.parent.setCenter(imageView);

    }
}
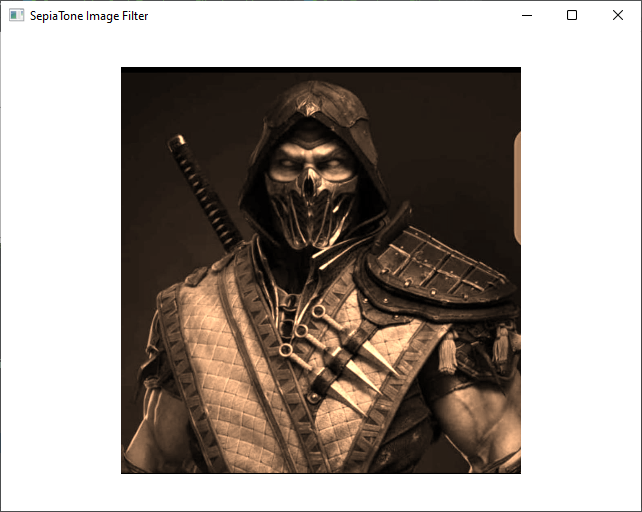
In this example, we first load an image using the Image class, set up an ImageView to display the image, and then apply the SepiaTone effect to the ImageView.
Customizing the SepiaTone Effect
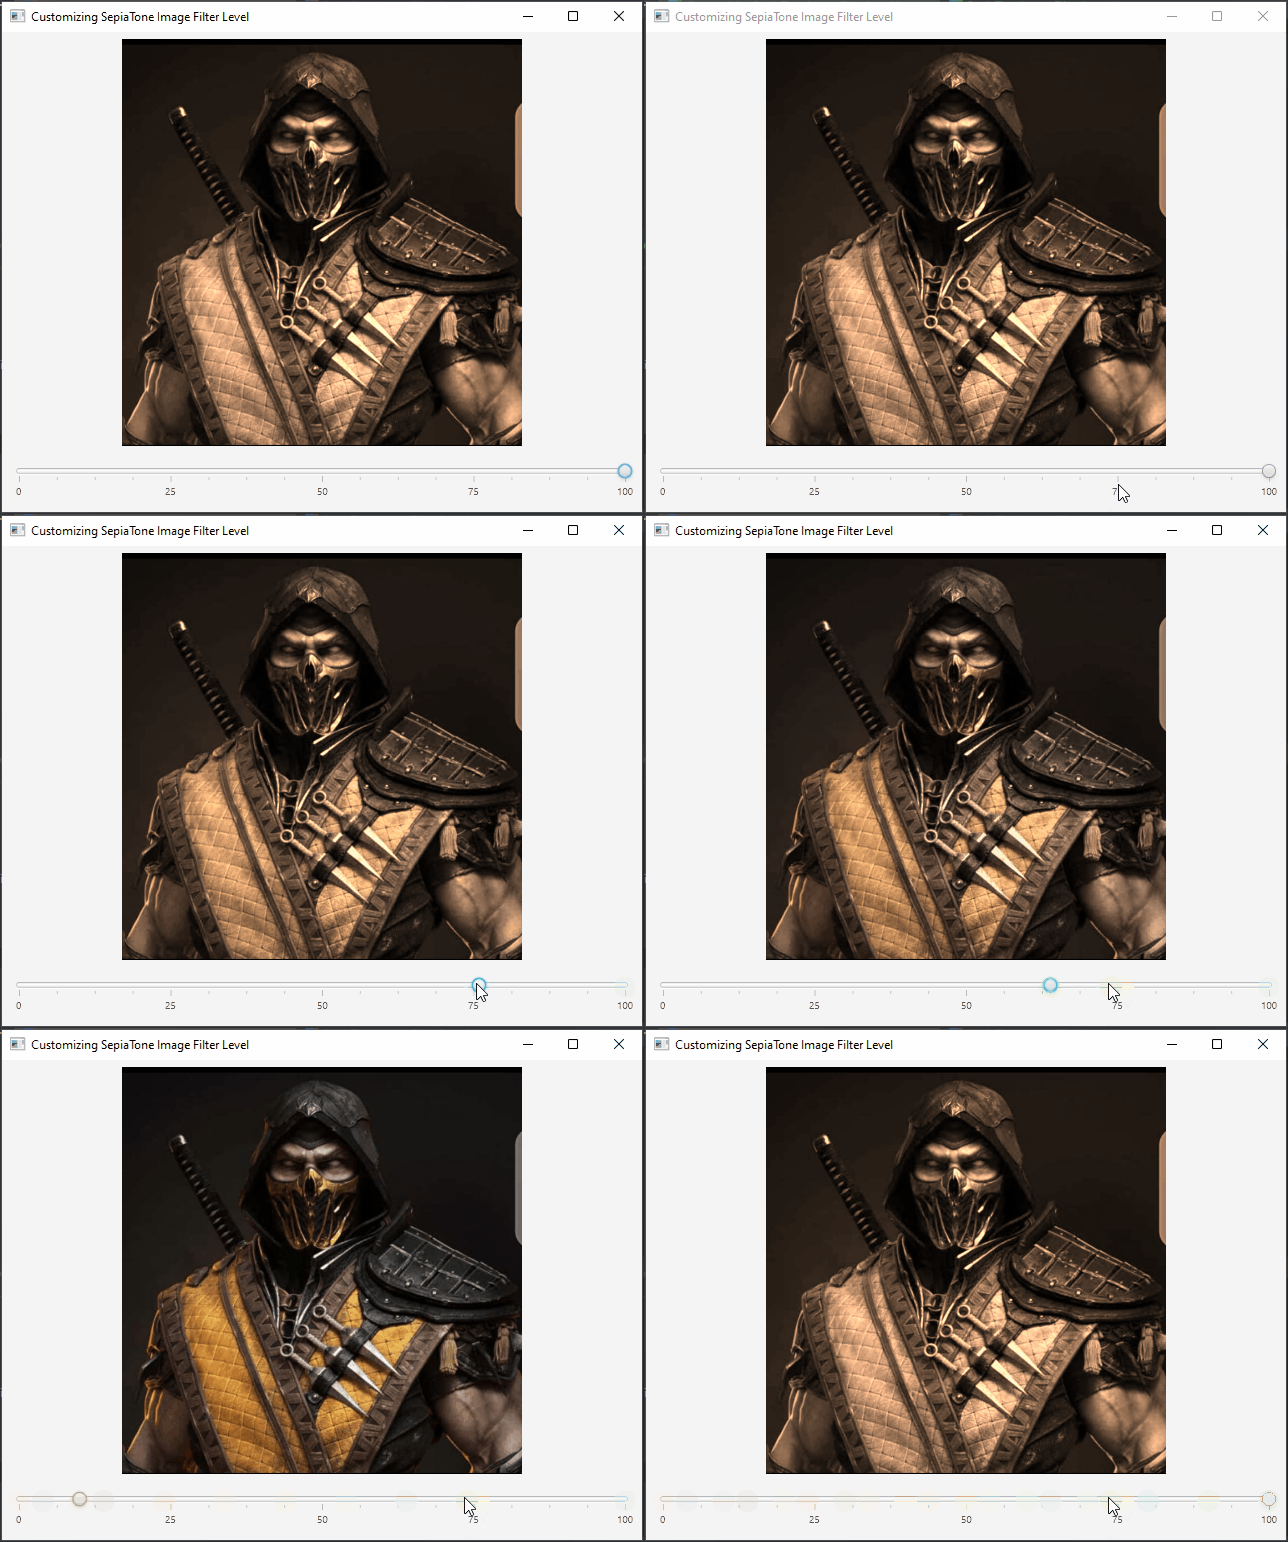
The SepiaTone effect in JavaFX allows you to fine-tune its appearance. You can adjust the level of sepia tone by changing the level property of the SepiaTone effect. The level property ranges from 0.0 (no effect) to 1.0 (maximum effect). Here’s how you can customize the sepia effect:
import javafx.application.Application;
import javafx.geometry.Insets;
import javafx.geometry.Pos;
import javafx.scene.Scene;
import javafx.scene.control.Slider;
import javafx.scene.effect.SepiaTone;
import javafx.scene.image.Image;
import javafx.scene.image.ImageView;
import javafx.scene.layout.BorderPane;
import javafx.stage.Stage;

public class CustomizingSepiaToneImageFilterLevel extends Application {

    private static final double WIDTH = 640;
    private static final double HEIGHT = 480;

    // Create the parent layout manager for the application
    private final BorderPane parent = new BorderPane();

    @Override
    public void start(Stage stage) throws Exception {

        // Create the main application scene
        Scene scene = new Scene(this.parent, WIDTH, HEIGHT);

        // Set the title for the application window
        stage.setTitle("Customizing SepiaTone Image Filter Level");

        // Set the scene for the stage
        stage.setScene(scene);

        // Center the stage on the screen
        stage.centerOnScreen();

        // Show the stage on the screen
        stage.show();
    }

    @Override
    public void init() throws Exception {
        super.init();

        Image image = new Image("scorpion.jpg");

        // Create an ImageView to display the loaded image
        ImageView imageView = new ImageView(image);
        imageView.setPreserveRatio(true);
        imageView.setFitWidth(400);

        // Create a Slider for adjusting the SepiaTone level
        Slider levelSlider = new Slider(0, 100, 100);
        levelSlider.setShowTickMarks(true);
        levelSlider.setShowTickLabels(true);

        // Create the SepiaTone Effect, and bind the level property
        // to the Slider's value property
        SepiaTone sepiaTone = new SepiaTone();
        sepiaTone.levelProperty().bind(levelSlider.valueProperty().divide(100));

        // Apply the SepiaTone effect
        imageView.setEffect(sepiaTone);

        // Add the ImageView to the center region of the BorderPane
        this.parent.setCenter(imageView);

        // Add the Slider to the bottom region of the BorderPane
        this.parent.setBottom(levelSlider);
        BorderPane.setAlignment(levelSlider, Pos.CENTER);
        BorderPane.setMargin(levelSlider, new Insets(10));

    }
}
We used a Slider to adjust the SepiaTone level. We bind the levelProperty of the SepiaTone effect to the valueProperty of the slider, allowing for real-time updates as you move the slider.
Conclusion
The JavaFX SepiaTone effect is a simple yet powerful tool for adding a touch of nostalgia and vintage charm to your desktop applications. With just a few lines of code, you can transform your images and user interfaces into visually stunning and engaging elements that capture the essence of days gone by. Whether you’re building a photo viewer, historical timeline, or any application with a historical or vintage theme, the SepiaTone effect can be a valuable addition to your toolkit.
I hope you found this article informative and useful. If you would like to receive more content, please consider subscribing to our newsletter.
