JavaFX is a powerful library for building graphical user interfaces (GUI) in Java applications. Among its many features, the TextField class is essential for user input and data capture. In this article, we will explore JavaFX TextField in depth, covering its features, customization options, and providing full code examples.

with hands-on learning.
get the skills and confidence to land your next move.
Understanding JavaFX TextField
The TextField class in JavaFX is used to create a single-line text input field where users can enter text or numeric data. It is widely employed in various applications, including data entry forms, search bars, and chat interfaces. TextField provides several useful methods and properties that enable developers to customize its appearance and behavior according to their requirements.
Creating a Simple JavaFX TextField
Before diving into complex examples, let’s start with a basic demonstration of how to create a simple JavaFX application with a TextField.
import javafx.application.Application;
import javafx.scene.Scene;
import javafx.scene.control.*;
import javafx.scene.layout.*;
import javafx.stage.Stage;

public class Main extends Application {

    private final BorderPane parent = new BorderPane();

    @Override
    public void start(Stage stage) throws Exception {
        this.setupStage(stage);
    }

    @Override
    public void init() throws Exception {
        super.init();
        this.buildUI();
    }

    private void buildUI() {

        TextField textField = new TextField();

        // Set the TextField maximum width
        textField.setMaxWidth(300.0);

        this.parent.setCenter(textField);

    }

    private void setupStage(Stage stage) {

        Scene scene = new Scene(this.parent, 640.0, 480.0);

        // Set the stage title
        stage.setTitle("JavaFX TextField");

        // Set the stage scene
        stage.setScene(scene);

        // Center the stage on the screen
        stage.centerOnScreen();

        // Show the stage on the screen
        stage.show();

    }

}
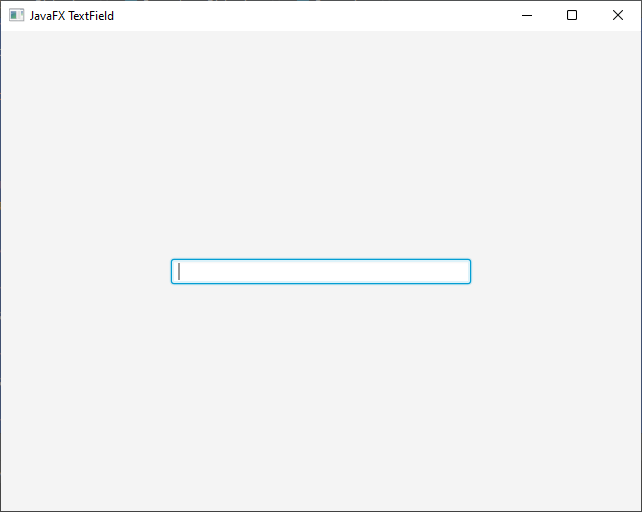
In this example, we create a simple JavaFX application with a single TextField widget. When you run this code, you will see a window with an empty text field.
Handling TextField Events
One of the key features of TextField is its ability to handle various events, such as when the user types in text or presses the Enter key. Let’s explore how to capture and handle these events.
import javafx.application.Application;
import javafx.geometry.Pos;
import javafx.scene.Scene;
import javafx.scene.control.*;
import javafx.scene.layout.*;
import javafx.stage.Stage;

public class Main extends Application {

    private final BorderPane parent = new BorderPane();

    @Override
    public void start(Stage stage) throws Exception {
        this.setupStage(stage);
    }

    @Override
    public void init() throws Exception {
        super.init();
        this.buildUI();
    }

    private void buildUI() {

        TextField textField = new TextField();
        Label label = new Label();

        // Set the TextField maximum width
        textField.setMaxWidth(300.0);

        // Event handler for text changes
        textField.textProperty().addListener((observable, oldValue, newValue) -> {

            label.setText("Current Text: " + newValue);

        });

        // Event handler for Enter key press
        textField.setOnAction(event -> {

            String enteredText = textField.getText();
            label.setText("You pressed Enter. Text entered: " + enteredText);

        });

        VBox vBox = new VBox(10, textField, label);
        vBox.setAlignment(Pos.CENTER);

        this.parent.setCenter(vBox);

    }

    private void setupStage(Stage stage) {

        Scene scene = new Scene(this.parent, 640.0, 480.0);

        // Set the stage title
        stage.setTitle("JavaFX TextField");

        // Set the stage scene
        stage.setScene(scene);

        // Center the stage on the screen
        stage.centerOnScreen();

        // Show the stage on the screen
        stage.show();

    }

}
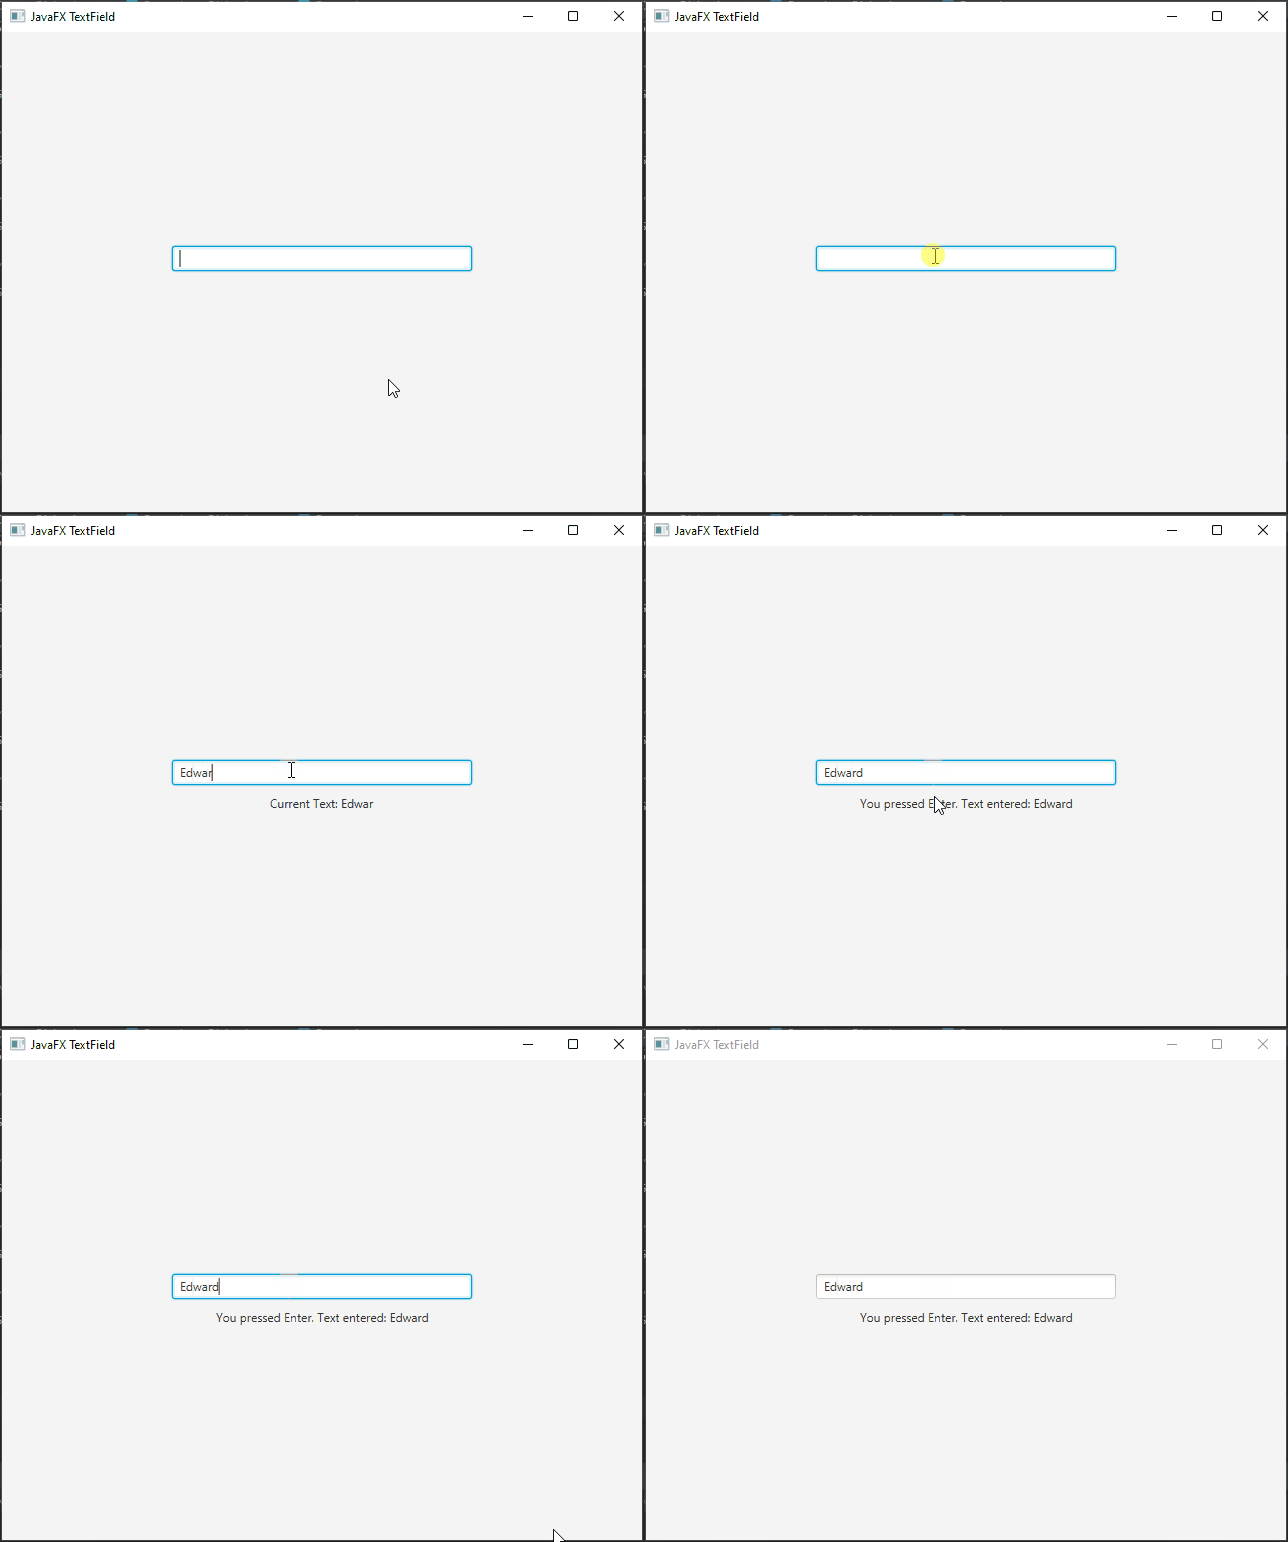
In this example, we’ve added an event listener to the TextField to track text changes and display the current text in a Label. Additionally, we capture the “Enter” key press event and show the entered text in the Label.
Restricting Input with a JavaFX TextField
Sometimes, you might want to restrict the type of input allowed in a TextField. For instance, you may want to accept only numeric values. Here’s how you can achieve that:
import javafx.application.Application;
import javafx.geometry.Pos;
import javafx.scene.Scene;
import javafx.scene.control.*;
import javafx.scene.layout.*;
import javafx.stage.Stage;

public class Main extends Application {

    private final BorderPane parent = new BorderPane();

    @Override
    public void start(Stage stage) throws Exception {
        this.setupStage(stage);
    }

    @Override
    public void init() throws Exception {
        super.init();
        this.buildUI();
    }

    private void buildUI() {

        TextField textField = new TextField();
        Label label = new Label();

        // Set the TextField maximum width
        textField.setMaxWidth(300.0);

        textField.textProperty().addListener((observable, oldValue, newValue) -> {

            if (!newValue.matches("\\d*")) {

                textField.setText(newValue.replaceAll("\\D", ""));
                label.setText("Error: Invalid Input...");
                label.setStyle("-fx-text-fill: red");

            } else {

                label.setText("Success: Valid Input...");
                label.setStyle("-fx-text-fill: green");

            }

        });

        VBox vBox = new VBox(10, textField, label);
        vBox.setAlignment(Pos.CENTER);

        this.parent.setCenter(vBox);

    }

    private void setupStage(Stage stage) {

        Scene scene = new Scene(this.parent, 640.0, 480.0);

        // Set the stage title
        stage.setTitle("JavaFX TextField");

        // Set the stage scene
        stage.setScene(scene);

        // Center the stage on the screen
        stage.centerOnScreen();

        // Show the stage on the screen
        stage.show();

    }

}
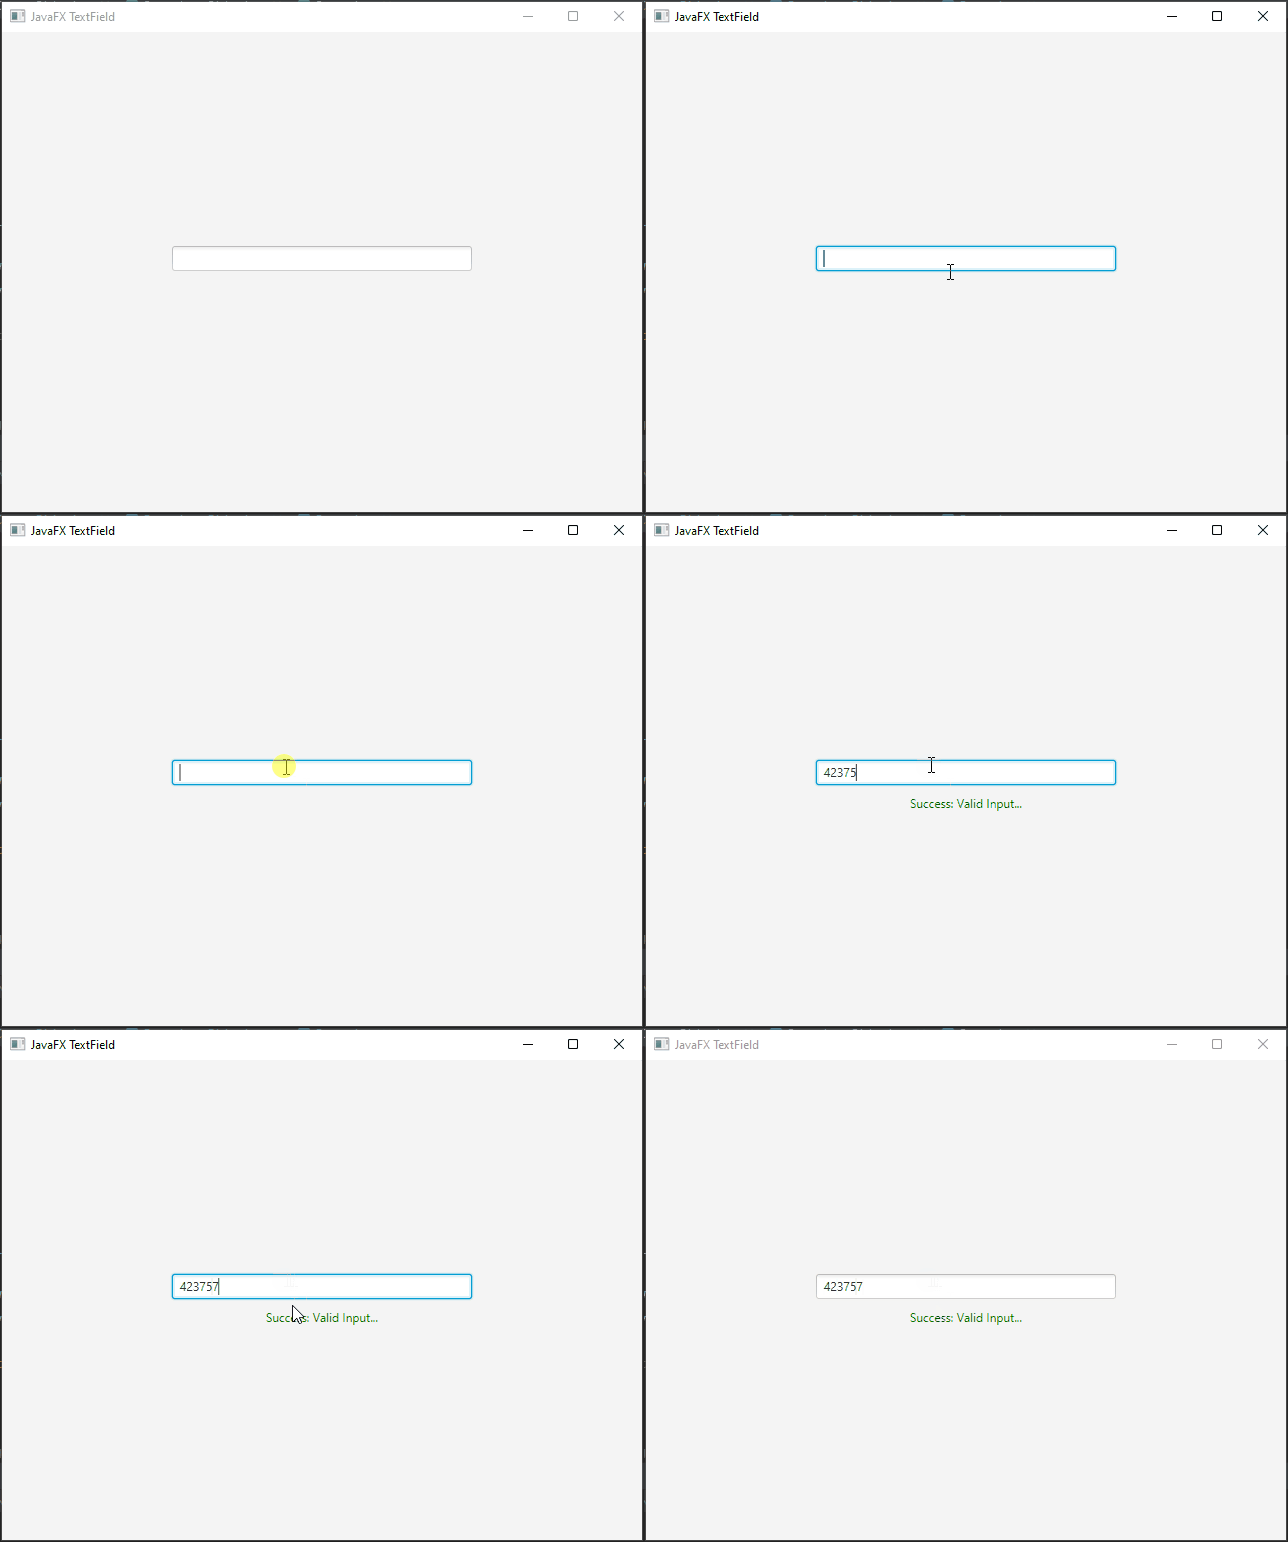
In this example, we’ve added a ChangeListener to the textProperty() of the TextField. It uses a regular expression (\d*) to match only numeric input. If the user tries to input non-numeric characters, they will be automatically removed from the TextField.
Input Validation with TextFormatter
Validating user input is an essential aspect of creating robust applications. JavaFX provides a powerful class called TextFormatter that allows you to perform input validation on TextField components. The TextFormatter class provides a mechanism to modify or restrict the input as the user types. In this section, we will explore how to use TextFormatter for input validation.
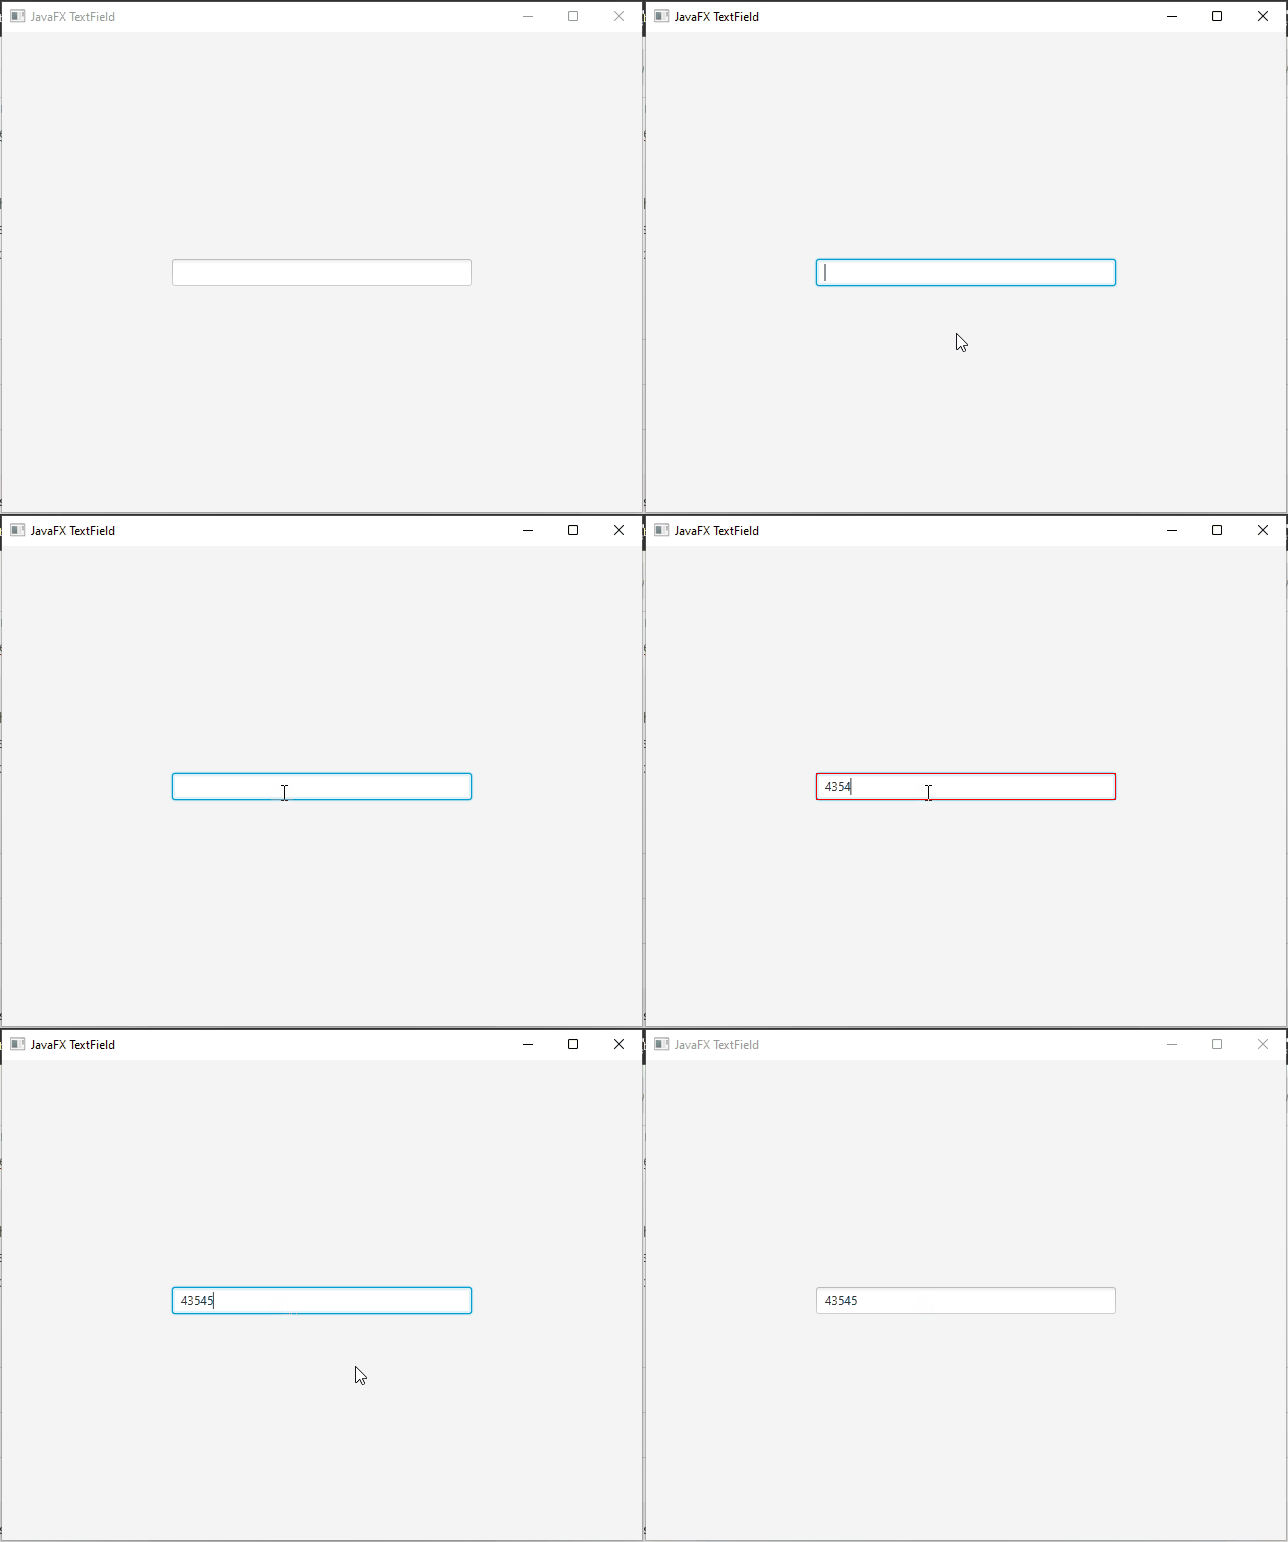
To demonstrate input validation using TextFormatter, let’s create a JavaFX application that only allows numeric input in the TextField:
import javafx.application.Application;
import javafx.scene.Scene;
import javafx.scene.control.*;
import javafx.scene.layout.*;
import javafx.stage.Stage;

public class Main extends Application {

    private final BorderPane parent = new BorderPane();

    @Override
    public void start(Stage stage) throws Exception {
        this.setupStage(stage);
    }

    @Override
    public void init() throws Exception {
        super.init();
        this.buildUI();
    }

    private void buildUI() {

        TextField textField = new TextField();

        // Set the TextField maximum width
        textField.setMaxWidth(300.0);

        // Define the text formatter with a filter
        TextFormatter<String> formatter = new TextFormatter<>(change -> {

            String newText = change.getControlNewText();

            if (newText.matches("\\d*")) {

                change.getControl().setStyle("-fx-border-color: transparent;");
                return change;

            } else {

                change.getControl().setStyle("-fx-border-color: red;");

                // Rejects the change if it's not numeric
                return null;

            }

        });

        textField.setTextFormatter(formatter);

        this.parent.setCenter(textField);

    }

    private void setupStage(Stage stage) {

        Scene scene = new Scene(this.parent, 640.0, 480.0);

        // Set the stage title
        stage.setTitle("JavaFX TextField");

        // Set the stage scene
        stage.setScene(scene);

        // Center the stage on the screen
        stage.centerOnScreen();

        // Show the stage on the screen
        stage.show();

    }

}
In this example, we create a TextField named numericTextField and then create a TextFormatter for it. The TextFormatter takes a UnaryOperator<TextFormatter.Change> parameter, where the operator’s apply method is invoked whenever the user types or modifies the text.
Inside the apply method, we check if the new text (after the user’s input) matches the regular expression \d*, which allows only numeric input. If the new text contains non-numeric characters, we return null, effectively preventing the change from being applied to the TextField. If the new text is numeric, we allow the change to take place.
Styling JavaFX TextField
JavaFX allows you to customize the appearance of TextField components using CSS. Let’s see how we can change the style of the TextField:
import javafx.application.Application;
import javafx.scene.Scene;
import javafx.scene.control.*;
import javafx.scene.layout.*;
import javafx.stage.Stage;

public class Main extends Application {

    private final BorderPane parent = new BorderPane();

    @Override
    public void start(Stage stage) throws Exception {
        this.setupStage(stage);
    }

    @Override
    public void init() throws Exception {
        super.init();
        this.buildUI();
    }

    private void buildUI() {

        TextField textField = new TextField();

        // Set the TextField maximum width
        textField.setMaxWidth(300.0);

        textField.setStyle("-fx-font-size: 16px; -fx-text-fill: darkblue;");

        this.parent.setCenter(textField);

    }

    private void setupStage(Stage stage) {

        Scene scene = new Scene(this.parent, 640.0, 480.0);

        // Set the stage title
        stage.setTitle("JavaFX TextField");

        // Set the stage scene
        stage.setScene(scene);

        // Center the stage on the screen
        stage.centerOnScreen();

        // Show the stage on the screen
        stage.show();

    }

}
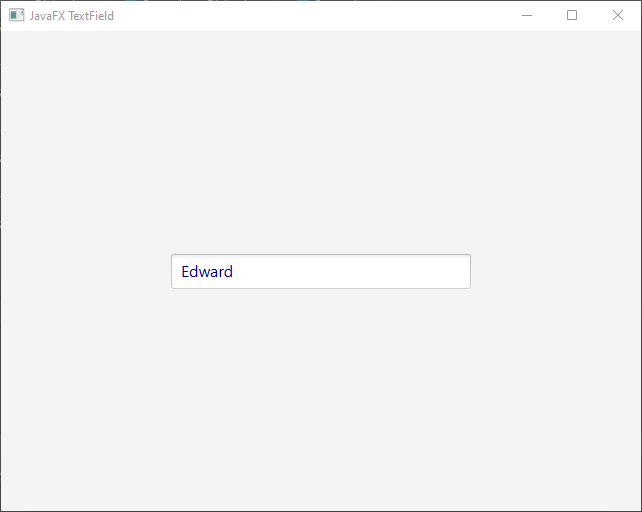
In this example, we’ve applied some simple styling to the TextField using the setStyle() method. We increased the font size and changed the text color to dark blue. You can use any valid CSS styles to customize the appearance of the TextField according to your application’s design.
Conclusion
In this article, we explored the JavaFX TextField component and its essential features. We learned how to create a basic TextField, handle text change events, restrict input to specific types, and style the TextField using CSS. Armed with this knowledge, you can now create interactive and user-friendly input fields in your JavaFX applications.
I hope you found this code informative and useful. If you would like to receive more content, please consider subscribing to our newsletter!
