In modern application development, representing data in a hierarchical manner is a common requirement. JavaFX, the popular UI toolkit for Java applications, provides the TreeView control, which allows you to visualize data in a tree-like structure. Whether you need to display file directories, organizational charts, or any other hierarchical information, JavaFX TreeView has got you covered. In this article, we’ll explore the JavaFX TreeView, understand its key components, and provide some code examples to help you get started.

with hands-on learning.
get the skills and confidence to land your next move.
What is JavaFX TreeView?
The TreeView is a graphical control in JavaFX that represents data in a hierarchical manner. It consists of a root node, which can have child nodes, forming a parent-child relationship. Each node in the TreeView can display text, icons, or any custom content. This component is commonly used to present file directories, hierarchical data, or categorized information.
Key features of the TreeView:
Customizable Cell Rendering
You can customize the appearance of tree items using cell factories, allowing you to display rich data and complex UI components in each tree cell.
Event Handling
The TreeView supports event handling, so you can respond to user interactions, such as selecting a tree item or expanding/collapsing nodes.
Observable Model
The TreeView can work with an ObservableList of TreeItems, which means that any changes to the underlying data model are automatically reflected in the tree view.
CheckBox TreeItem
JavaFX also provides CheckBoxTreeItem, allowing you to create trees with checkboxes, making it easy to select multiple items.
Creating a Basic TreeView
Let’s start by creating a simple TreeView to display a list of programming languages. For this example, we’ll represent the data using a TreeItem<String>.
import javafx.application.Application;
import javafx.scene.Scene;
import javafx.scene.control.TreeItem;
import javafx.scene.control.TreeView;
import javafx.scene.layout.*;
import javafx.stage.Stage;

public class Main extends Application {

    private final BorderPane parent = new BorderPane();

    @Override
    public void start(Stage stage) throws Exception {
        this.setupStage(stage);
    }

    @Override
    public void init() throws Exception {
        super.init();
        this.buildUI();
    }

    private void buildUI() {

        // Create root item
        TreeItem<String> languages = new TreeItem<>("Languages");

        // Create child items
        TreeItem<String> dart = new TreeItem<>("Dart");

        // Add child items to Dart
        dart.getChildren().addAll(new TreeItem<>("Flutter"));

        TreeItem<String> php = new TreeItem<>("PHP");

        // Add child items to PHP
        php.getChildren().addAll(new TreeItem<>("Laravel"));

        TreeItem<String> javascript = new TreeItem<>("JavaScript");

        // Add child items to JavaScript
        javascript.getChildren().addAll(new TreeItem<>("ReactJS"));

        TreeItem<String> java = new TreeItem<>("Java");

        // Add child items to Java
        java.getChildren().addAll(new TreeItem<>("Hibernate"));

        TreeItem<String> python = new TreeItem<>("Python");

        // Add child items to Python
        python.getChildren().addAll(new TreeItem<>("Django"));

        // Add child items to the root
        languages.getChildren().addAll(dart, php, javascript, java, python);

        // Create TreeView with the root item
        TreeView<String> treeView = new TreeView<>(languages);

        this.parent.setLeft(treeView);

    }

    private void setupStage(Stage stage) {

        Scene scene = new Scene(this.parent, 640.0, 480.0);

        // Set the stage title
        stage.setTitle("Organizing Your Data in Hierarchical Structures");

        // Set the stage scene
        stage.setScene(scene);

        // Center the stage on the screen
        stage.centerOnScreen();

        // Show the stage on the screen
        stage.show();

    }

}
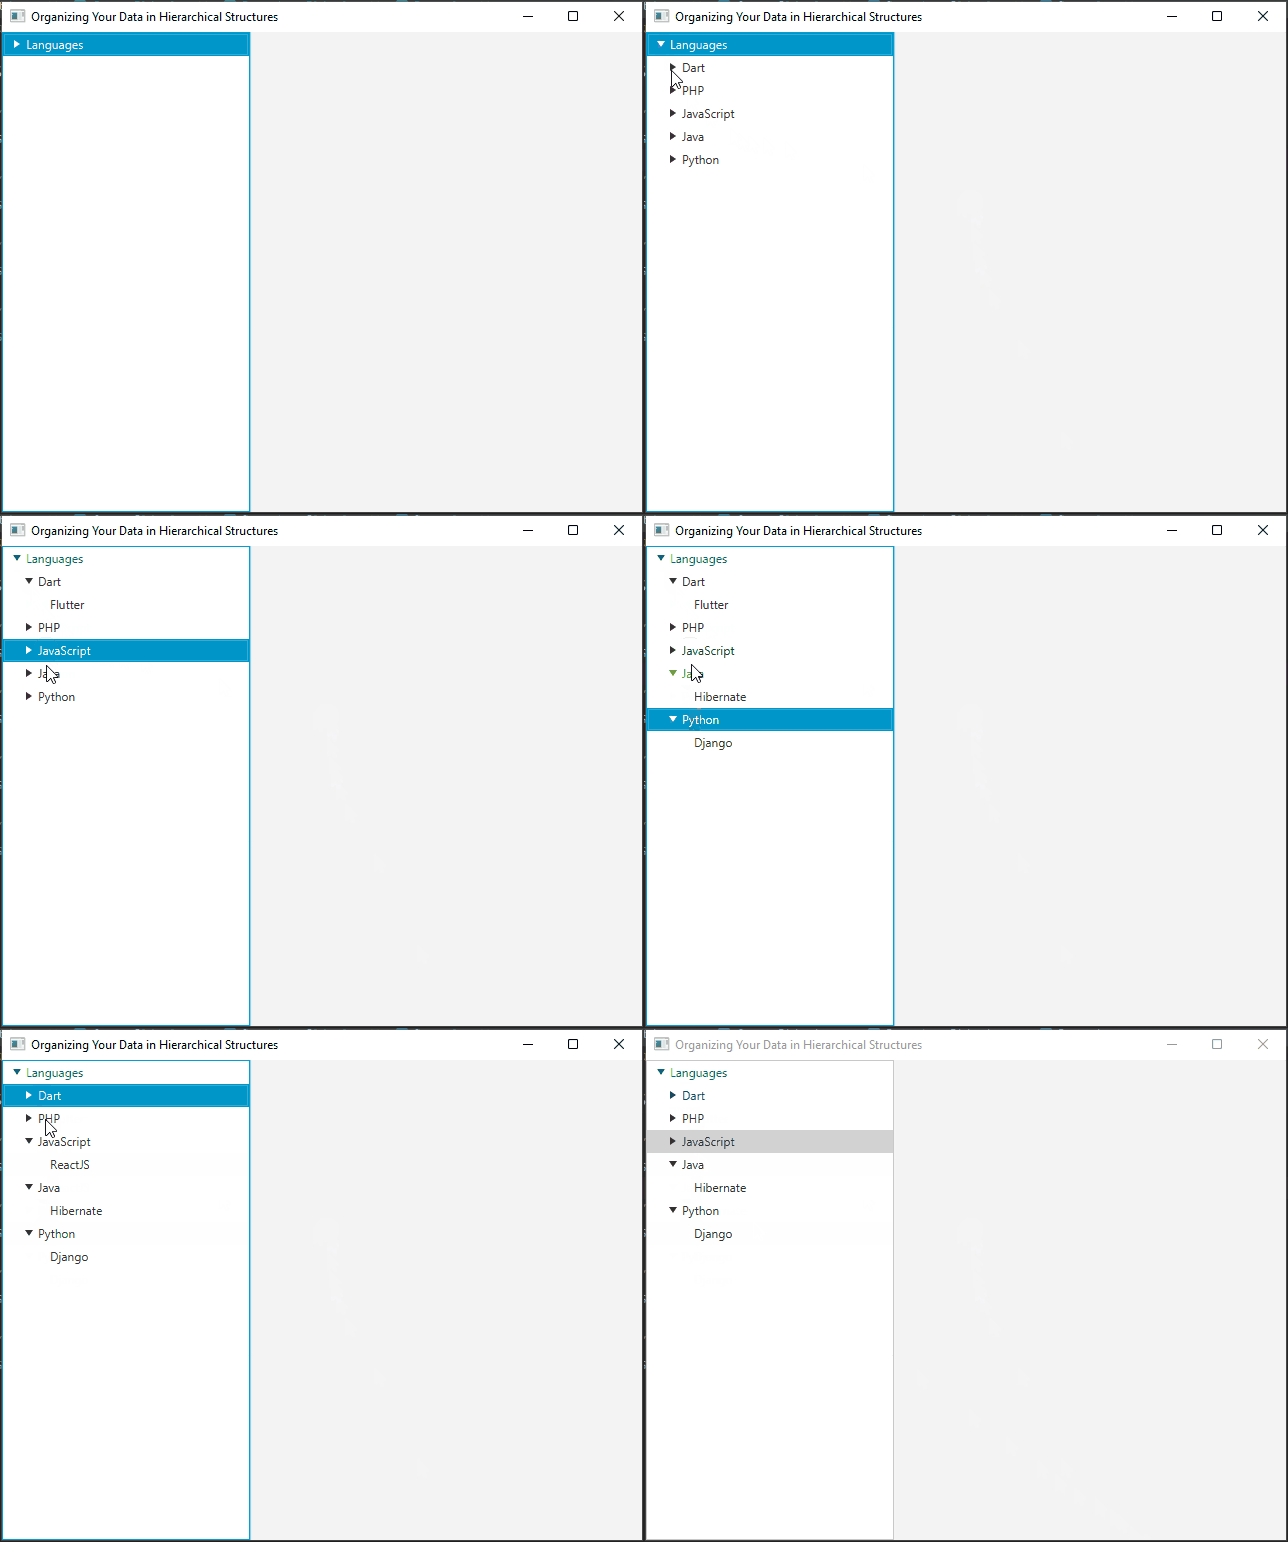
In this example, we create a TreeView with a root item, five child items, and display it using a BorderPane. When you run this application, you’ll see a window displaying the tree structure with the “Languages” root and five child items (“Dart”, “PHP”, “Java”, “JavaScript”, and “Python”).
Handling TreeView Events
JavaFX TreeView allows you to handle events such as selecting an item or expanding/collapsing a node. Let’s enhance our previous example to demonstrate this capability:
import javafx.application.Application;
import javafx.scene.Scene;
import javafx.scene.control.Alert;
import javafx.scene.control.TreeItem;
import javafx.scene.control.TreeView;
import javafx.scene.input.MouseButton;
import javafx.scene.layout.*;
import javafx.stage.Stage;

public class Main extends Application {

    private final BorderPane parent = new BorderPane();

    @Override
    public void start(Stage stage) throws Exception {
        this.setupStage(stage);
    }

    @Override
    public void init() throws Exception {
        super.init();
        this.buildUI();
    }

    private void buildUI() {

        // Create root item
        TreeItem<String> languages = new TreeItem<>("Languages");

        // Create child items
        TreeItem<String> dart = new TreeItem<>("Dart");

        // Add child items to Dart
        dart.getChildren().addAll(new TreeItem<>("Flutter"));

        TreeItem<String> php = new TreeItem<>("PHP");

        // Add child items to PHP
        php.getChildren().addAll(new TreeItem<>("Laravel"));

        TreeItem<String> javascript = new TreeItem<>("JavaScript");

        // Add child items to JavaScript
        javascript.getChildren().addAll(new TreeItem<>("ReactJS"));

        TreeItem<String> java = new TreeItem<>("Java");

        // Add child items to Java
        java.getChildren().addAll(new TreeItem<>("Hibernate"));

        TreeItem<String> python = new TreeItem<>("Python");

        // Add child items to Python
        python.getChildren().addAll(new TreeItem<>("Django"));

        // Add child items to the root
        languages.getChildren().addAll(dart, php, javascript, java, python);

        // Create TreeView with the root item
        TreeView<String> treeView = new TreeView<>(languages);

        // Handle item selection
        treeView.getSelectionModel().selectedItemProperty().addListener((observable, oldValue, newValue) -> {

            if (newValue != null) {

                showAlert("Selected Item", newValue.getValue());

            }

        });

        // Handle item expansion/collapse
        treeView.setOnMouseClicked(event -> {

            if (event.getButton() == MouseButton.PRIMARY && event.getClickCount() == 2) {

                TreeItem<String> selectedItem = treeView.getSelectionModel().getSelectedItem();

                if (selectedItem != null) {

                    boolean isExpanded = selectedItem.isExpanded();
                    selectedItem.setExpanded(!isExpanded);

                }

            }

        });

        this.parent.setLeft(treeView);

    }

    private void showAlert(String title, String message) {
        Alert alert = new Alert(Alert.AlertType.INFORMATION);
        alert.setTitle(title);
        alert.setHeaderText(null);
        alert.setContentText(message);
        alert.showAndWait();
    }

    private void setupStage(Stage stage) {

        Scene scene = new Scene(this.parent, 640.0, 480.0);

        // Set the stage title
        stage.setTitle("Organizing Your Data in Hierarchical Structures");

        // Set the stage scene
        stage.setScene(scene);

        // Center the stage on the screen
        stage.centerOnScreen();

        // Show the stage on the screen
        stage.show();

    }

}
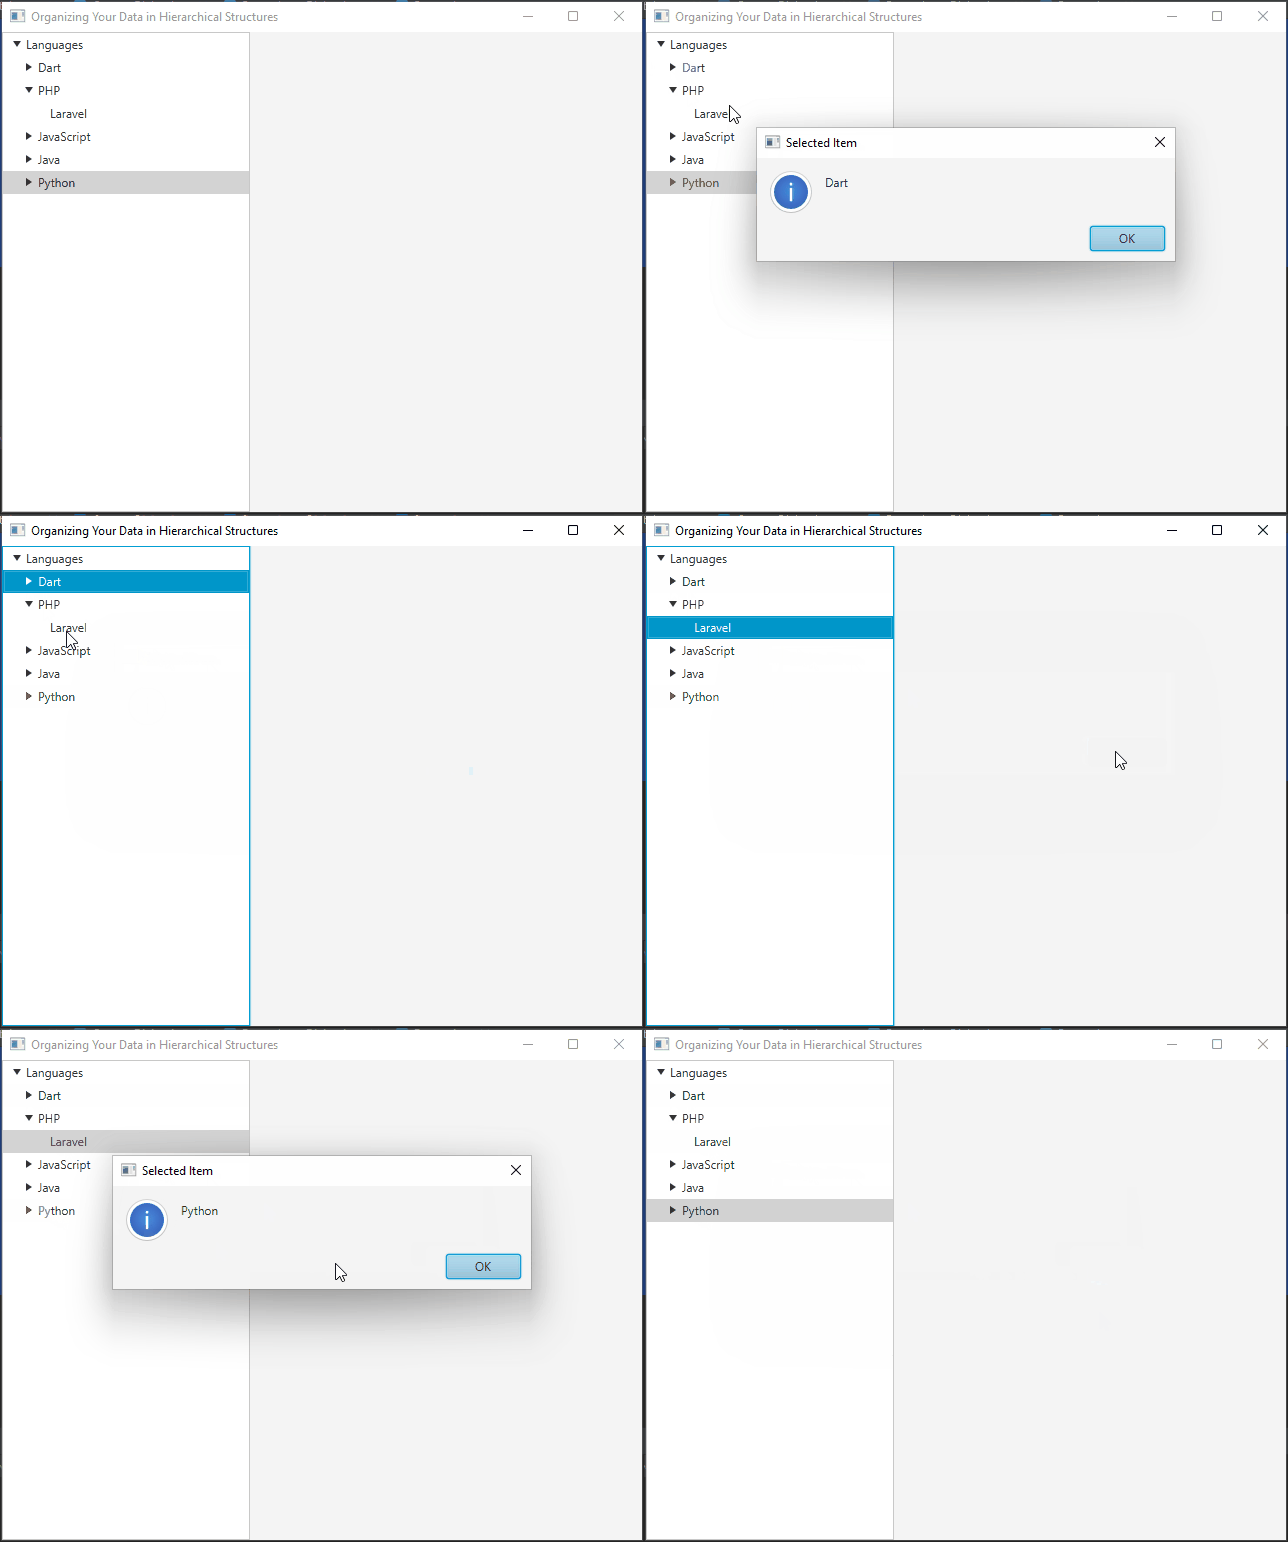
In this example, we handle two events: item selection and double-clicking on a node to expand or collapse it. The selectedItemProperty() allows us to listen for item selection changes, and the setOnMouseClicked() method captures mouse click events to expand or collapse nodes. We use a simple Alert to display the selected item’s value when it’s clicked.
Customizing TreeView with Graphics
JavaFX TreeView allows you to customize the appearance of tree nodes by using graphics or icons. Let’s create an example where we display icons for each language:
import javafx.application.Application;
import javafx.scene.Scene;
import javafx.scene.control.Alert;
import javafx.scene.control.TreeItem;
import javafx.scene.control.TreeView;
import javafx.scene.image.Image;
import javafx.scene.image.ImageView;
import javafx.scene.input.MouseButton;
import javafx.scene.layout.*;
import javafx.stage.Stage;

public class Main extends Application {

    private final BorderPane parent = new BorderPane();

    @Override
    public void start(Stage stage) throws Exception {
        this.setupStage(stage);
    }

    @Override
    public void init() throws Exception {
        super.init();
        this.buildUI();
    }

    private void buildUI() {

        // Create root item
        TreeItem<String> languages = new TreeItem<>("Languages");

        // Create child items
        TreeItem<String> dart = new TreeItem<>("Dart", createIcon("dart.png"));

        // Add child items to Dart
        dart.getChildren().addAll(new TreeItem<>("Flutter"));

        TreeItem<String> php = new TreeItem<>("PHP", createIcon("php.png"));

        // Add child items to PHP
        php.getChildren().addAll(new TreeItem<>("Laravel"));

        TreeItem<String> javascript = new TreeItem<>("JavaScript", createIcon("javascript.png"));

        // Add child items to JavaScript
        javascript.getChildren().addAll(new TreeItem<>("ReactJS"));

        TreeItem<String> java = new TreeItem<>("Java", createIcon("java.png"));

        // Add child items to Java
        java.getChildren().addAll(new TreeItem<>("Hibernate"));

        TreeItem<String> python = new TreeItem<>("Python", createIcon("python.png"));

        // Add child items to Python
        python.getChildren().addAll(new TreeItem<>("Django"));

        // Add child items to the root
        languages.getChildren().addAll(dart, php, javascript, java, python);

        // Create TreeView with the root item
        TreeView<String> treeView = new TreeView<>(languages);

        // Handle item selection
        treeView.getSelectionModel().selectedItemProperty().addListener((observable, oldValue, newValue) -> {

            if (newValue != null) {

                showAlert("Selected Item", newValue.getValue());

            }

        });

        // Handle item expansion/collapse
        treeView.setOnMouseClicked(event -> {

            if (event.getButton() == MouseButton.PRIMARY && event.getClickCount() == 2) {

                TreeItem<String> selectedItem = treeView.getSelectionModel().getSelectedItem();

                if (selectedItem != null) {

                    boolean isExpanded = selectedItem.isExpanded();
                    selectedItem.setExpanded(!isExpanded);

                }

            }

        });

        this.parent.setLeft(treeView);

    }

    private ImageView createIcon(String path) {
        Image image = new Image(path);
        ImageView imageView = new ImageView(image);
        imageView.setFitWidth(16);
        imageView.setFitHeight(16);
        return imageView;
    }

    private void showAlert(String title, String message) {
        Alert alert = new Alert(Alert.AlertType.INFORMATION);
        alert.setTitle(title);
        alert.setHeaderText(null);
        alert.setContentText(message);
        alert.showAndWait();
    }

    private void setupStage(Stage stage) {

        Scene scene = new Scene(this.parent, 640.0, 480.0);

        // Set the stage title
        stage.setTitle("Organizing Your Data in Hierarchical Structures");

        // Set the stage scene
        stage.setScene(scene);

        // Center the stage on the screen
        stage.centerOnScreen();

        // Show the stage on the screen
        stage.show();

    }

}
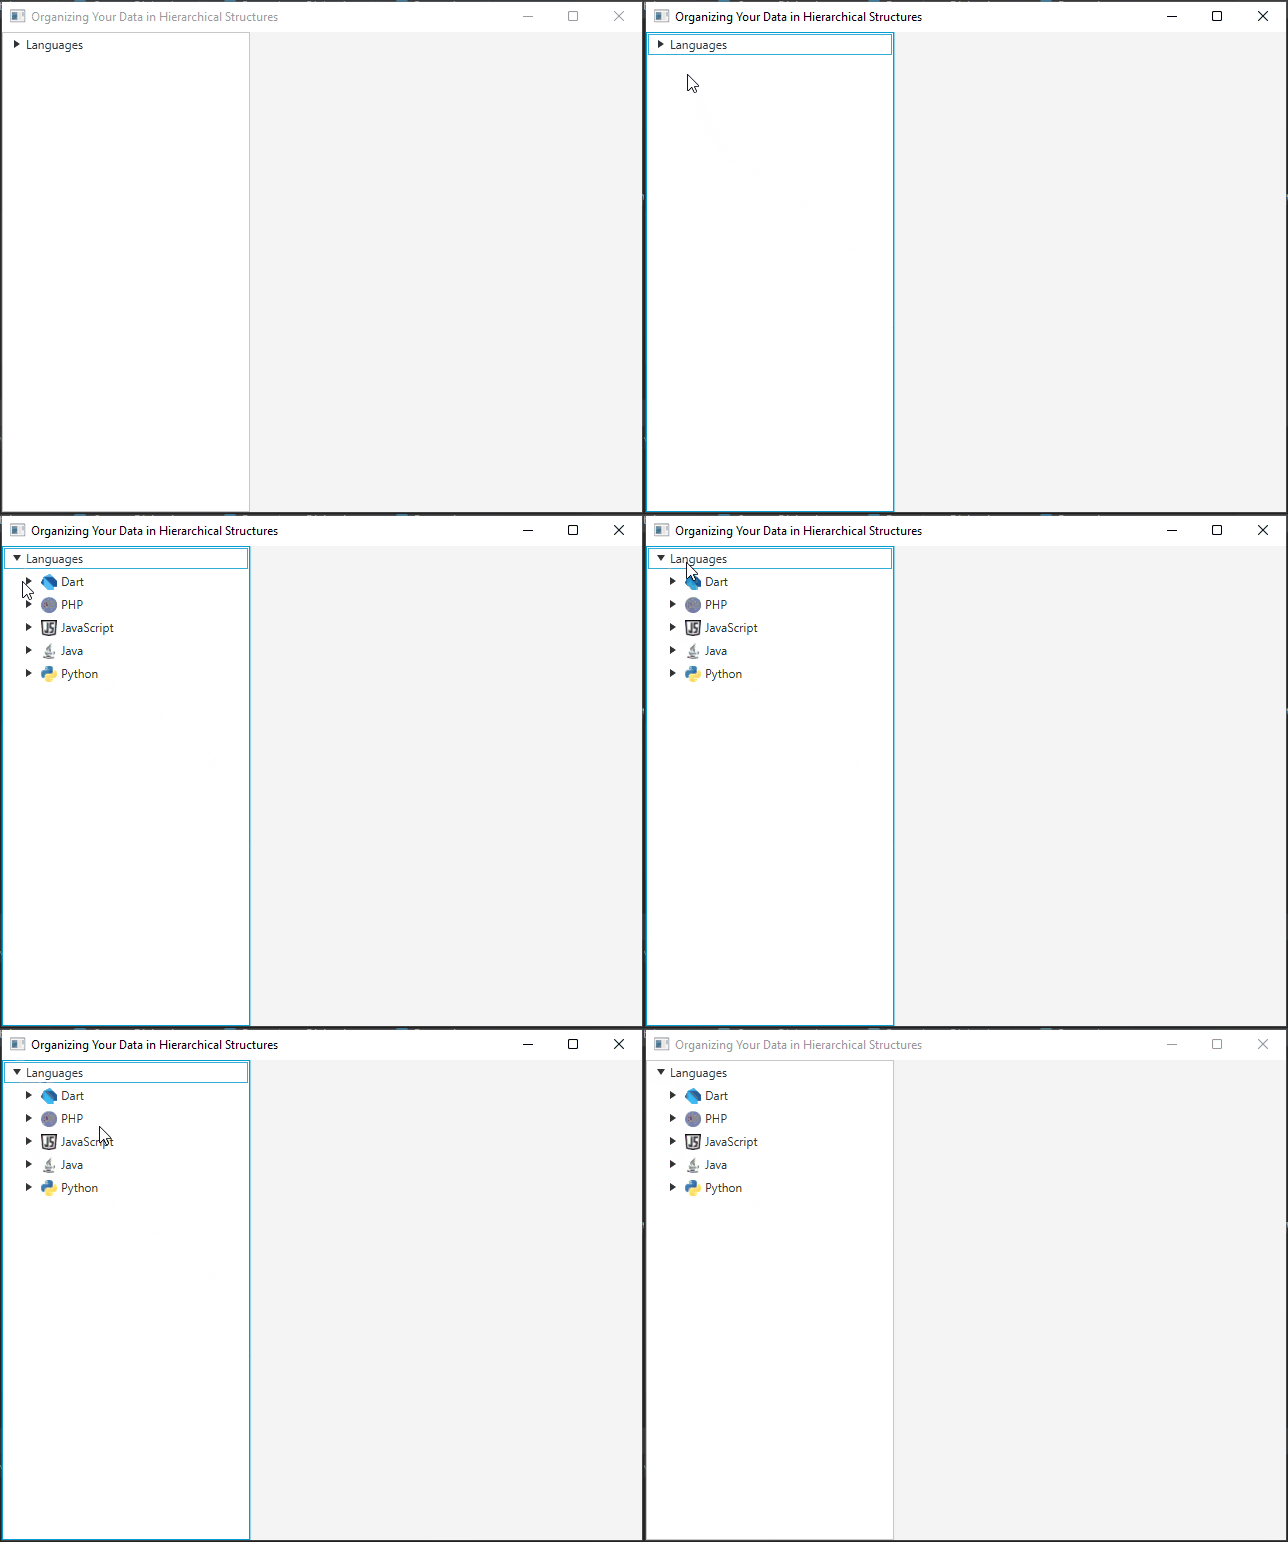
In this example, we load custom icons for each category using the createIcon() method and display them in the TreeView. The icons are simple image files located in the same folder as the Main class.
Customized TreeView with CheckBoxTreeItems
The following example demonstrates a TreeView with customized cell rendering and checkboxes using CheckBoxTreeItem.
import javafx.application.Application;
import javafx.scene.Scene;
import javafx.scene.control.CheckBoxTreeItem;
import javafx.scene.control.TreeView;
import javafx.scene.control.cell.CheckBoxTreeCell;
import javafx.scene.layout.*;
import javafx.stage.Stage;

public class Main extends Application {

    private final BorderPane parent = new BorderPane();

    @Override
    public void start(Stage stage) throws Exception {
        this.setupStage(stage);
    }

    @Override
    public void init() throws Exception {
        super.init();
        this.buildUI();
    }

    private void buildUI() {

        // Create root item
        CheckBoxTreeItem<String> languages = new CheckBoxTreeItem<>("Languages");

        CheckBoxTreeItem<String> dart = new CheckBoxTreeItem<>("Dart");
        CheckBoxTreeItem<String> php = new CheckBoxTreeItem<>("PHP");
        CheckBoxTreeItem<String> java = new CheckBoxTreeItem<>("Java");
        CheckBoxTreeItem<String> javascript = new CheckBoxTreeItem<>("JavaScript");
        CheckBoxTreeItem<String> python = new CheckBoxTreeItem<>("Python");

        // Add items to root item
        languages.getChildren().addAll(dart, php, java, javascript, python);

        // Create TreeView and root item
        TreeView<String> treeView = new TreeView<>(languages);

        treeView.setCellFactory(CheckBoxTreeCell.forTreeView());

        this.parent.setLeft(treeView);

    }

    private void setupStage(Stage stage) {

        Scene scene = new Scene(this.parent, 640.0, 480.0);

        // Set the stage title
        stage.setTitle("Organizing Your Data in Hierarchical Structures");

        // Set the stage scene
        stage.setScene(scene);

        // Center the stage on the screen
        stage.centerOnScreen();

        // Show the stage on the screen
        stage.show();

    }

}
In this example, we use CheckBoxTreeItem to enable checkboxes for each tree item. We also customize the appearance of the tree using CheckBoxTreeCell to display checkboxes in the cells.
Customizing the TreeView with a Cell Factory
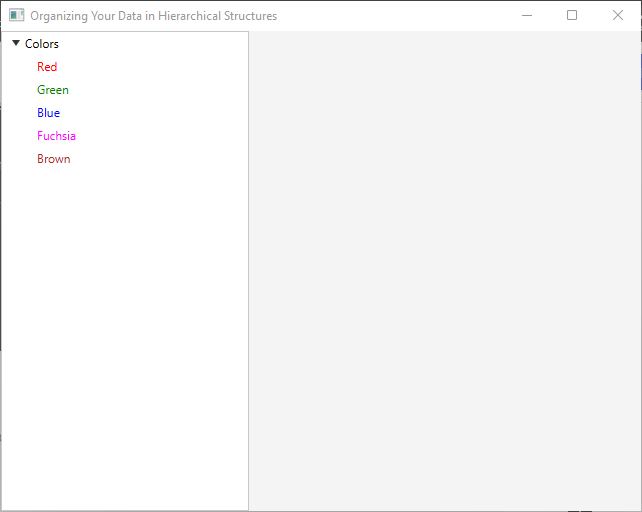
By default, the TreeView will use the toString() method of each TreeItem’s value to display the content. However, you can customize the visual representation using a cell factory. The cell factory allows you to define how each TreeItem should be rendered in the TreeView.
import javafx.application.Application;
import javafx.scene.Scene;
import javafx.scene.control.TreeCell;
import javafx.scene.control.TreeItem;
import javafx.scene.control.TreeView;
import javafx.scene.layout.*;
import javafx.stage.Stage;
import javafx.util.Callback;

public class Main extends Application {

    private final BorderPane parent = new BorderPane();

    @Override
    public void start(Stage stage) throws Exception {
        this.setupStage(stage);
    }

    @Override
    public void init() throws Exception {
        super.init();
        this.buildUI();
    }

    private void buildUI() {

        // Create the root TreeItem
        TreeItem<String> colors = new TreeItem<>("Colors");

        // Add child TreeItems
        TreeItem<String> red = new TreeItem<>("Red");
        TreeItem<String> green = new TreeItem<>("Green");
        TreeItem<String> blue = new TreeItem<>("Blue");
        TreeItem<String> fuchsia = new TreeItem<>("Fuchsia");
        TreeItem<String> brown = new TreeItem<>("Brown");

        colors.getChildren().addAll(red, green, blue, fuchsia, brown);

        // Create the TreeView with the root item
        TreeView<String> treeView = new TreeView<>(colors);

        // Set a cell factory to customize the appearance of TreeItems
        treeView.setCellFactory(new Callback<>() {

            @Override
            public TreeCell<String> call(TreeView<String> param) {

                return new TreeCell<>() {
                    @Override
                    protected void updateItem(String item, boolean empty) {

                        super.updateItem(item, empty);

                        setText(item);

                        if (!empty) {

                            setStyle("-fx-text-fill: %s;".formatted(item));

                        }

                    }

                };
            }
        });

        this.parent.setLeft(treeView);

    }

    private void setupStage(Stage stage) {

        Scene scene = new Scene(this.parent, 640.0, 480.0);

        // Set the stage title
        stage.setTitle("Organizing Your Data in Hierarchical Structures");

        // Set the stage scene
        stage.setScene(scene);

        // Center the stage on the screen
        stage.centerOnScreen();

        // Show the stage on the screen
        stage.show();

    }

}
In this example, we use a cell factory to customize the appearance of each TreeItem. By overriding the updateItem method of the TreeCell, we can modify the text and apply custom styling if needed.
Conclusion
The TreeView in JavaFX is a powerful tool for displaying hierarchical data in a user-friendly manner. With its customizable cell rendering and event handling capabilities, you can create dynamic and interactive tree structures tailored to your application’s needs. This article provided a brief overview and practical examples to help you get started with JavaFX TreeView. Explore further, unleash your creativity, and build impressive hierarchical data representations in your Java applications!
I hope you found this code informative and useful. If you would like to receive more content, please consider subscribing to our newsletter!


