One of the essential components of any GUI application is a toolbar, which provides quick access to frequently used actions and commands. In this article, we’ll walk you through creating a custom toolbar using JavaFX, complete with code examples to help you get started.
What is a Toolbar?
A toolbar is a graphical user interface element that typically contains buttons, icons, or other controls used to perform specific actions in the application. It is usually positioned at the top or sides of the window and provides a convenient way for users to access frequently used functionalities without navigating through menus.
Creating a Basic Toolbar
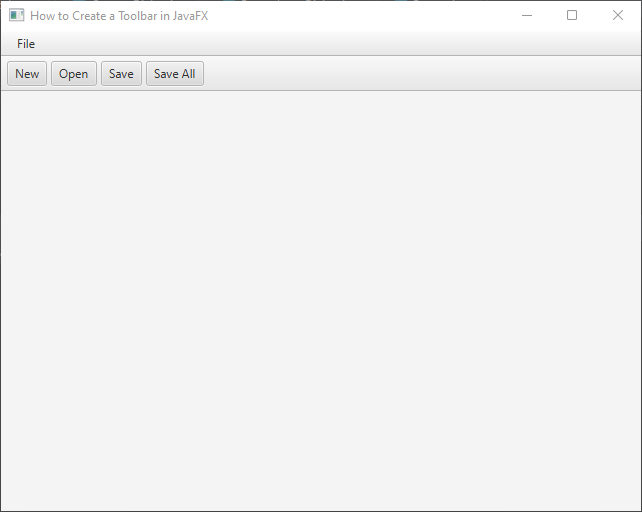
In this section, we’ll create a simple JavaFX toolbar with a few buttons. We’ll start with a basic toolbar layout and then add functionality to the buttons later.
import javafx.application.Application;
import javafx.scene.Scene;
import javafx.scene.control.*;
import javafx.scene.layout.*;
import javafx.stage.Stage;

public class Main extends Application {

    private final BorderPane parent = new BorderPane();

    @Override
    public void start(Stage stage) throws Exception {
        this.setupStage(stage);
    }

    @Override
    public void init() throws Exception {
        super.init();
        this.buildUI();
    }

    private void buildUI() {

        // Create App Menu
        AppMenu menu = new AppMenu();

        // Create content BorderPane
        BorderPane contentPane = new BorderPane();

        // Create Toolbar
        ToolBar toolbar = new ToolBar();

        // Create Toolbar Buttons
        Button tbNew = new Button("New");
        Button tbOpen = new Button("Open");
        Button tbSave = new Button("Save");
        Button tbSaveAll = new Button("Save All");

        toolbar.getItems().addAll(tbNew, tbOpen, tbSave, tbSaveAll);

        // Add Toolbar to the top of the content BorderPane
        contentPane.setTop(toolbar);

        // Add Menu to the top of the primary layout BorderPane
        this.parent.setTop(menu);

        // Add content BorderPane to the center of the primary layout BorderPane
        this.parent.setCenter(contentPane);

    }

    private void setupStage(Stage stage) {

        Scene scene = new Scene(this.parent, 640.0, 480.0);

        // Set the stage title
        stage.setTitle("How to Create a Toolbar in JavaFX");

        // Set the stage scene
        stage.setScene(scene);

        // Center the stage on the screen
        stage.centerOnScreen();

        // Show the stage on the screen
        stage.show();

    }

    static class AppMenu extends MenuBar {

        public AppMenu() {

            // File Menu
            Menu mnuFile = new Menu("File");

            // File Menu Items
            MenuItem mnuNew = new MenuItem("New");
            MenuItem mnuOpen = new MenuItem("Open");
            MenuItem mnuClose = new MenuItem("Close");

            MenuItem mnuSettings = new MenuItem("Settings");

            MenuItem mnuSave = new MenuItem("Save");
            MenuItem mnuSaveAll = new MenuItem("Save All");

            MenuItem mnuExit = new MenuItem("Exit");

            mnuFile.getItems().addAll(
                    mnuNew, mnuOpen, mnuClose,
                    new SeparatorMenuItem(),
                    mnuSettings,
                    new SeparatorMenuItem(),
                    mnuSave,
                    mnuSaveAll,
                    new SeparatorMenuItem(),
                    mnuExit
            );

            this.getMenus().addAll(mnuFile);

        }

    }

}
In this code, we use the ToolBar class to create our toolbar and add some buttons to it. The BorderPane layout is used to position the toolbar at the top of the window. Note that we’re not adding any functionality to the buttons at this point.
Adding Functionality to Toolbar Buttons
A toolbar without any functionality isn’t very useful. In this section, we’ll add actions to the toolbar buttons so that they perform specific tasks when clicked.
import javafx.application.Application;
import javafx.event.ActionEvent;
import javafx.scene.Scene;
import javafx.scene.control.*;
import javafx.scene.layout.*;
import javafx.stage.Stage;

public class Main extends Application {

    private final BorderPane parent = new BorderPane();

    @Override
    public void start(Stage stage) throws Exception {
        this.setupStage(stage);
    }

    @Override
    public void init() throws Exception {
        super.init();
        this.buildUI();
    }

    private void buildUI() {

        // Create App Menu
        AppMenu menu = new AppMenu();

        // Create content BorderPane
        BorderPane contentPane = new BorderPane();

        // Create Toolbar
        ToolBar toolbar = new ToolBar();

        // Create Toolbar Buttons
        Button tbNew = new Button("New");
        Button tbOpen = new Button("Open");
        Button tbSave = new Button("Save");
        Button tbSaveAll = new Button("Save All");

        // Adding Event Handlers to Buttons
        tbNew.setOnAction(this::onNew);
        tbOpen.setOnAction(this::onOpen);
        tbSave.setOnAction(this::onSave);
        tbSaveAll.setOnAction(this::onSaveAll);


        toolbar.getItems().addAll(tbNew, tbOpen, tbSave, tbSaveAll);

        // Add Toolbar to the top of the content BorderPane
        contentPane.setTop(toolbar);

        // Add Menu to the top of the primary layout BorderPane
        this.parent.setTop(menu);

        // Add content BorderPane to the center of the primary layout BorderPane
        this.parent.setCenter(contentPane);

    }

    private void onSaveAll(ActionEvent actionEvent) {
        System.out.println("Saving all the Files...");
    }

    private void onSave(ActionEvent actionEvent) {
        System.out.println("Saving File...");
    }

    private void onOpen(ActionEvent actionEvent) {
        System.out.println("Opening File...");
    }

    private void onNew(ActionEvent actionEvent) {
        System.out.println("New File Created...");
    }

    private void setupStage(Stage stage) {

        Scene scene = new Scene(this.parent, 640.0, 480.0);

        // Set the stage title
        stage.setTitle("How to Create a Toolbar in JavaFX");

        // Set the stage scene
        stage.setScene(scene);

        // Center the stage on the screen
        stage.centerOnScreen();

        // Show the stage on the screen
        stage.show();

    }

    class AppMenu extends MenuBar {

        public AppMenu() {

            // File Menu
            Menu mnuFile = new Menu("File");

            // File Menu Items
            MenuItem mnuNew = new MenuItem("New");

            // Add event handler to the new menu item
            mnuNew.setOnAction(Main.this::onNew);

            MenuItem mnuOpen = new MenuItem("Open");

            // Add event handler to the open menu item
            mnuOpen.setOnAction(Main.this::onOpen);

            MenuItem mnuClose = new MenuItem("Close");

            MenuItem mnuSettings = new MenuItem("Settings");

            MenuItem mnuSave = new MenuItem("Save");

            // Add event handler to the save menu item
            mnuSave.setOnAction(Main.this::onSave);

            MenuItem mnuSaveAll = new MenuItem("Save All");

            // Add event handler to the save all menu item
            mnuSaveAll.setOnAction(Main.this::onSaveAll);

            MenuItem mnuExit = new MenuItem("Exit");

            mnuFile.getItems().addAll(
                    mnuNew, mnuOpen, mnuClose,
                    new SeparatorMenuItem(),
                    mnuSettings,
                    new SeparatorMenuItem(),
                    mnuSave,
                    mnuSaveAll,
                    new SeparatorMenuItem(),
                    mnuExit
            );

            this.getMenus().addAll(mnuFile);

        }

    }

}
In this code, we use the setOnAction method for each button to define what action should be performed when it’s clicked. For demonstration purposes, we’ve included a simple print statement, but in a real application, you would implement the actual functionality you desire.
Adding Icons to Buttons
Adding icons to buttons in a JavaFX toolbar can significantly enhance the user experience and make the toolbar more visually appealing. In this section, we’ll show you how to add icons to the toolbar buttons using FontAwesomeFX, a popular library that provides a wide range of icons for JavaFX applications.
Adding FontAwesomeFX to Your Project
To use FontAwesomeFX in your JavaFX project, you need to add the library as a dependency. If you’re using Maven, add the following dependency to your pom.xml file:
<dependency>
	<groupId>de.jensd</groupId>
	<artifactId>fontawesomefx-fontawesome</artifactId>
	<version>4.7.0-9.1.2</version>
</dependency>
For other build systems or manual setups, you can download the JAR files from JARDownload and include them in your project.
Now, let’s update the Main class to use FontAwesomeFX icons on the buttons:
import de.jensd.fx.glyphs.fontawesome.FontAwesomeIcon;
import de.jensd.fx.glyphs.fontawesome.FontAwesomeIconView;
import javafx.application.Application;
import javafx.event.ActionEvent;
import javafx.scene.Scene;
import javafx.scene.control.*;
import javafx.scene.layout.*;
import javafx.stage.Stage;

public class Main extends Application {

    private final BorderPane parent = new BorderPane();

    @Override
    public void start(Stage stage) throws Exception {
        this.setupStage(stage);
    }

    @Override
    public void init() throws Exception {
        super.init();
        this.buildUI();
    }

    private void buildUI() {

        // Create App Menu
        AppMenu menu = new AppMenu();

        // Create content BorderPane
        BorderPane contentPane = new BorderPane();

        // Create Toolbar
        ToolBar toolbar = new ToolBar();

        // Create Toolbar Buttons with Icons
        Button tbNew = createButton("New", FontAwesomeIcon.PLUS);
        Button tbOpen = createButton("Open", FontAwesomeIcon.FOLDER_OPEN);
        Button tbSave = createButton("Save", FontAwesomeIcon.SAVE);
        Button tbSaveAll = createButton("Save All", FontAwesomeIcon.SAVE);

        // Adding Event Handlers to Buttons
        tbNew.setOnAction(this::onNew);
        tbOpen.setOnAction(this::onOpen);
        tbSave.setOnAction(this::onSave);
        tbSaveAll.setOnAction(this::onSaveAll);

        toolbar.getItems().addAll(tbNew, tbOpen, tbSave, tbSaveAll);

        // Add Toolbar to the top of the content BorderPane
        contentPane.setTop(toolbar);

        // Add Menu to the top of the primary layout BorderPane
        this.parent.setTop(menu);

        // Add content BorderPane to the center of the primary layout BorderPane
        this.parent.setCenter(contentPane);

    }

    private Button createButton(String text, FontAwesomeIcon fontAwesomeIcon) {

        FontAwesomeIconView icon = new FontAwesomeIconView(fontAwesomeIcon);

        icon.setSize("16px");

        Button button = new Button(text, icon);

        button.getStyleClass().add("toolbar-button");

        return button;

    }

    private void onSaveAll(ActionEvent actionEvent) {
        System.out.println("Saving all the Files...");
    }

    private void onSave(ActionEvent actionEvent) {
        System.out.println("Saving File...");
    }

    private void onOpen(ActionEvent actionEvent) {
        System.out.println("Opening File...");
    }

    private void onNew(ActionEvent actionEvent) {
        System.out.println("New File Created...");
    }

    private void setupStage(Stage stage) {

        Scene scene = new Scene(this.parent, 640.0, 480.0);

        // Set the stage title
        stage.setTitle("How to Create a Toolbar in JavaFX");

        // Set the stage scene
        stage.setScene(scene);

        // Center the stage on the screen
        stage.centerOnScreen();

        // Show the stage on the screen
        stage.show();

    }

    class AppMenu extends MenuBar {

        public AppMenu() {

            // File Menu
            Menu mnuFile = new Menu("File");

            // File Menu Items
            MenuItem mnuNew = new MenuItem("New");

            // Add event handler to the new menu item
            mnuNew.setOnAction(Main.this::onNew);

            MenuItem mnuOpen = new MenuItem("Open");

            // Add event handler to the open menu item
            mnuOpen.setOnAction(Main.this::onOpen);

            MenuItem mnuClose = new MenuItem("Close");

            MenuItem mnuSettings = new MenuItem("Settings");

            MenuItem mnuSave = new MenuItem("Save");

            // Add event handler to the save menu item
            mnuSave.setOnAction(Main.this::onSave);

            MenuItem mnuSaveAll = new MenuItem("Save All");

            // Add event handler to the save all menu item
            mnuSaveAll.setOnAction(Main.this::onSaveAll);

            MenuItem mnuExit = new MenuItem("Exit");

            mnuFile.getItems().addAll(
                    mnuNew, mnuOpen, mnuClose,
                    new SeparatorMenuItem(),
                    mnuSettings,
                    new SeparatorMenuItem(),
                    mnuSave,
                    mnuSaveAll,
                    new SeparatorMenuItem(),
                    mnuExit
            );

            this.getMenus().addAll(mnuFile);

        }

    }

}
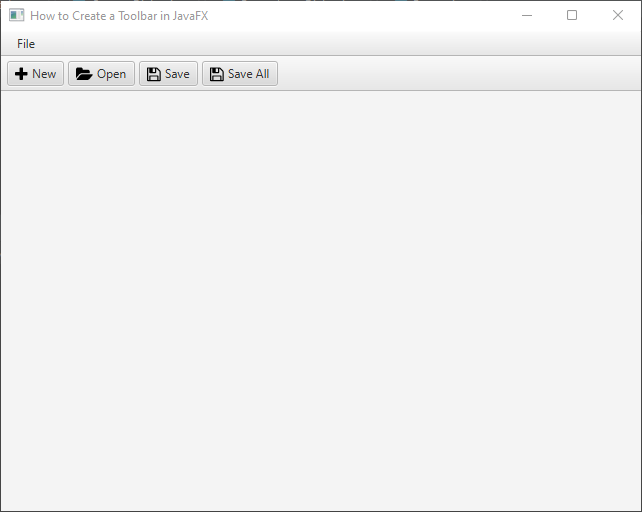
Now, when you run the application, the buttons in the toolbar should have icons from FontAwesomeFX alongside their labels. The FontAwesomeIconView class is used to represent the icons, and the FontAwesomeIcon enumeration provides the icon codes.
By using icons, you can make your toolbar more visually attractive and user-friendly, as users can easily recognize the actions associated with each button. FontAwesomeFX provides a vast collection of icons to choose from, so feel free to explore and pick the ones that best suit your application’s needs.
Remember to customize the size and appearance of the icons as needed by modifying the CSS style or the properties of the FontAwesomeIconView. With this addition, your JavaFX toolbar will be even more polished and professional-looking.
Adding Separators
Adding separators to the toolbar can help organize the buttons and provide a visual distinction between different groups of actions. In JavaFX, you can use the Separator class to add horizontal or vertical lines between components. In this section, we’ll demonstrate how to add separators to the JavaFX toolbar.
import de.jensd.fx.glyphs.fontawesome.FontAwesomeIcon;
import de.jensd.fx.glyphs.fontawesome.FontAwesomeIconView;
import javafx.application.Application;
import javafx.event.ActionEvent;
import javafx.geometry.Orientation;
import javafx.scene.Scene;
import javafx.scene.control.*;
import javafx.scene.layout.*;
import javafx.stage.Stage;

public class Main extends Application {

    private final BorderPane parent = new BorderPane();

    @Override
    public void start(Stage stage) throws Exception {
        this.setupStage(stage);
    }

    @Override
    public void init() throws Exception {
        super.init();
        this.buildUI();
    }

    private void buildUI() {

        // Create App Menu
        AppMenu menu = new AppMenu();

        // Create content BorderPane
        BorderPane contentPane = new BorderPane();

        // Create Toolbar
        ToolBar toolbar = new ToolBar();

        // Create Toolbar Buttons with Icons
        Button tbNew = createButton("New", FontAwesomeIcon.PLUS);
        Button tbOpen = createButton("Open", FontAwesomeIcon.FOLDER_OPEN);
        Button tbSave = createButton("Save", FontAwesomeIcon.SAVE);
        Button tbSaveAll = createButton("Save All", FontAwesomeIcon.SAVE);

        // Adding Event Handlers to Buttons
        tbNew.setOnAction(this::onNew);
        tbOpen.setOnAction(this::onOpen);
        tbSave.setOnAction(this::onSave);
        tbSaveAll.setOnAction(this::onSaveAll);

        // Create a Separator
        Separator separator = new Separator();
        separator.setOrientation(Orientation.VERTICAL);

        toolbar.getItems().addAll(tbNew, tbOpen, separator, tbSave, tbSaveAll);

        // Add Toolbar to the top of the content BorderPane
        contentPane.setTop(toolbar);

        // Add Menu to the top of the primary layout BorderPane
        this.parent.setTop(menu);

        // Add content BorderPane to the center of the primary layout BorderPane
        this.parent.setCenter(contentPane);

    }

    private Button createButton(String text, FontAwesomeIcon fontAwesomeIcon) {

        FontAwesomeIconView icon = new FontAwesomeIconView(fontAwesomeIcon);

        icon.setSize("16px");

        Button button = new Button(text, icon);

        button.getStyleClass().add("toolbar-button");

        return button;

    }

    private void onSaveAll(ActionEvent actionEvent) {
        System.out.println("Saving all the Files...");
    }

    private void onSave(ActionEvent actionEvent) {
        System.out.println("Saving File...");
    }

    private void onOpen(ActionEvent actionEvent) {
        System.out.println("Opening File...");
    }

    private void onNew(ActionEvent actionEvent) {
        System.out.println("New File Created...");
    }

    private void setupStage(Stage stage) {

        Scene scene = new Scene(this.parent, 640.0, 480.0);

        // Set the stage title
        stage.setTitle("How to Create a Toolbar in JavaFX");

        // Set the stage scene
        stage.setScene(scene);

        // Center the stage on the screen
        stage.centerOnScreen();

        // Show the stage on the screen
        stage.show();

    }

    class AppMenu extends MenuBar {

        public AppMenu() {

            // File Menu
            Menu mnuFile = new Menu("File");

            // File Menu Items
            MenuItem mnuNew = new MenuItem("New");

            // Add event handler to the new menu item
            mnuNew.setOnAction(Main.this::onNew);

            MenuItem mnuOpen = new MenuItem("Open");

            // Add event handler to the open menu item
            mnuOpen.setOnAction(Main.this::onOpen);

            MenuItem mnuClose = new MenuItem("Close");

            MenuItem mnuSettings = new MenuItem("Settings");

            MenuItem mnuSave = new MenuItem("Save");

            // Add event handler to the save menu item
            mnuSave.setOnAction(Main.this::onSave);

            MenuItem mnuSaveAll = new MenuItem("Save All");

            // Add event handler to the save all menu item
            mnuSaveAll.setOnAction(Main.this::onSaveAll);

            MenuItem mnuExit = new MenuItem("Exit");

            mnuFile.getItems().addAll(
                    mnuNew, mnuOpen, mnuClose,
                    new SeparatorMenuItem(),
                    mnuSettings,
                    new SeparatorMenuItem(),
                    mnuSave,
                    mnuSaveAll,
                    new SeparatorMenuItem(),
                    mnuExit
            );

            this.getMenus().addAll(mnuFile);

        }

    }

}
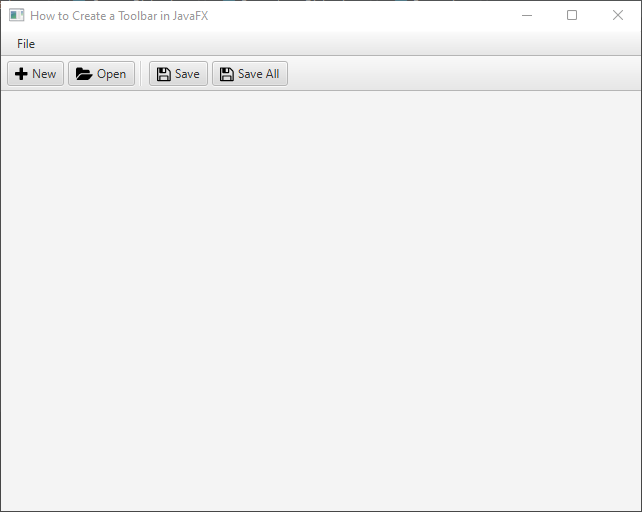
With this addition, your JavaFX toolbar is now more polished, complete with separators to group and organize the buttons effectively.
Conclusion
The JavaFX Toolbar is a powerful user interface component that enhances the usability and user experience of your applications. By providing quick access to essential actions, you can improve productivity and streamline user interactions. In this article, we explored the basics of the JavaFX Toolbar and demonstrated its implementation with code examples. Now, you can confidently integrate a Toolbar into your JavaFX applications and create intuitive and feature-rich user interfaces.
I hope you found this code informative and useful. If you would like to receive more content, please consider subscribing to our newsletter!