When working with the HTML5 Canvas API, one of the fundamental techniques to bring graphics to life is filling and stroking shapes. Filling refers to coloring the inside area of a shape, while stroking means drawing an outline around that shape. These two simple yet powerful concepts enable the creation of vivid and clear visual elements, from basic rectangles to complex polygons. Understanding how to control fills and strokes opens up endless creative possibilities in canvas-based graphics and games.
Learn C Programming For Free on Windows
A beginner-friendly course that teaches real C programming using a Windows compiler. Learn arrays, pointers, functions, and file handling step by step with practical lessons.
Start Learning C ProgrammingBoth filling and stroking are done using the 2D rendering context of the canvas, through the properties fillStyle and strokeStyle which define the colors or patterns used. Alongside these, the lineWidth property controls the thickness of the stroke. This article will guide you step-by-step through the process of filling and stroking various shapes on the canvas with engaging examples that bring life and color to your graphics.
Setting Up the Canvas for Drawing
Before we dive into filling and stroking, we need a canvas element in our HTML page and a 2D context to draw on. This is the foundation for all canvas operations.
Here is a basic HTML structure that sets up a canvas of 400×400 pixels:
<!DOCTYPE html>
<html lang="en">
<head>
    <meta charset="UTF-8" />
    <title>Canvas Setup</title>
</head>
<body>

    <canvas id="myCanvas" width="400" height="400" style="border:1px solid black;"></canvas>

    <script>

        const canvas = document.getElementById('myCanvas');
        const ctx = canvas.getContext('2d');

    </script>

</body>
</html>This example creates a canvas with a visible border so we can see the drawing area clearly. The JavaScript grabs the canvas and gets the 2D drawing context, which is stored in the variable ctx. From this point, we use ctx to draw shapes, set colors, and control the stroke.

Filling Basic Shapes: Rectangles and Circles
Filling shapes means coloring their interiors. The easiest way to fill a rectangle is with the fillRect() method, which takes the x, y coordinates and width, height of the rectangle.
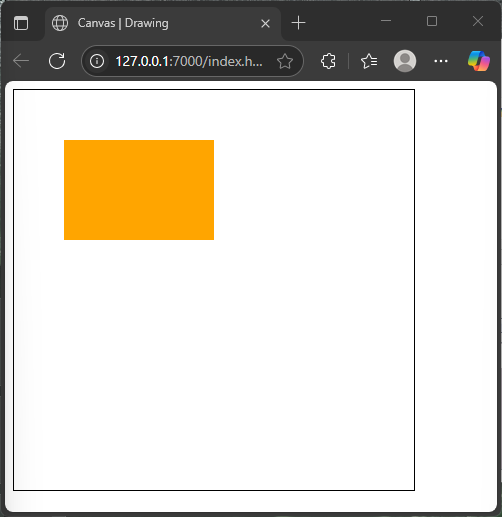
Let’s create a bright orange rectangle, inspired by the mane of a lion, that fills a portion of the canvas.
<!DOCTYPE html>
<html lang="en">
<head>
    <meta charset="UTF-8" />
    <title>Canvas | Drawing</title>
</head>
<body>

    <canvas id="myCanvas" width="400" height="400" style="border:1px solid black;"></canvas>

    <script>

        const canvas = document.getElementById('myCanvas');
        const ctx = canvas.getContext('2d');

        ctx.fillStyle = 'orange'; // Lion's Mane Orange
        ctx.fillRect(50, 50, 150, 100); // x=50, y=50, width=150, height=100

    </script>

</body>
</html>The above code colors the rectangle’s interior in orange. You don’t see an outline yet because we only filled the shape.
Next, to draw a filled circle, we need to use a path. We start with beginPath(), then use arc() to define the circle, and finally fill() to fill it with color.
<!DOCTYPE html>
<html lang="en">
<head>
    <meta charset="UTF-8" />
    <title>Canvas | Drawing</title>
</head>
<body>

    <canvas id="myCanvas" width="400" height="400" style="border:1px solid black;"></canvas>

    <script>

        const canvas = document.getElementById('myCanvas');
        const ctx = canvas.getContext('2d');

        ctx.fillStyle = 'orange'; // Lion's Mane Orange
        ctx.fillRect(50, 50, 150, 100); // x=50, y=50, width=150, height=100


        ctx.beginPath();
        ctx.arc(300, 100, 50, 0, Math.PI * 2); // Circle at (300,100) with radius 50
        ctx.fillStyle = 'black'; // Zebra Black
        ctx.fill();

    </script>

</body>
</html>This example draws a solid black circle resembling the bold stripes of a zebra. Using arc(), we specify the center coordinates, radius, and the full circle angle in radians (Math.PI * 2).
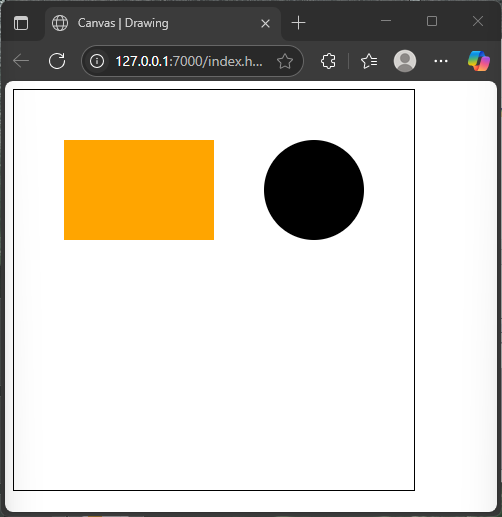
Both fillRect() and fill() are used to fill different shapes, showing that canvas supports a variety of shape-filling methods.
Stroking Shapes: Outlining Rectangles and Circles
While filling colors the inside of shapes, stroking draws outlines around them. For rectangles, stroking can be done using strokeRect(). For circles and complex shapes, you use paths with stroke().
Let’s stroke the same rectangle with a thick dark outline to represent the bold line of an elephant.
<!DOCTYPE html>
<html lang="en">
<head>
    <meta charset="UTF-8" />
    <title>Canvas | Drawing</title>
</head>
<body>

    <canvas id="myCanvas" width="400" height="400" style="border:1px solid black;"></canvas>

    <script>

        const canvas = document.getElementById('myCanvas');
        const ctx = canvas.getContext('2d');

        ctx.fillStyle = 'orange'; // Lion's Mane Orange
        ctx.fillRect(50, 50, 150, 100); // x=50, y=50, width=150, height=100

        ctx.lineWidth = 8; // Thick Elephant lines
        ctx.strokeStyle = 'darkgray';
        ctx.strokeRect(50, 50, 150, 100);

    </script>

</body>
</html>This draws a thick gray outline around the orange rectangle.

For stroking a circle, we similarly define a path and then call stroke() instead of fill().
<!DOCTYPE html>
<html lang="en">
<head>
    <meta charset="UTF-8" />
    <title>Canvas | Drawing</title>
</head>
<body>

    <canvas id="myCanvas" width="400" height="400" style="border:1px solid black;"></canvas>

    <script>

        const canvas = document.getElementById('myCanvas');
        const ctx = canvas.getContext('2d');

        ctx.fillStyle = 'orange'; // Lion's Mane Orange
        ctx.fillRect(50, 50, 150, 100); // x=50, y=50, width=150, height=100

        ctx.lineWidth = 8; // Thick Elephant lines
        ctx.strokeStyle = 'darkgray';
        ctx.strokeRect(50, 50, 150, 100);


        ctx.beginPath();
        ctx.arc(300, 100, 50, 0, Math.PI * 2); // Circle at (300,100) with radius 50
        ctx.fillStyle = 'black'; // Zebra Black
        ctx.fill();

        ctx.beginPath();
        ctx.arc(300, 100, 50, 0, Math.PI * 2);
        ctx.lineWidth = 3; // Cheetah-thin outlines
        ctx.strokeStyle = 'yellow';
        ctx.stroke();

    </script>

</body>
</html>Here, a yellow outline frames the black circle with a thin line, resembling the delicate patterns of a cheetah.
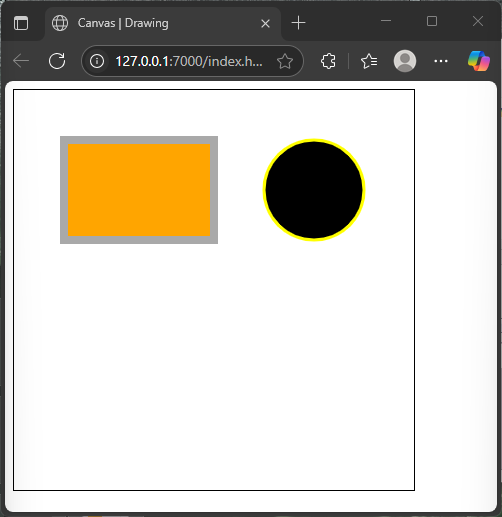
Stroking helps shapes stand out and adds definition to drawings.
Combining Filling and Stroking in One Shape
You can combine filling and stroking to create visually rich shapes. First, you fill the shape’s interior, then stroke its outline. The order of these commands affects the final look, as stroking over filling highlights the edges clearly.
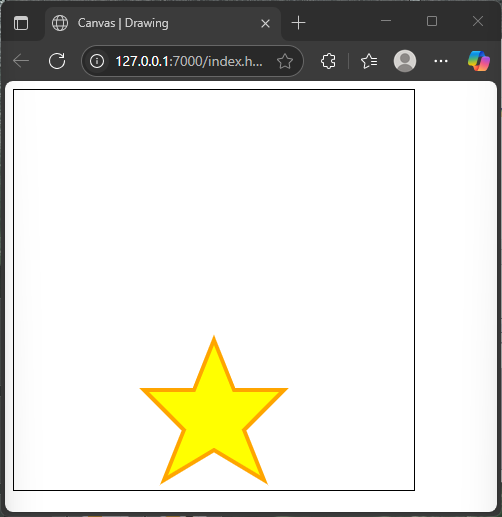
For example, let’s draw a star shape filled with bright yellow and outlined with orange.
<!DOCTYPE html>
<html lang="en">
<head>
    <meta charset="UTF-8" />
    <title>Canvas | Drawing</title>
</head>
<body>

    <canvas id="myCanvas" width="400" height="400" style="border:1px solid black;"></canvas>

    <script>

        const canvas = document.getElementById('myCanvas');
        const ctx = canvas.getContext('2d');

        ctx.beginPath();
        ctx.moveTo(200, 250);
        ctx.lineTo(220, 300);
        ctx.lineTo(270, 300);
        ctx.lineTo(230, 340);
        ctx.lineTo(250, 390);
        ctx.lineTo(200, 360);
        ctx.lineTo(150, 390);
        ctx.lineTo(170, 340);
        ctx.lineTo(130, 300);
        ctx.lineTo(180, 300);
        ctx.closePath();

        ctx.fillStyle = 'yellow'; // Bright Sun Yellow
        ctx.fill();

        ctx.lineWidth = 4;
        ctx.strokeStyle = 'orange'; // Outline like a burning flame
        ctx.stroke();

    </script>

</body>
</html>In this example, we carefully define the star’s points with moveTo() and lineTo(). After closing the path, fill() colors the inside, and then stroke() draws the outline. The combination makes the star pop with vibrant colors.
Drawing Complex Shapes with Paths: Polygons and Stars
Using beginPath(), moveTo(), and lineTo() you can draw any polygon or custom shape on the canvas. This flexibility lets you create colorful and interesting graphics.
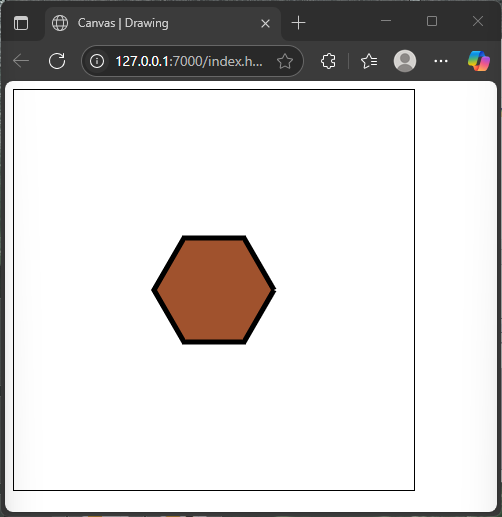
For example, here is a filled hexagon with a giraffe-like brown color and a contrasting black outline:
<!DOCTYPE html>
<html lang="en">
<head>
    <meta charset="UTF-8" />
    <title>Canvas | Drawing</title>
</head>
<body>

    <canvas id="myCanvas" width="400" height="400" style="border:1px solid black;"></canvas>

    <script>

        const canvas = document.getElementById('myCanvas');
        const ctx = canvas.getContext('2d');

        ctx.beginPath();
        const centerX = 200;
        const centerY = 200;
        const size = 60;

        for(let i = 0; i <= 6; i++) {

            const angle = i * Math.PI / 3;
            const x = centerX + size * Math.cos(angle);
            const y = centerY + size * Math.sin(angle);

            if(i === 0) {
                ctx.moveTo(x, y);
            } else {
                ctx.lineTo(x, y);
            }

        }

        ctx.fillStyle = '#A0522D'; // Giraffe Brown
        ctx.fill();

        ctx.lineWidth = 5;
        ctx.strokeStyle = 'black';
        ctx.stroke();

    </script>

</body>
</html>This polygon is created by looping six times, calculating the points of a hexagon with basic trigonometry. The fill and stroke add color and definition. This shows how path drawing combined with fill and stroke can produce more complex art.
Using Transparency with fillStyle and strokeStyle
Canvas supports transparency in colors by using rgba() values, where the “a” controls the alpha channel (opacity). This allows overlapping shapes to blend visually, creating interesting effects.
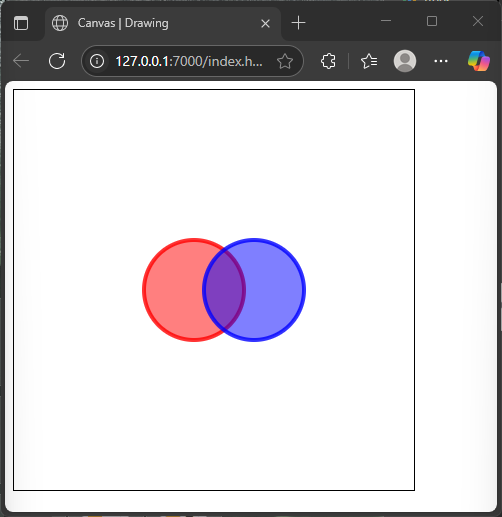
Let’s draw two overlapping circles with semi-transparent fills and strokes to simulate a colorful overlapping pattern.
<!DOCTYPE html>
<html lang="en">
<head>
    <meta charset="UTF-8" />
    <title>Canvas | Drawing</title>
</head>
<body>

    <canvas id="myCanvas" width="400" height="400" style="border:1px solid black;"></canvas>

    <script>

        const canvas = document.getElementById('myCanvas');
        const ctx = canvas.getContext('2d');

        // First circle: semi-transparent red fill and stroke
        ctx.beginPath();

        ctx.arc(180, 200, 50, 0, Math.PI * 2);
        ctx.fillStyle = 'rgba(255, 0, 0, 0.5)'; // Red with 50% opacity
        ctx.fill();

        ctx.lineWidth = 4;
        ctx.strokeStyle = 'rgba(255, 0, 0, 0.8)';
        ctx.stroke();

        // Second circle: semi-transparent blue fill and stroke overlapping first circle
        ctx.beginPath();

        ctx.arc(240, 200, 50, 0, Math.PI * 2);
        ctx.fillStyle = 'rgba(0, 0, 255, 0.5)'; // Blue with 50% opacity
        ctx.fill();

        ctx.lineWidth = 4;
        ctx.strokeStyle = 'rgba(0, 0, 255, 0.8)';
        ctx.stroke();

    </script>

</body>
</html>The overlapping regions create purple shades where the red and blue transparencies combine. Transparency adds depth and layering to canvas graphics.
Creating Fun Effects: Multiple Filled and Stroked Shapes
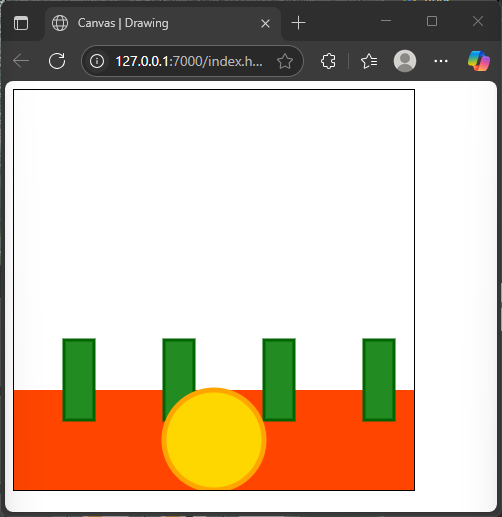
By layering multiple shapes with different fills and strokes, you can create vibrant scenes. Let’s draw a simple abstract “Savannah sunset” using overlapping circles and rectangles with various colors.
<!DOCTYPE html>
<html lang="en">
<head>
    <meta charset="UTF-8" />
    <title>Canvas | Drawing</title>
</head>
<body>

    <canvas id="myCanvas" width="400" height="400" style="border:1px solid black;"></canvas>

    <script>

        const canvas = document.getElementById('myCanvas');
        const ctx = canvas.getContext('2d');

        // Background sunset rectangle
        ctx.fillStyle = '#FF4500'; // Sunset orange
        ctx.fillRect(0, 300, 400, 100);

        // Trees: green rectangles with dark green strokes
        ctx.fillStyle = '#228B22'; // Forest green
        ctx.strokeStyle = '#006400'; // Dark green
        ctx.lineWidth = 3;

        for(let x = 50; x <= 350; x += 100) {
            ctx.fillRect(x, 250, 30, 80);
            ctx.strokeRect(x, 250, 30, 80);
        }

        // Sun circle with stroke
        ctx.beginPath();

        ctx.arc(200, 350, 50, 0, Math.PI * 2);
        ctx.fillStyle = '#FFD700'; // Golden sun
        ctx.fill();

        ctx.lineWidth = 5;
        ctx.strokeStyle = '#FFA500'; // Darker orange outline
        ctx.stroke();

    </script>

</body>
</html>This code layers a glowing sunset rectangle with a golden sun outlined in orange. The “trees” are simple rectangles filled and stroked in shades of green. Combining fills and strokes this way makes the scene lively and colorful.
Conclusion
Filling and stroking shapes on the HTML5 Canvas provide essential tools for creating colorful and defined graphics. Through the use of fillStyle and strokeStyle, combined with shape drawing methods like fillRect(), arc(), and paths, you can bring simple or complex designs to life.
This article has walked through drawing and coloring rectangles, circles, polygons, and overlapping shapes, demonstrating how filling colors the interior while stroking outlines the edges. By experimenting with transparency and layering multiple shapes, you can create vibrant scenes and creative artwork.
Keep practicing these techniques to unlock the full artistic potential of the canvas API.
References
- MDN Web Docs: CanvasRenderingContext2D.fillRect()
- MDN Web Docs: CanvasRenderingContext2D.strokeRect()
- MDN Web Docs: CanvasRenderingContext2D.arc()
- MDN Web Docs: CanvasRenderingContext2D.fill()
- MDN Web Docs: CanvasRenderingContext2D.stroke()