Flutter is a super cool tool made by Google that helps you build apps for phones, websites, and even computers using just one set of instructions. But before you can start creating with Flutter, you need to set it up on your computer. This guide will show you how to install Flutter (Setting Up Flutter Development Environment), get a place to write your code, and make sure everything is working perfectly.

with hands-on learning.
get the skills and confidence to land your next move.
What You Need Before Getting Started
Before you can set up Flutter, make sure your computer has these things:
- Operating System: Flutter works on macOS, Windows, and Linux.
- Disk Space: You’ll need at least 2 GB of free space on your computer.
- Tools: You need to install Git on your computer. Git helps you manage the installation and updates for Flutter.
Installing Flutter SDK
How to Download Flutter SDK
- Visit the Flutter Website: First, open your internet browser (like Chrome, Safari, etc.), and go to the official Flutter website by clicking on this link. This website has all the steps you’ll need to get Flutter up and running.
- Pick Your Computer Type: Flutter works on different types of computers, like macOS, Windows, or Linux. Once you’re on the website, you’ll see a section where you can choose your computer’s type. Just click on the one that matches your computer.
- Download Flutter: After selecting your operating system, you’ll see a button or link that lets you download the Flutter SDK (this is a package of tools Flutter needs to work). Click on the download link to get the latest version of Flutter. Once the file is downloaded, you’ll be ready to move on to the next step.
This is the first step to getting Flutter ready to use, so make sure to follow along.
Extracting the Flutter SDK
- Find the Downloaded File: After downloading the Flutter SDK, you’ll need to locate the file you just downloaded. It will usually be in your “Downloads” folder unless you saved it somewhere else.
- Extract the File: Now, you need to “unzip” or “extract” the downloaded file. This just means opening it and putting its contents in a folder on your computer. For example, on Windows, you might want to extract it to
C:\src\flutterso it’s easy to find.- On Windows, you can right-click on the downloaded file and select Extract All…, then choose where you want to put it (like
C:\src\flutter). - On macOS or Linux, you can simply double-click the file to extract it.
- On Windows, you can right-click on the downloaded file and select Extract All…, then choose where you want to put it (like
By extracting the Flutter SDK, you’re getting all the tools and files you need to start using Flutter.
Updating Your Path
After extracting Flutter, you need to make sure your computer knows where to find it. This is done by adding Flutter to your Path. The Path is like a list where your computer looks for programs to run.
Here’s how to do it for different systems:
Windows:
- Open Environment Settings: Click on the Start menu, type in “env”, and click on “Edit the system environment variables.”
- Edit the PATH: In the window that pops up, click on the Environment Variables button. Look under System variables for a variable named Path, then click Edit.
- Add the Flutter Path: In the editor, click New and add the full path to the
flutter/bindirectory. For example, if you extracted Flutter toC:\src\flutter, then addC:\src\flutter\binto the list. Click OK to save and close everything.
macOS and Linux:
- Open Terminal: Open the Terminal app on your computer.
- Add Flutter to Path: Type this command in your terminal:
export PATH="$PATH:`pwd`/flutter/bin"- Make It Permanent: To make this change stick forever, you need to add the above line to a special file. Depending on what terminal you use, you might need to add it to:
.bashrc.zshrc.profile.zshenv
You can do this by opening the file in a text editor. For example, type:
nano ~/.bashrcThen, paste the line at the end of the file and save.
By updating your Path, your computer can now find Flutter easily whenever you need it.
Setting Up an Editor
To start writing Flutter code, you’ll need a text editor or an Integrated Development Environment (IDE). These tools help you write code easily and make sure everything works correctly.
Two of the most popular editors for Flutter are:
Visual Studio Code (VS Code)
Visual Studio Code (VS Code) is a free, lightweight code editor that works great with Flutter. It’s simple to use and has lots of helpful features like code suggestions and error checking.
To set up VS Code:
- Download and install VS Code from here.
- Open VS Code and install the Flutter and Dart extensions:
- Go to the Extensions view by clicking on the Extensions icon on the left side.
- Search for Flutter and click Install.
- Do the same for Dart. Both extensions will help you with writing and running Flutter apps.
Android Studio
Android Studio is another great option, especially for people who want to create apps for Android devices. It comes with everything you need to develop Android apps and is also perfect for Flutter development.
To set up Android Studio:
- Download and install Android Studio from here.
- During installation, make sure to check the box to install the Flutter plugin and Dart plugin.
- After installation, open Android Studio and set it up for Flutter by following the on-screen instructions.
Both VS Code and Android Studio are great choices for Flutter development. You can choose the one that you feel most comfortable with.
Verifying Installation
Running flutter doctor
Once you’ve installed Flutter and set up your editor, it’s important to verify that everything is working correctly. Flutter provides a built-in tool called flutter doctor to check your setup.
- Open a Terminal: Open your terminal or command prompt.
- Run
flutter doctor: Type the following command and press Enter:
flutter doctor- Review the Output: This command scans your system and displays a report showing the status of your Flutter installation. It checks if Flutter, Dart, your chosen IDE, and necessary device configurations are properly set up.
If you see any issues in the report, follow the provided suggestions to fix them before continuing with development.
Creating and Running a Simple Flutter Application
- Create a New Flutter Project: Open your terminal and type:
flutter create my_first_flutter_app- Navigate to the Project Directory: Go to your project folder by typing:
cd my_first_flutter_app- Open the Project in Your Editor: Open the project in an editor like VS Code or Android Studio.
- Run the Flutter Application: Run the app with this command:
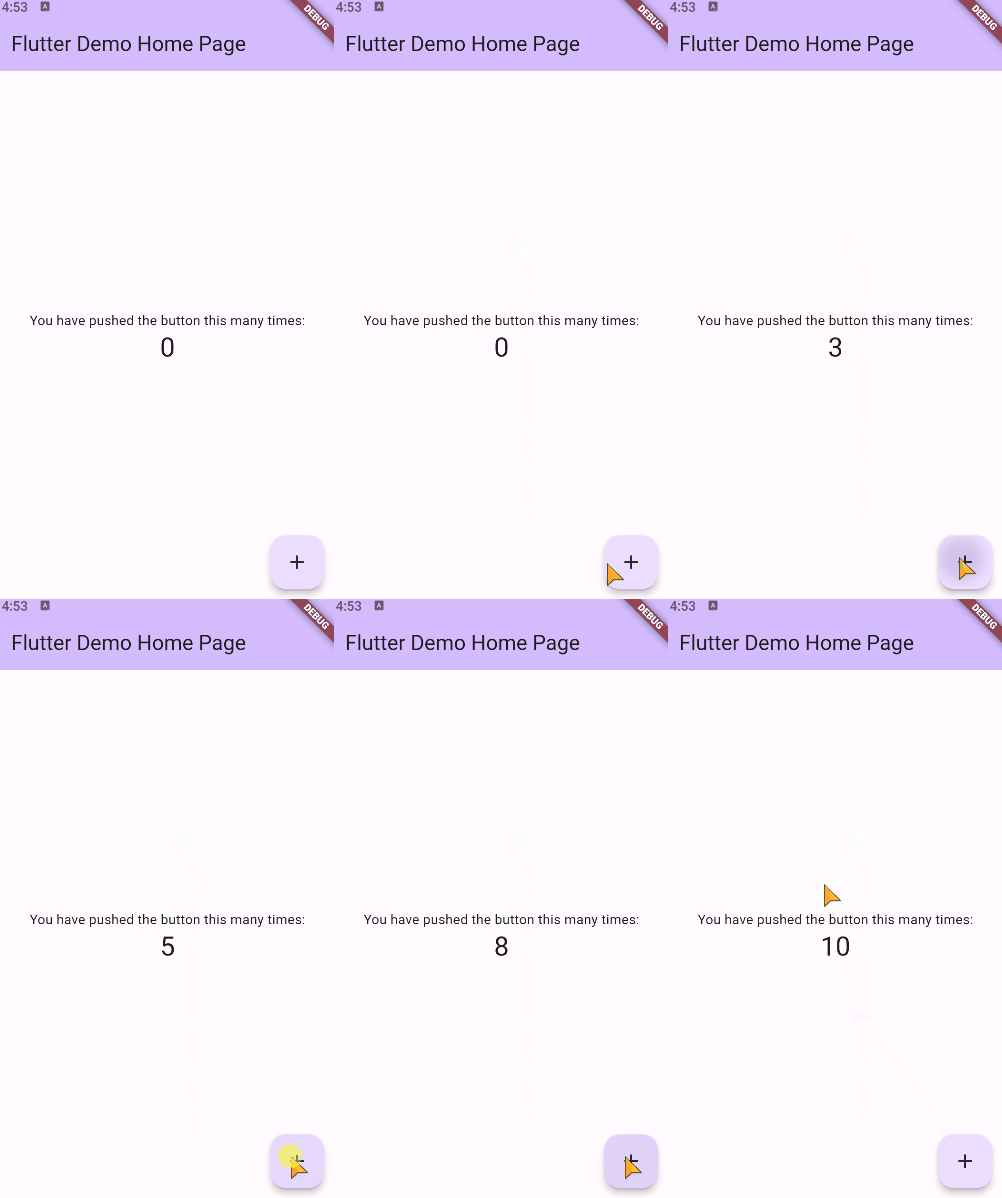
flutter runYou should see a simple Flutter app on your device or emulator, showing a counter that increases when you tap the “Increment” button.
Conclusion
Setting up Flutter requires installing the Flutter SDK, choosing an editor, and running flutter doctor to make sure everything is ready. Once everything is set up, you can start building awesome apps that work on phones, websites, and computers.
To keep learning, check out the official Flutter documentation, watch online tutorials, and join the Flutter community to improve your skills and knowledge.
