When it comes to creating captivating and visually appealing user interfaces, JavaFX offers a wide array of tools and features to help developers achieve their creative vision. One such feature is the GaussianBlur Effect, which allows you to apply a Gaussian blur effect to UI components. In this article, we will explore the GaussianBlur, its capabilities and showing you how to use it to enhance your applications.

with hands-on learning.
get the skills and confidence to land your next move.
What is GaussianBlur?
GaussianBlur is a common image processing technique used to create a blur effect in images. This filter gets its name from the Gaussian distribution, which is used to calculate the amount of blurring applied to each pixel in the image. In simpler terms, it softens the edges and transitions between different colors and shapes, creating a pleasing, smooth, and dreamy effect.
The GaussianBlur effect is often used in various visual applications to draw attention to specific elements in an image, create depth, or simply to give a more artistic touch to the visuals. In JavaFX, you can easily apply this filter to your images and UI components, taking your application’s visual appeal to the next level.
Implementing GaussianBlur
JavaFX simplifies the implementation of the GaussianBlur image filter through its built-in library, providing a straightforward way to apply this effect to your images or UI components. Below is an example of how to use the GaussianBlur effect in JavaFX:
import javafx.application.Application;
import javafx.scene.Scene;
import javafx.scene.effect.GaussianBlur;
import javafx.scene.image.Image;
import javafx.scene.image.ImageView;
import javafx.scene.layout.BorderPane;
import javafx.stage.Stage;

public class GaussianBlurImageFilter extends Application {

    private static final double WIDTH = 640;
    private static final double HEIGHT = 480;

    /* The parent layout manager */
    private final BorderPane parent = new BorderPane();

    @Override
    public void start(Stage stage) throws Exception {

        Scene scene = new Scene(this.parent, WIDTH, HEIGHT);

        // Sets the stage title
        stage.setTitle("Gaussian Blur Image Filter");

        // Set the stage scene
        stage.setScene(scene);

        // Center stage on screen
        stage.centerOnScreen();

        // Show stage on screen
        stage.show();

    }

    @Override
    public void init() throws Exception {
        super.init();

        Image image = new Image("scorpion.jpg");

        ImageView imageView = new ImageView(image);
        imageView.setPreserveRatio(true);
        imageView.setFitWidth(400);

        // Apply the GaussianBlur effect with a radius of 10
        GaussianBlur blur = new GaussianBlur(10);
        imageView.setEffect(blur);

        /* Add the ImageView to the BorderPane center region */
        this.parent.setCenter(imageView);

    }

}
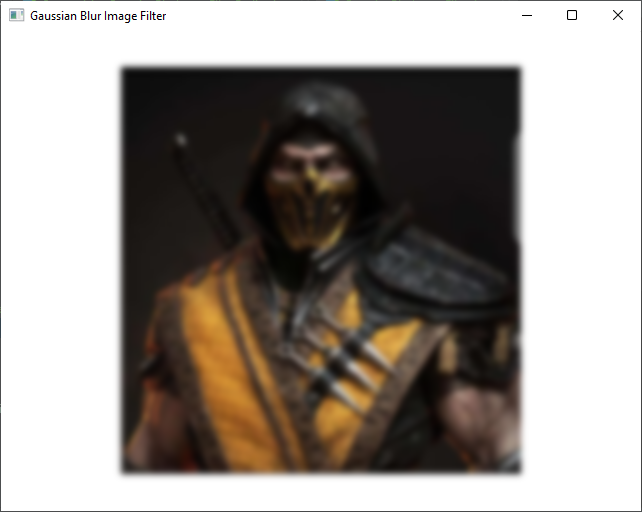
In the above example, we load an image using the Image class and create an ImageView to display it. We then create a GaussianBlur instance, specifying the radius as an argument. The radius determines how far the blur effect extends from each pixel. Smaller values produce a subtle effect, while larger values create a stronger blur.
Finally, we set the GaussianBlur effect on the ImageView using imageView.setEffect(blur). This applies the Gaussian blur to the image, resulting in a visually pleasing and softened appearance.
Customizing the Gaussian Blur Effect
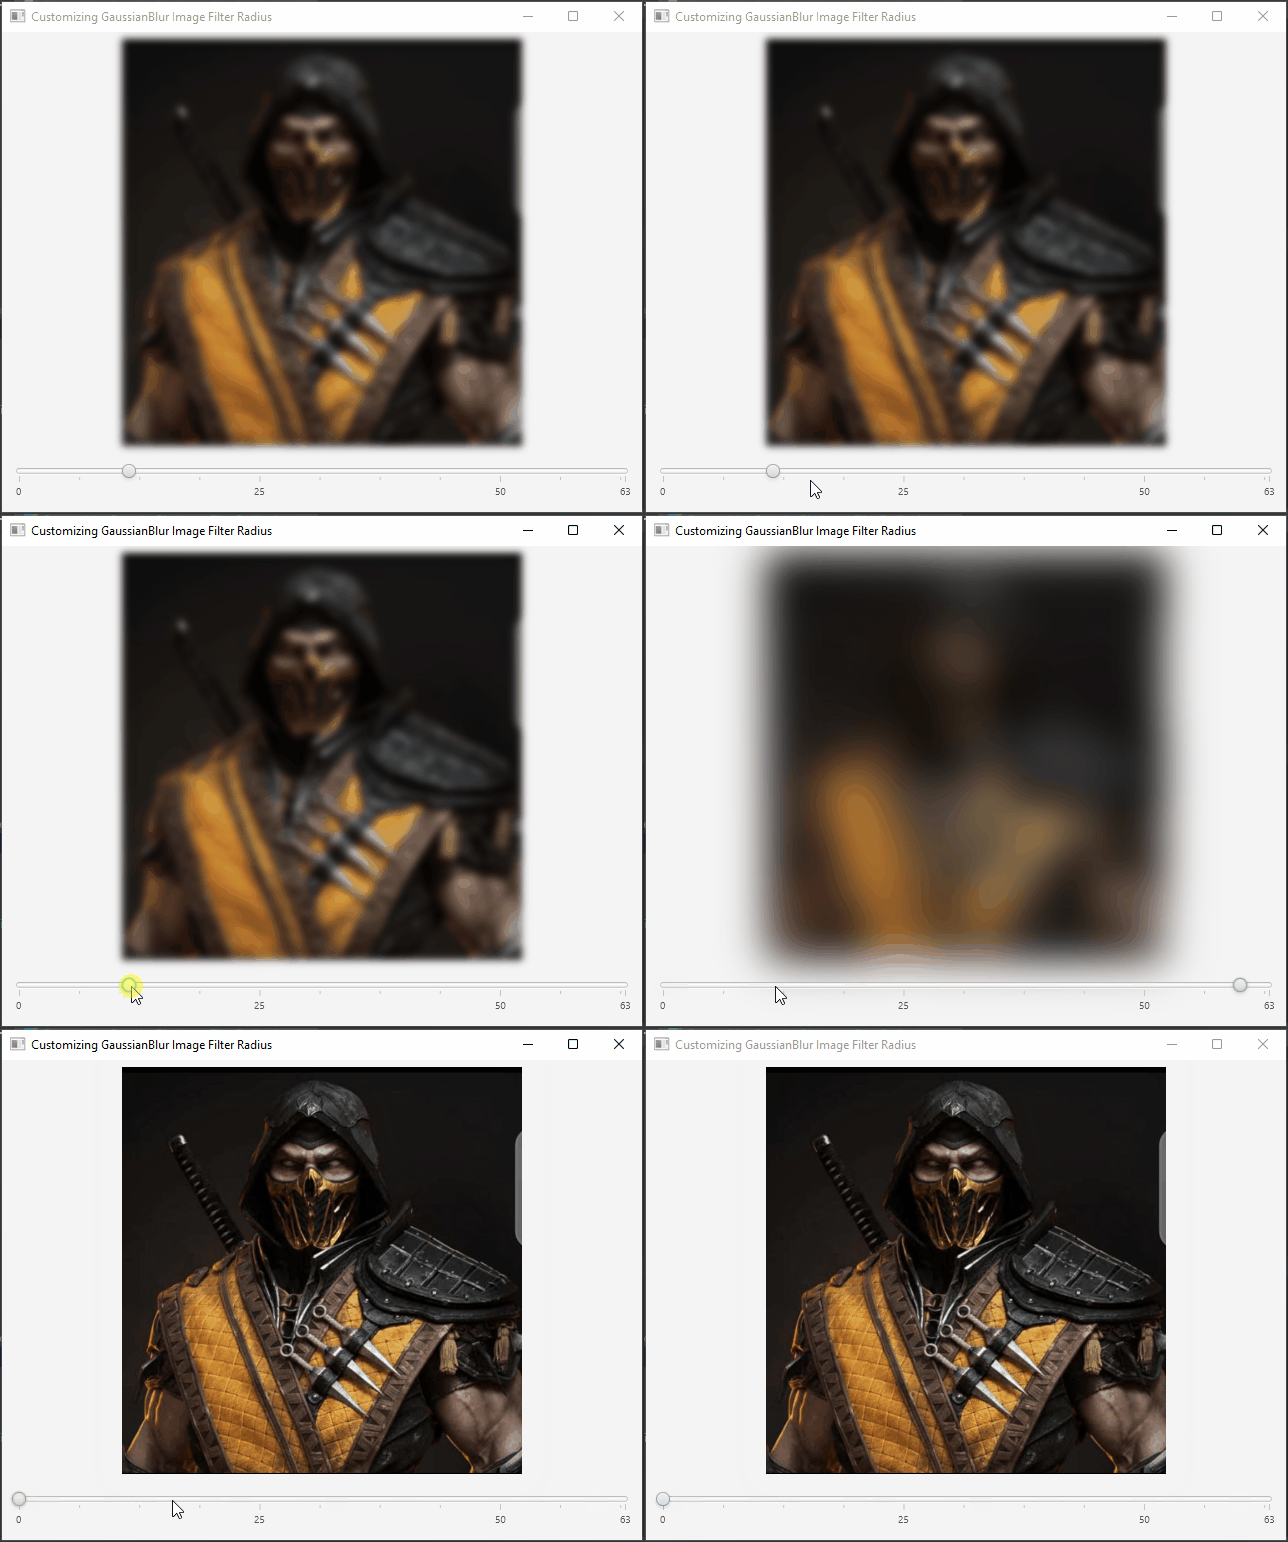
The GaussianBlur effect can be further customized by adjusting its radius. The radius determines the extent of the blurring effect. Smaller values create a subtle blur, while larger values result in a more pronounced blur. Experiment with different radius values to achieve the desired visual effect.
import javafx.application.Application;
import javafx.geometry.Insets;
import javafx.geometry.Pos;
import javafx.scene.Scene;
import javafx.scene.control.Slider;
import javafx.scene.effect.GaussianBlur;
import javafx.scene.image.Image;
import javafx.scene.image.ImageView;
import javafx.scene.layout.BorderPane;
import javafx.stage.Stage;

public class CustomizingGaussianBlurImageFilterRadius extends Application {

    private static final double WIDTH = 640;
    private static final double HEIGHT = 480;

    // Create the parent layout manager for the application
    private final BorderPane parent = new BorderPane();

    @Override
    public void start(Stage stage) throws Exception {

        // Create the main application scene
        Scene scene = new Scene(this.parent, WIDTH, HEIGHT);

        // Set the title for the application window
        stage.setTitle("Customizing GaussianBlur Image Filter Radius");

        // Set the scene for the stage
        stage.setScene(scene);

        // Center the stage on the screen
        stage.centerOnScreen();

        // Show the stage on the screen
        stage.show();
    }

    @Override
    public void init() throws Exception {
        super.init();

        Image image = new Image("scorpion.jpg");

        // Create an ImageView to display the loaded image
        ImageView imageView = new ImageView(image);
        imageView.setPreserveRatio(true);
        imageView.setFitWidth(400);

        // Create a Slider for adjusting the blur radius
        Slider radiusSlider = new Slider(0, 63, 10);
        radiusSlider.setShowTickMarks(true);
        radiusSlider.setShowTickLabels(true);

        // Create a GaussianBlur
        GaussianBlur blur = new GaussianBlur();

        // Bind the blur radius to the Slider's value
        blur.radiusProperty().bind(radiusSlider.valueProperty());

        // Apply the GaussianBlur effect to the ImageView
        imageView.setEffect(blur);

        // Add the ImageView to the center region of the BorderPane
        this.parent.setCenter(imageView);

        // Add the Slider to the bottom region of the BorderPane
        this.parent.setBottom(radiusSlider);
        BorderPane.setAlignment(radiusSlider, Pos.CENTER);
        BorderPane.setMargin(radiusSlider, new Insets(10));
    }
}
In this example, we load an image and create a Slider to dynamically adjust the blur radius. By binding the blur effect’s radius to the Slider’s value, we can instantly see how different radius values impact the image’s appearance.
Conclusion
The GaussianBlur Effect in JavaFX is a powerful tool that enables you to create captivating visual effects and enhance user interfaces. Understanding the principles of this effect and its application is essential for any developer or designer. With its simplicity and versatility, you can use it to add a touch of artistry to your projects, engage users, and create stunning visuals.
I hope you found this article informative and useful. If you would like to receive more content, please consider subscribing to our newsletter.
