In Flutter, the Text widget is one of the most used tools to display words on the screen. But plain text can feel boring without some style. Fonts help us add personality and mood to our text. Just like colors and icons, the font you choose can make your app feel playful, serious, modern, or classy.
In this article, we’ll learn how to set fonts in the Text widget, how to add custom fonts, and how to apply fonts across your entire app.
The Default Font in Flutter
When you use a Text widget in Flutter and don’t set any style, it uses the system’s default font. It looks clean and simple, but sometimes you may want something different—like a bold title, a handwritten look, or a clean modern feel.
That’s where the fontFamily property comes in.
Using the fontFamily Property
The fontFamily property lets you change the font used in a Text widget. If you want to use built-in fonts (like 'Roboto', 'Courier', or 'Arial'), you can write:
import 'package:flutter/material.dart';
void main() {
runApp(const MyApp());
}
class MyApp extends StatelessWidget {
const MyApp({super.key});
@override
Widget build(BuildContext context) {
return MaterialApp(
home: Scaffold(
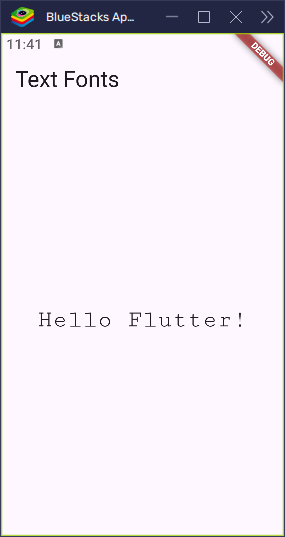
appBar: AppBar(title: Text('Text Fonts')),
body: Center(
child: Padding(
padding: const EdgeInsets.all(12.0),
child: Text(
'Hello Flutter!',
style: TextStyle(fontFamily: 'Courier', fontSize: 24),
),
),
),
),
);
}
}This shows your text in the Courier font, which has a typewriter feel.
Note: Not all fonts work on all devices unless added properly. Built-in font support depends on the platform and OS.
Adding Custom Fonts to Your Flutter Project
You can use any font you like by adding it to your project. Here’s how to do it:
Step 1: Add the Font Files
First, download a font (like .ttf or .otf file) and save it inside your project’s assets/fonts/ folder. For example:
my_flutter_app/
  assets/
    fonts/
      Poppins-Regular.ttf
Step 2: Edit pubspec.yaml
Next, tell Flutter about your new font:
flutter:
  fonts:
    - family: Poppins
      fonts:
        - asset: assets/fonts/Poppins-Regular.ttf
Make sure the indentation is correct—YAML is picky!
Then run:
flutter pub getStep 3: Use It in Your Text Widget
Now you can use your new font like this:
import 'package:flutter/material.dart';
void main() {
runApp(const MyApp());
}
class MyApp extends StatelessWidget {
const MyApp({super.key});
@override
Widget build(BuildContext context) {
return MaterialApp(
home: Scaffold(
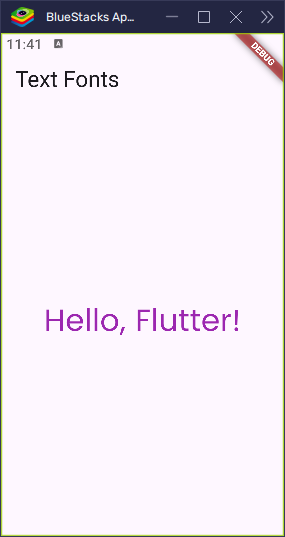
appBar: AppBar(title: Text('Text Fonts')),
body: Center(
child: Padding(
padding: const EdgeInsets.all(12.0),
child: Text(
'Hello, Flutter!',
style: TextStyle(
fontFamily: 'Poppins',
fontSize: 30,
color: Colors.purple,
),
),
),
),
),
);
}
}Your text will now have a fun, fancy style using the Poppins font!
Setting a Custom Font for the Whole App
If you want the same font across your entire app, you don’t need to set it in every Text widget. Instead, apply it globally using ThemeData.
Here’s how:
import 'package:flutter/material.dart';
void main() {
runApp(const MyApp());
}
class MyApp extends StatelessWidget {
const MyApp({super.key});
@override
Widget build(BuildContext context) {
return MaterialApp(
theme: ThemeData(fontFamily: 'Poppins'),
home: Scaffold(
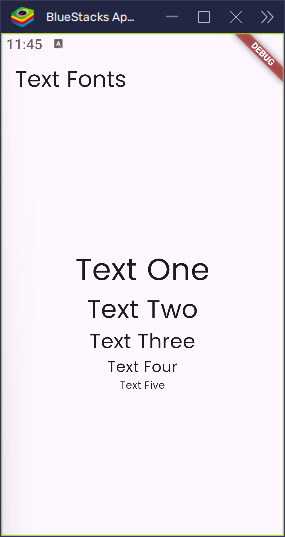
appBar: AppBar(title: Text('Text Fonts')),
body: Center(
child: Padding(
padding: const EdgeInsets.all(12.0),
child: Column(
mainAxisAlignment: MainAxisAlignment.center,
children: [
Text('Text One', style: TextStyle(fontSize: 30)),
Text('Text Two', style: TextStyle(fontSize: 25)),
Text('Text Three', style: TextStyle(fontSize: 20)),
Text('Text Four', style: TextStyle(fontSize: 15)),
Text('Text Five', style: TextStyle(fontSize: 10)),
],
),
),
),
),
);
}
}Now every Text in your app will use the Poppins font by default—clean and consistent.
Combining Fonts with Other Styles
You can still add more styling even when using a custom font. For example:
import 'package:flutter/material.dart';
void main() {
runApp(const MyApp());
}
class MyApp extends StatelessWidget {
const MyApp({super.key});
@override
Widget build(BuildContext context) {
return MaterialApp(
home: Scaffold(
appBar: AppBar(title: Text('Text Fonts')),
body: Center(
child: Padding(
padding: const EdgeInsets.all(12.0),
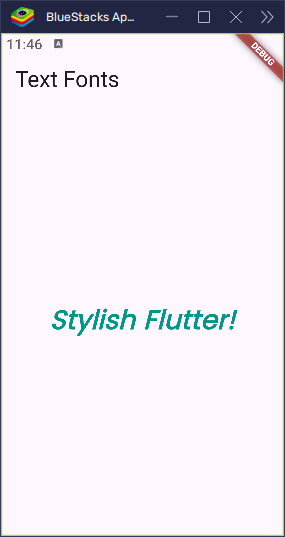
child: Text(
'Stylish Flutter!',
style: TextStyle(
fontFamily: 'Poppins',
fontSize: 26,
fontWeight: FontWeight.bold,
fontStyle: FontStyle.italic,
color: Colors.teal,
),
),
),
),
),
);
}
}This shows colorful, bold, italic text using a custom font. Try different combinations to find the look you love!
Troubleshooting Tips
Sometimes, fonts may not work as expected. Here are a few things to check:
- Make sure your file path in
pubspec.yamlis correct. - Check the indentation — incorrect spacing can break things.
- Run
flutter pub getafter editing the file. - Restart your app completely after adding fonts.
- Check for typos in the
fontFamilyname (it must match the one inpubspec.yaml).
Conclusion
Setting fonts in Flutter is simple and powerful. You can:
- Use
fontFamilyto style text with system or custom fonts. - Add new fonts by editing
pubspec.yamland placing font files in your project. - Apply fonts globally to keep your design consistent.
Fonts bring personality to your app and help create a unique experience for users. Try experimenting with different fonts to give your Flutter app its own voice!