When it comes to creating user interfaces in Java applications, JavaFX is a popular and robust choice. JavaFX provides a wide range of controls to build interactive and engaging UIs. One such control is the ListView, which allows you to display a list of items in a vertical scrollable container. In this article, we will explore the JavaFX ListView in detail.

with hands-on learning.
get the skills and confidence to land your next move.
Understanding JavaFX ListView
The ListView in JavaFX is a versatile control used for displaying a list of items. It provides the following key features:
- Vertical Scroll: ListView allows you to display a large number of items in a limited amount of space by providing vertical scrolling.
- Customization: You can customize the appearance of ListView items by using cell factories, which allow you to define how each item should be rendered.
- Selection Model: ListView supports multiple selection modes, such as single-selection, and multiple-selection.
- Event Handling: You can attach event handlers to ListView to respond to user interactions, such as item selection or clicks.
Creating a Simple ListView
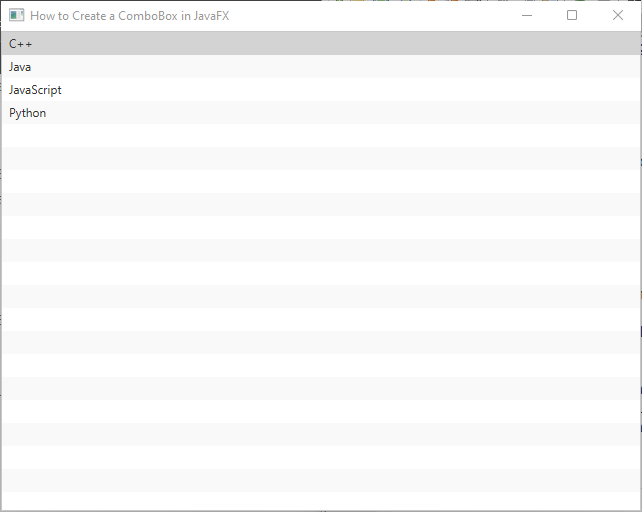
Let’s start by creating a simple JavaFX application with a ListView. For this example, we’ll display a list of programming languages.
import javafx.application.Application;
import javafx.collections.FXCollections;
import javafx.collections.ObservableList;
import javafx.scene.Scene;
import javafx.scene.control.*;
import javafx.scene.layout.*;
import javafx.stage.Stage;

public class Main extends Application {

    private final BorderPane parent = new BorderPane();

    @Override
    public void start(Stage stage) throws Exception {
        this.setupStage(stage);
    }

    @Override
    public void init() throws Exception {
        super.init();
        this.buildUI();
    }

    private void buildUI() {

        ObservableList<String> languages = FXCollections.observableArrayList(
                "C++", "Java", "JavaScript", "Python"
        );

        // Create a ListView and set the items
        ListView<String> listView = new ListView<>(languages);

        this.parent.setCenter(listView);

    }

    private void setupStage(Stage stage) {

        Scene scene = new Scene(this.parent, 640.0, 480.0);

        // Set the stage title
        stage.setTitle("How to Create a ListView in JavaFX");

        // Set the stage scene
        stage.setScene(scene);

        // Center the stage on the screen
        stage.centerOnScreen();

        // Show the stage on the screen
        stage.show();

    }

}
In this example, we create a ListView and populate it with programming languages using an ObservableList. We then add the ListView to a BorderPane and display it in a simple JavaFX application.
Customizing ListView Items
In some cases, you might want to customize the appearance of the items in the ListView. For instance, you may wish to display each item with an icon or additional information.
To achieve this, we can use a cell factory to customize the rendering of each item in the ListView. In the following example, we’ll create a custom cell factory to display each programming language with an associated icon.
import javafx.application.Application;
import javafx.collections.FXCollections;
import javafx.collections.ObservableList;
import javafx.scene.Scene;
import javafx.scene.control.*;
import javafx.scene.image.Image;
import javafx.scene.image.ImageView;
import javafx.scene.layout.*;
import javafx.stage.Stage;

public class Main extends Application {

    private final BorderPane parent = new BorderPane();

    @Override
    public void start(Stage stage) throws Exception {
        this.setupStage(stage);
    }

    @Override
    public void init() throws Exception {
        super.init();
        this.buildUI();
    }

    private void buildUI() {

        ObservableList<String> languages = FXCollections.observableArrayList(
                "C++", "Java", "JavaScript", "Python"
        );

        // Create a ListView and set the items
        ListView<String> listView = new ListView<>(languages);

        // Custom cell factory to display each item with an icon
        listView.setCellFactory(param -> new ListCell<>() {

            @Override
            protected void updateItem(String item, boolean empty) {
                super.updateItem(item, empty);

                if (item != null) {

                    setText(item);
                    setGraphic(getLanguageIcon(item));

                } else {

                    setText(null);
                    setGraphic(null);

                }

            }

        });

        this.parent.setCenter(listView);

    }

    // Helper method to get the corresponding language icon
    private ImageView getLanguageIcon(String language) {

        String iconPath = language.toLowerCase().replace("++", "pp") + ".png";
        return new ImageView(new Image(iconPath));

    }

    private void setupStage(Stage stage) {

        Scene scene = new Scene(this.parent, 640.0, 480.0);

        // Set the stage title
        stage.setTitle("How to Create a ListView in JavaFX");

        // Set the stage scene
        stage.setScene(scene);

        // Center the stage on the screen
        stage.centerOnScreen();

        // Show the stage on the screen
        stage.show();

    }

}
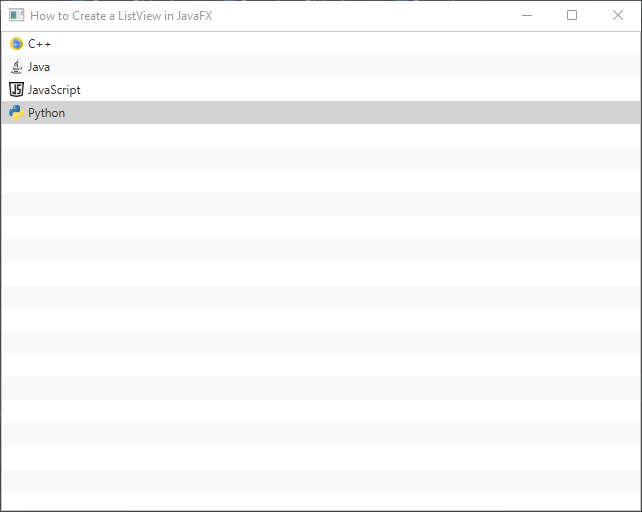
In this example, we assume that there are image files for each programming language in the same folder as the Main class (e.g., java.png, python.png, etc.).
With the custom cell factory, you’ll see the ListView displaying each programming language with its corresponding icon.
Handling ListView Selection
By default, ListView supports single selection mode. However, you can enable multiple selection mode by setting the selectionModel property to a MultipleSelectionModel.
import javafx.application.Application;
import javafx.collections.FXCollections;
import javafx.collections.ObservableList;
import javafx.scene.Scene;
import javafx.scene.control.*;
import javafx.scene.layout.*;
import javafx.stage.Stage;

public class Main extends Application {

    private final BorderPane parent = new BorderPane();

    @Override
    public void start(Stage stage) throws Exception {
        this.setupStage(stage);
    }

    @Override
    public void init() throws Exception {
        super.init();
        this.buildUI();
    }

    private void buildUI() {

        ObservableList<String> languages = FXCollections.observableArrayList(
                "C++", "Java", "JavaScript", "Python"
        );

        // Create a ListView and set the items
        ListView<String> listView = new ListView<>(languages);

        // Allow multiple selection
        listView.getSelectionModel().setSelectionMode(SelectionMode.MULTIPLE);

        this.parent.setCenter(listView);

    }

    private void setupStage(Stage stage) {

        Scene scene = new Scene(this.parent, 640.0, 480.0);

        // Set the stage title
        stage.setTitle("How to Create a ListView in JavaFX");

        // Set the stage scene
        stage.setScene(scene);

        // Center the stage on the screen
        stage.centerOnScreen();

        // Show the stage on the screen
        stage.show();

    }

}
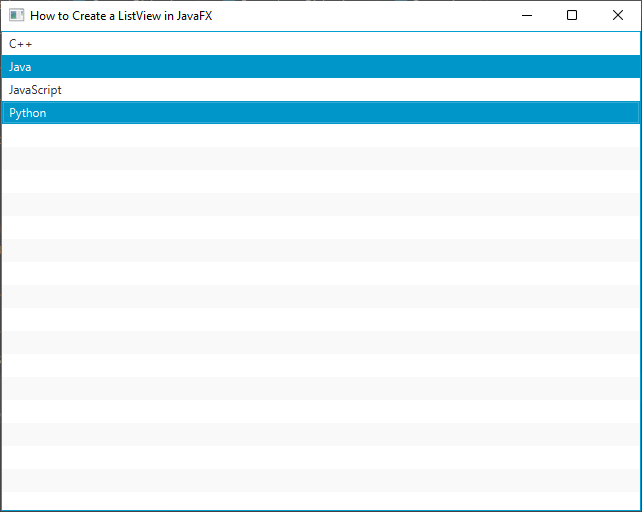
In this example, we set the selection mode of the ListView to SelectionMode.MULTIPLE. This allows users to select multiple items by holding the Ctrl key (or Command key on macOS) and clicking on the items they want to select.
Handling ListView Events
One of the strengths of the ListView is its ability to handle selection events. We can add a listener to the ListView to respond to user interactions. In this example, we’ll print the selected item whenever the user clicks on an item in the list.
import javafx.application.Application;
import javafx.collections.FXCollections;
import javafx.collections.ObservableList;
import javafx.scene.Scene;
import javafx.scene.control.*;
import javafx.scene.layout.*;
import javafx.stage.Stage;

public class Main extends Application {

    private final BorderPane parent = new BorderPane();

    @Override
    public void start(Stage stage) throws Exception {
        this.setupStage(stage);
    }

    @Override
    public void init() throws Exception {
        super.init();
        this.buildUI();
    }

    private void buildUI() {

        ObservableList<String> languages = FXCollections.observableArrayList(
                "C++", "Java", "JavaScript", "Python"
        );

        // Create a ListView and set the items
        ListView<String> listView = new ListView<>(languages);

        // Adding a selection listener to respond to selection events
        listView.getSelectionModel().selectedItemProperty().addListener(
                (observable, oldValue, newValue) -> {

                    if (newValue != null) {

                        System.out.println("Selected: " + newValue);

                    }

                }

        );

        this.parent.setCenter(listView);

    }

    private void setupStage(Stage stage) {

        Scene scene = new Scene(this.parent, 640.0, 480.0);

        // Set the stage title
        stage.setTitle("How to Create a ListView in JavaFX");

        // Set the stage scene
        stage.setScene(scene);

        // Center the stage on the screen
        stage.centerOnScreen();

        // Show the stage on the screen
        stage.show();

    }

}
Now, when you run the application and click on an item in the list, you should see the selected item being printed to the console.
Dynamic Modification of ListView Items
One of the most powerful aspects of ListView is its dynamic nature. You can add or remove items from the list at runtime, and the ListView will automatically update to reflect the changes. Let’s create an example to demonstrate this capability.
import javafx.application.Application;
import javafx.collections.FXCollections;
import javafx.collections.ObservableList;
import javafx.geometry.Insets;
import javafx.geometry.Pos;
import javafx.scene.Scene;
import javafx.scene.control.*;
import javafx.scene.layout.*;
import javafx.stage.Stage;

public class Main extends Application {

    private final BorderPane parent = new BorderPane();

    @Override
    public void start(Stage stage) throws Exception {
        this.setupStage(stage);
    }

    @Override
    public void init() throws Exception {
        super.init();
        this.buildUI();
    }

    private void buildUI() {

        ObservableList<String> languages = FXCollections.observableArrayList(
                "C++", "Java", "JavaScript", "Python"
        );

        // Create a ListView and set the items
        ListView<String> listView = new ListView<>(languages);

        // Buttons to add and remove items
        Button addButton = new Button("Add Language");
        Button removeButton = new Button("Remove Language");

        // Event handling for adding items
        addButton.setOnAction(event -> {

            String newLanguage = "New Language";
            languages.add(newLanguage);
            listView.scrollTo(newLanguage);

        });

        // Event handling for removing items
        removeButton.setOnAction(event -> {

            String selectedLanguage = listView.getSelectionModel().getSelectedItem();

            if (selectedLanguage != null) {
                languages.remove(selectedLanguage);
            }

        });

        // Create a layout and add the buttons to it
        HBox buttonsLayout = new HBox(10, addButton, removeButton);

        buttonsLayout.setPadding(new Insets(10));
        buttonsLayout.setAlignment(Pos.CENTER);

        this.parent.setCenter(listView);

        // Add the buttons to the bottom of the BorderPane
        this.parent.setBottom(buttonsLayout);

    }

    private void setupStage(Stage stage) {

        Scene scene = new Scene(this.parent, 640.0, 480.0);

        // Set the stage title
        stage.setTitle("How to Create a ListView in JavaFX");

        // Set the stage scene
        stage.setScene(scene);

        // Center the stage on the screen
        stage.centerOnScreen();

        // Show the stage on the screen
        stage.show();

    }

}
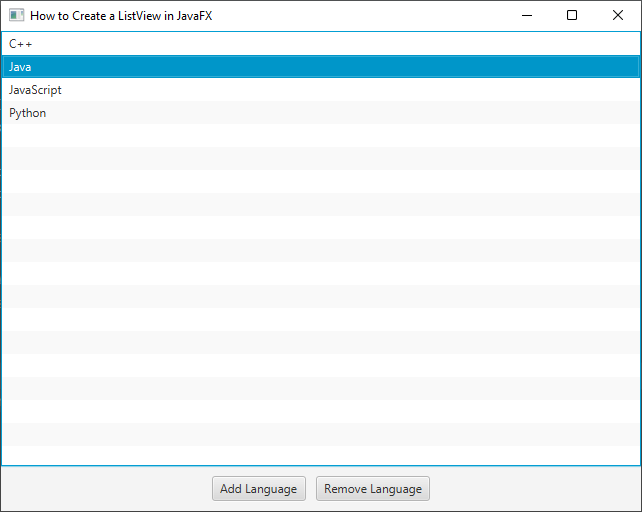
In this example, we’ve added two buttons to the scene: “Add Language” and “Remove Language.” When the “Add Language” button is clicked, a new language item is added to the list, and the ListView is scrolled to show the newly added item. When the “Remove Language” button is clicked, the selected language is removed from the list.
Customizing ListView Appearance
The appearance of the ListView can be customized using CSS styling. JavaFX allows you to define custom CSS styles to change the appearance of the control.
Let’s modify the previous example to apply some basic CSS styling to the ListView:
import javafx.application.Application;
import javafx.collections.FXCollections;
import javafx.collections.ObservableList;
import javafx.scene.Scene;
import javafx.scene.control.*;
import javafx.scene.layout.*;
import javafx.stage.Stage;

public class Main extends Application {

    private final BorderPane parent = new BorderPane();

    @Override
    public void start(Stage stage) throws Exception {
        this.setupStage(stage);
    }

    @Override
    public void init() throws Exception {
        super.init();
        this.buildUI();
    }

    private void buildUI() {

        ObservableList<String> languages = FXCollections.observableArrayList(
                "C++", "Java", "JavaScript", "Python"
        );

        // Create a ListView and set the items
        ListView<String> listView = new ListView<>(languages);

        // Applying CSS styling to the ListView
        listView.setStyle("-fx-background-color: #f0f0f0; -fx-font-size: 16px;");

        this.parent.setCenter(listView);

    }

    private void setupStage(Stage stage) {

        Scene scene = new Scene(this.parent, 640.0, 480.0);

        // Set the stage title
        stage.setTitle("How to Create a ListView in JavaFX");

        // Set the stage scene
        stage.setScene(scene);

        // Center the stage on the screen
        stage.centerOnScreen();

        // Show the stage on the screen
        stage.show();

    }

}
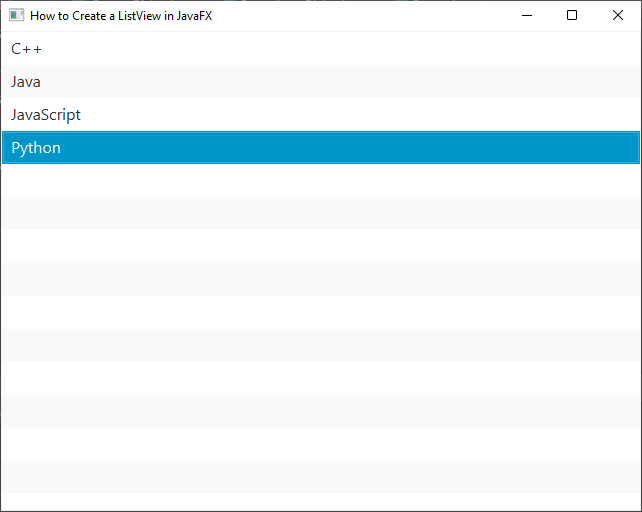
In this example, we set the background color of the ListView to a light gray (#f0f0f0) and increase the font size to 16 pixels.
Conclusion
The ListView is a versatile component in JavaFX that allows you to present data in a scrollable list format. In this article, we covered how to create a basic ListView, customize its appearance, and handle user selection. With this knowledge, you can create interactive and user-friendly applications using JavaFX.
Remember, the examples provided are just the starting point, and you can explore more advanced features of the ListView, such as multiple selections, context menus, and complex custom cell rendering. JavaFX provides a rich set of tools to create stunning desktop applications, and the ListView is one of the building blocks to achieve that goal.
I hope you found this code informative and useful. If you would like to receive more content, please consider subscribing to our newsletter!


