Python’s Tkinter library provides a straightforward and powerful way to create graphical user interfaces (GUIs). One of the essential elements in any GUI is an entry widget, which allows users to input text or data. In this article, we’ll explore how to create and use an entry widget using Python Tkinter.

with hands-on learning.
get the skills and confidence to land your next move.
Creating an Entry Widget
Creating an entry widget in Tkinter is a straightforward process. Entry class is used to implement this widget, and you can customize its appearance and behavior according to your needs.
Here’s a basic example of creating an entry widget:
import tkinter as tk


class PyFrame(tk.Tk):

    def __init__(self, width, height):
        super().__init__()

        self.width = width
        self.height = height

        self.geometry(f"{self.width}x{self.height}")

    def center_on_screen(self):
        left = (self.winfo_screenwidth() - self.width) // 2
        top = (self.winfo_screenheight() - self.height) // 2

        self.geometry(f"{self.width}x{self.height}+{left}+{top}")


def on_entry_changed(event):
    value = entry.get()
    print("Entry value:", value)


if __name__ == '__main__':
    # Create the main application window
    root = PyFrame(640, 480)
    root.title("How to Create an Entry Widget in Python Tkinter")

    # center window on the screen
    root.center_on_screen()

    # Create the entry widget
    entry = tk.Entry(root)
    entry.pack()

    # Bind an event to the entry widget
    entry.bind("<Return>", on_entry_changed)

    # Run the main event loop
    root.mainloop()
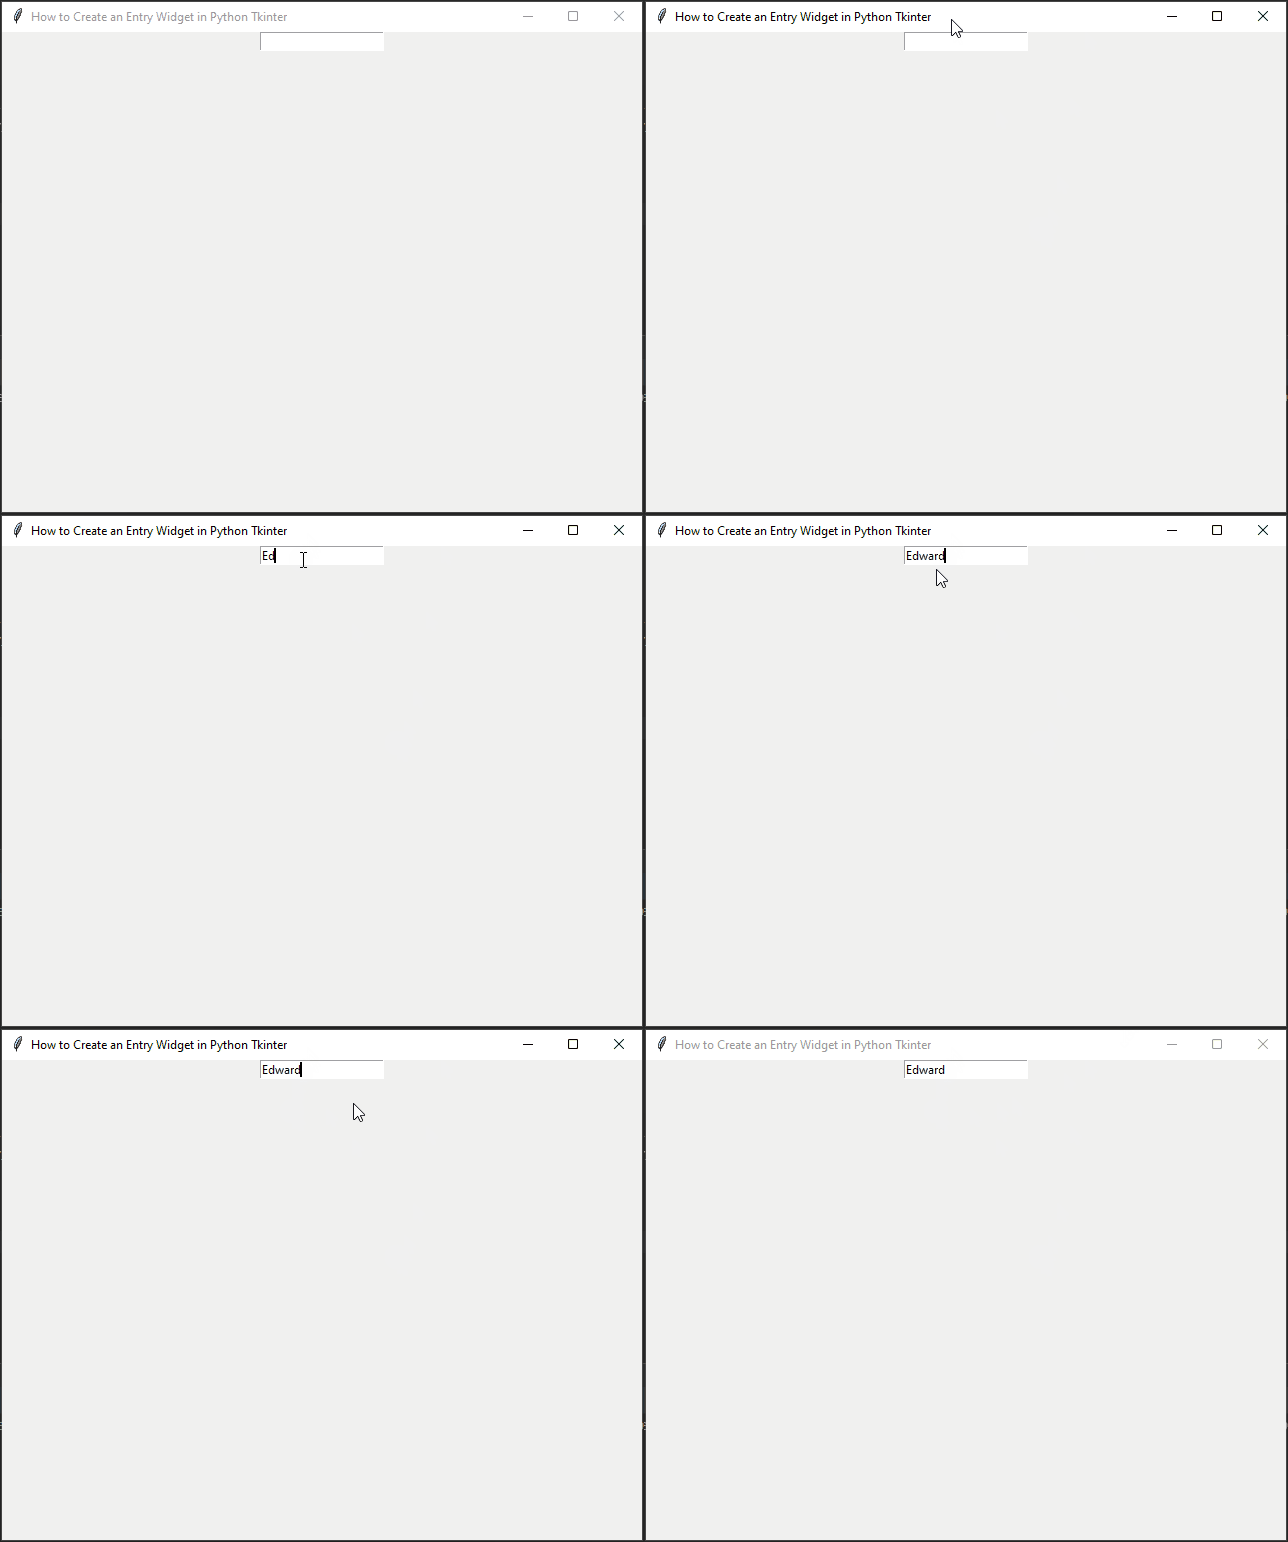
In this example, we import the Tkinter library and define a simple function on_entry_changed, which will be called when the user presses the “Return” key (Enter) after entering text into the entry widget. Inside this function, we retrieve the current value of the entry widget using the get() method and print it to the console.
The Tk() function is used to create the main application window, and the Entry() function is used to create the entry widget. The pack() method is then used to display the entry widget within the window. Finally, we bind the event to the on_entry_changed function, so it will be called when the “Return” key is pressed.

Entry Widget with a Button
Now, let’s create a more practical example of an entry widget with a button that processes the input data:
import tkinter as tk


class PyFrame(tk.Tk):

    def __init__(self, width, height):
        super().__init__()

        self.width = width
        self.height = height

        self.geometry(f"{self.width}x{self.height}")

    def center_on_screen(self):
        left = (self.winfo_screenwidth() - self.width) // 2
        top = (self.winfo_screenheight() - self.height) // 2

        self.geometry(f"{self.width}x{self.height}+{left}+{top}")


def process_data():
    value = entry.get()
    result_label.config(text="Processed Data: " + value)


if __name__ == '__main__':
    # Create the main application window
    root = PyFrame(640, 480)
    root.title("How to Create an Entry Widget in Python Tkinter")

    # center window on the screen
    root.center_on_screen()

    # Create the entry widget
    entry = tk.Entry(root)
    entry.pack()

    # Create a button to process data
    process_button = tk.Button(root, text="Process Data", command=process_data)
    process_button.pack()

    # Create a label to display the result
    result_label = tk.Label(root, text="")
    result_label.pack()

    # Run the main event loop
    root.mainloop()
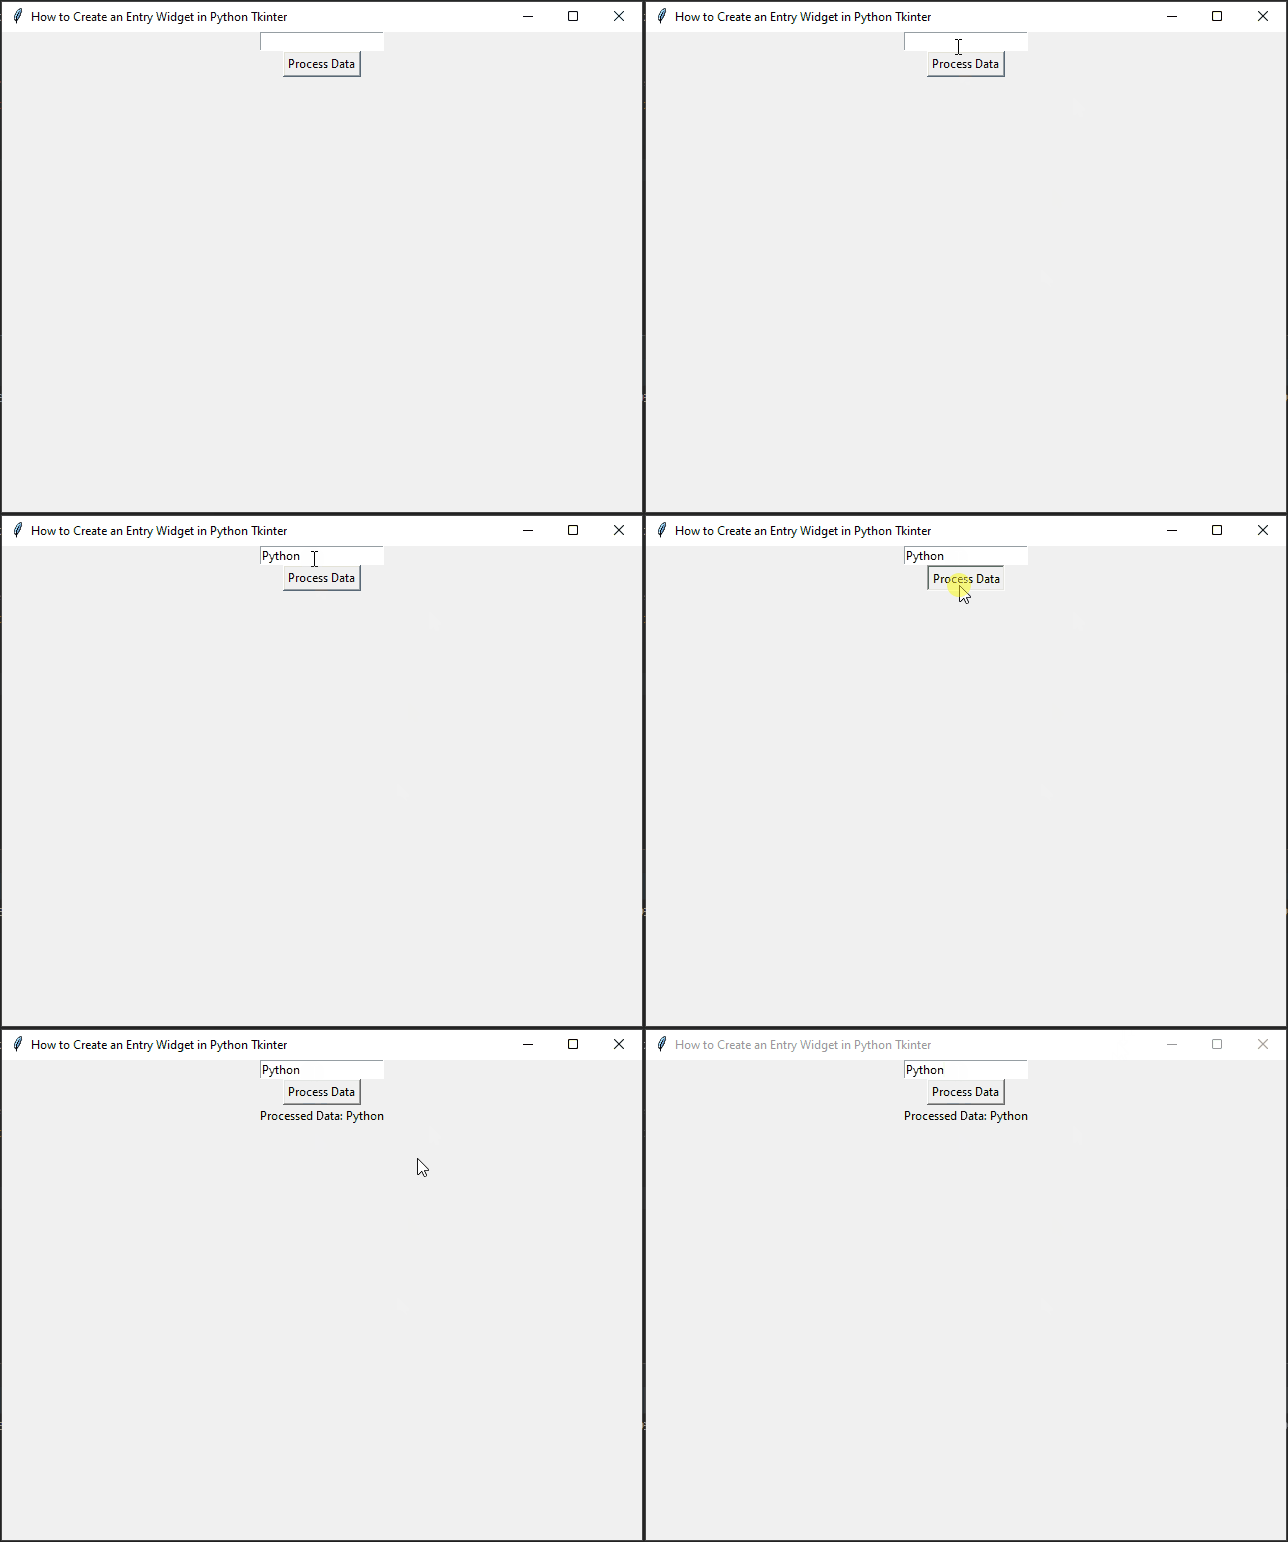
In this example, we define a function called process_data that retrieves the value from the entry widget, processes it (in this case, we are just displaying it as a label), and updates the result label with the processed data.
We use the Button() function to create a button and link it to the process_data function using the command parameter. The Label() function is used to create a label where we’ll display the processed data.

Conclusion
In this article, we’ve learned how to create an entry widget in Python Tkinter and how to retrieve and process data entered by the user. Entry widgets are essential components of GUI applications as they allow users to interact with the program. You can further customize the entry widget by adding features such as default text, input validation, and more.
Remember that Tkinter provides a wide range of widgets and options to create powerful and interactive GUIs in Python. Feel free to experiment with different configurations and widgets to build the perfect GUI for your application.
I hope you found this code informative and useful. If you would like to receive more content, please consider subscribing to our newsletter!


