One of the essential elements in any graphical application is displaying images. JavaFX provides the ImageView class, which allows developers to load, display, and manipulate images seamlessly. In this article, we will explore the JavaFX ImageView class and demonstrate how to use it to incorporate images into your Java applications with code examples.

with hands-on learning.
get the skills and confidence to land your next move.
Introduction to ImageView
The ImageView class in JavaFX is a part of the javafx.scene.image package and is used to display images within a JavaFX application. It provides various features such as image scaling, rotation, and cropping, making it a versatile component for handling images in your GUI.
Basic Usage
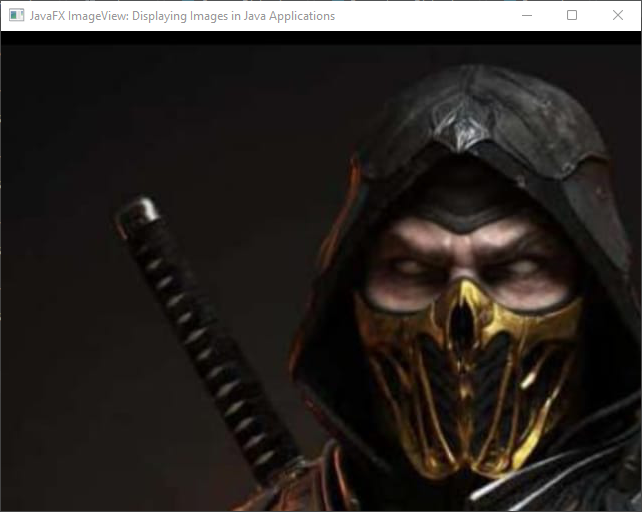
Let’s start by creating a simple JavaFX application that displays an image using the ImageView component.
import javafx.application.Application;
import javafx.scene.Scene;
import javafx.scene.image.Image;
import javafx.scene.image.ImageView;
import javafx.scene.layout.*;
import javafx.stage.Stage;

public class Main extends Application {

    private final BorderPane parent = new BorderPane();

    @Override
    public void start(Stage stage) throws Exception {
        this.setupStage(stage);
    }

    @Override
    public void init() throws Exception {
        super.init();
        this.buildUI();
    }

    private void buildUI() {

        // Load an image from a file
        Image image = new Image("image.jpeg");

        // Create an ImageView and set the image
        ImageView imageView = new ImageView(image);

        // Add the ImageView to the BorderPane layout manager
        this.parent.setCenter(imageView);

    }

    private void setupStage(Stage stage) {

        Scene scene = new Scene(this.parent, 640.0, 480.0);

        // Set the stage title
        stage.setTitle("JavaFX ImageView: Displaying Images in Java Applications");

        // Set the stage scene
        stage.setScene(scene);

        // Center the stage on the screen
        stage.centerOnScreen();

        // Show the stage on the screen
        stage.show();

    }

}
In this example, we load an image named “image.jpeg” from the same directory as the source code. We then create an ImageView and set the loaded image to it. The BorderPane is used as the root layout, and the ImageView is added to it. Finally, we create a Scene, set it to the stage, and display the stage.

Image Manipulation
The ImageView class provides several methods to manipulate the displayed image. Let’s explore a few of them:
Resizing the Image
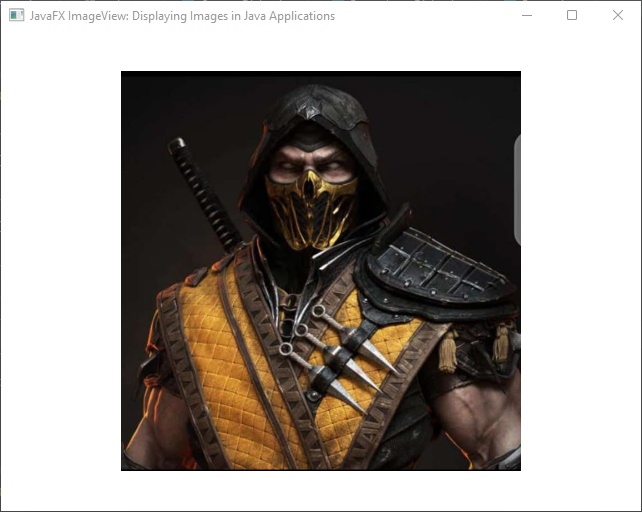
You can resize the displayed image using the fitWidth and fitHeight properties of the ImageView. This is useful when you need to ensure that an image fits within a specific size while maintaining its aspect ratio.
import javafx.application.Application;
import javafx.scene.Scene;
import javafx.scene.image.Image;
import javafx.scene.image.ImageView;
import javafx.scene.layout.*;
import javafx.stage.Stage;

public class Main extends Application {

    private final BorderPane parent = new BorderPane();

    @Override
    public void start(Stage stage) throws Exception {
        this.setupStage(stage);
    }

    @Override
    public void init() throws Exception {
        super.init();
        this.buildUI();
    }

    private void buildUI() {

        // Load an image from a file
        Image image = new Image("image.jpeg");

        // Create an ImageView and set the image
        ImageView imageView = new ImageView(image);

        // Resize the image to fit within specified dimensions
        imageView.setFitWidth(400);
        imageView.setFitHeight(400);

        // Add the ImageView to the BorderPane layout manager
        this.parent.setCenter(imageView);

    }

    private void setupStage(Stage stage) {

        Scene scene = new Scene(this.parent, 640.0, 480.0);

        // Set the stage title
        stage.setTitle("JavaFX ImageView: Displaying Images in Java Applications");

        // Set the stage scene
        stage.setScene(scene);

        // Center the stage on the screen
        stage.centerOnScreen();

        // Show the stage on the screen
        stage.show();

    }

}

Rotating the Image
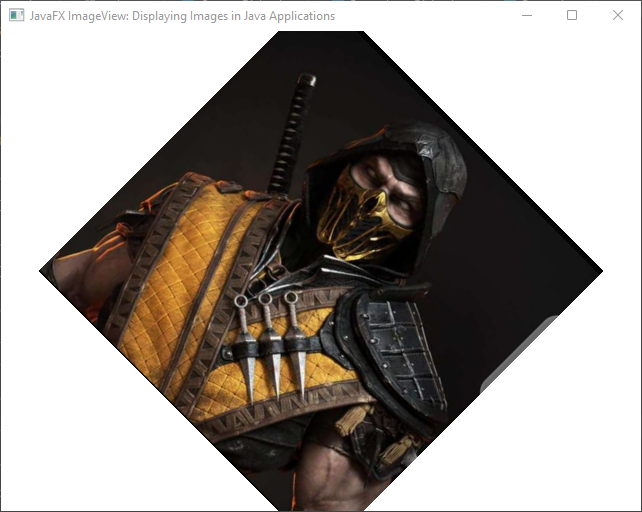
You can rotate the displayed image using the rotate property of the ImageView.
import javafx.application.Application;
import javafx.scene.Scene;
import javafx.scene.image.Image;
import javafx.scene.image.ImageView;
import javafx.scene.layout.*;
import javafx.stage.Stage;

public class Main extends Application {

    private final BorderPane parent = new BorderPane();

    @Override
    public void start(Stage stage) throws Exception {
        this.setupStage(stage);
    }

    @Override
    public void init() throws Exception {
        super.init();
        this.buildUI();
    }

    private void buildUI() {

        // Load an image from a file
        Image image = new Image("image.jpeg");

        // Create an ImageView and set the image
        ImageView imageView = new ImageView(image);

        // Resize the image to fit within specified dimensions
        imageView.setFitWidth(400);
        imageView.setFitHeight(400);

        // Rotate the image by 45 degrees clockwise
        imageView.setRotate(45);

        // Add the ImageView to the BorderPane layout manager
        this.parent.setCenter(imageView);

    }

    private void setupStage(Stage stage) {

        Scene scene = new Scene(this.parent, 640.0, 480.0);

        // Set the stage title
        stage.setTitle("JavaFX ImageView: Displaying Images in Java Applications");

        // Set the stage scene
        stage.setScene(scene);

        // Center the stage on the screen
        stage.centerOnScreen();

        // Show the stage on the screen
        stage.show();

    }

}

Cropping the Image
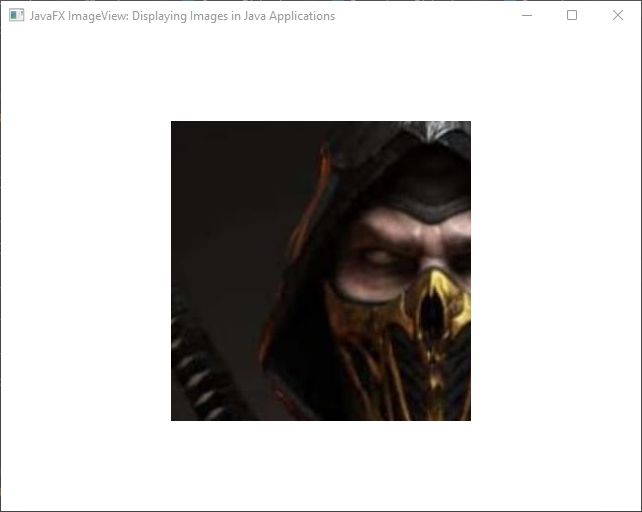
You can crop the displayed image using the viewport property of the ImageView. This property allows you to define a rectangular region of the image to be displayed.
import javafx.application.Application;
import javafx.geometry.Rectangle2D;
import javafx.scene.Scene;
import javafx.scene.image.Image;
import javafx.scene.image.ImageView;
import javafx.scene.layout.*;
import javafx.stage.Stage;

public class Main extends Application {

    private final BorderPane parent = new BorderPane();

    @Override
    public void start(Stage stage) throws Exception {
        this.setupStage(stage);
    }

    @Override
    public void init() throws Exception {
        super.init();
        this.buildUI();
    }

    private void buildUI() {

        // Load an image from a file
        Image image = new Image("image.jpeg");

        // Create an ImageView and set the image
        ImageView imageView = new ImageView(image);

        // Define a rectangular viewport (x, y, width, height) to crop the image
        imageView.setViewport(new Rectangle2D(200, 100, 300, 300));

        // Add the ImageView to the BorderPane layout manager
        this.parent.setCenter(imageView);

    }

    private void setupStage(Stage stage) {

        Scene scene = new Scene(this.parent, 640.0, 480.0);

        // Set the stage title
        stage.setTitle("JavaFX ImageView: Displaying Images in Java Applications");

        // Set the stage scene
        stage.setScene(scene);

        // Center the stage on the screen
        stage.centerOnScreen();

        // Show the stage on the screen
        stage.show();

    }

}

Conclusion
The ImageView class in JavaFX is a versatile component that allows you to display images in your GUI with various manipulation options. In this article, we covered the basic usage of ImageView for displaying images and explored some image manipulation techniques, such as resizing, rotating, and cropping.
As you continue to develop JavaFX applications, the ImageView class will prove to be an essential tool for enhancing the visual appeal of your user interfaces. Experiment with different features and settings to create engaging and interactive image displays within your applications.
Remember to explore the official JavaFX documentation and API reference for more details and advanced features of the ImageView class and other JavaFX components.
I hope you found this code informative and useful. If you would like to receive more content, please consider subscribing to our newsletter!


