When it comes to designing user interfaces (UIs), arranging UI elements in an organized and visually appealing manner is crucial. JavaFX, a popular UI toolkit for Java applications, provides a variety of layout panes to assist developers in achieving this goal. One such pane is the TilePane, which allows you to arrange UI elements in a grid-like fashion, making it ideal for displaying images, buttons, and other components in a tile-based layout. In this article, we will explore the JavaFX TilePane, and provide code examples to demonstrate how to create stunning tile arrangements.

with hands-on learning.
get the skills and confidence to land your next move.
What’s a TilePane?
The TilePane is a layout container in JavaFX that automatically arranges its child nodes in a grid, with each element occupying a “tile” in the grid. This grid can be either horizontal or vertical, depending on how you set the orientation of the TilePane. The TilePane automatically adjusts the size of its children to fit within the available space, ensuring a consistent appearance.
Key features of the TilePane include:
- Alignment: You can specify the alignment of the child nodes within the tiles, controlling their position both horizontally and vertically.
- Orientation: The TilePane can be oriented either horizontally (tiles arranged in rows) or vertically (tiles arranged in columns).
- Gaps: You can set the horizontal and vertical gaps between the tiles to control the spacing between the elements.
- Resizable Children: The TilePane automatically resizes the child nodes to fit the available space, maintaining a consistent layout.
Creating a Basic TilePane
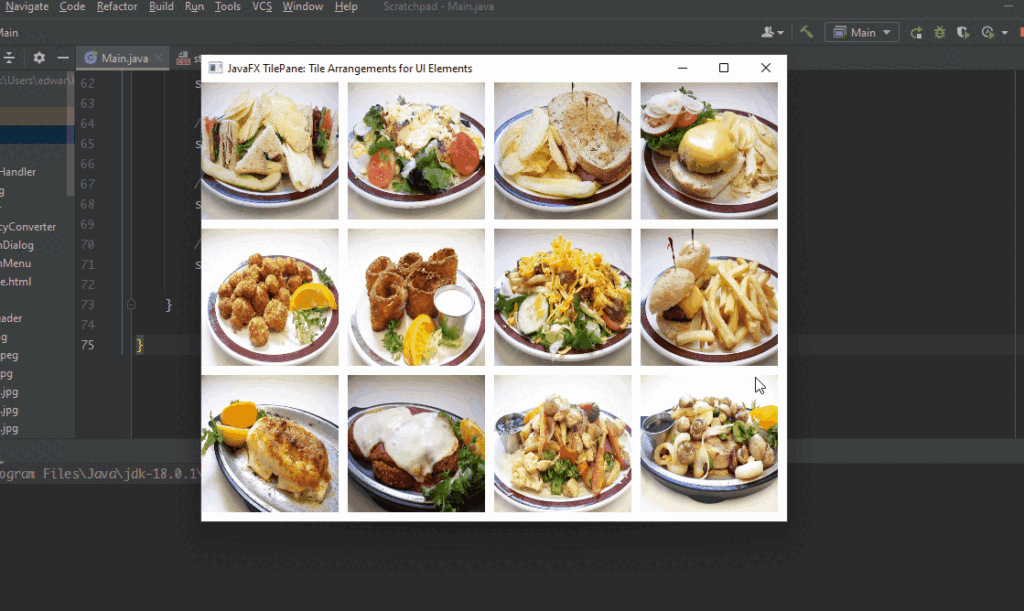
Let’s start by creating a basic JavaFX application that uses a TilePane to display a set of images. For this example, we will display a grid of images using ImageViews.
import javafx.application.Application;
import javafx.scene.Scene;
import javafx.scene.image.Image;
import javafx.scene.image.ImageView;
import javafx.scene.layout.*;
import javafx.stage.Stage;

public class Main extends Application {

    private final BorderPane parent = new BorderPane();

    @Override
    public void init() throws Exception {
        super.init();
        this.buildUI();
    }

    private void buildUI() {

        // Create the TilePane
        TilePane tilePane = new TilePane();

        // Set horizontal gap between tiles
        tilePane.setHgap(10);

        // Set vertical gap between tiles
        tilePane.setVgap(10);

        // Set preferred number of columns
        tilePane.setPrefColumns(3);

        // Add ImageViews to the TilePane
        for (int i = 1; i <= 12; i++) {

            Image image = new Image("image" + i + ".jpg");

            ImageView imageView = new ImageView(image);

            imageView.setFitWidth(150);

            imageView.setFitHeight(150);

            tilePane.getChildren().add(imageView);

        }

        // Add the TilePane to the BorderPane
        this.parent.setCenter(tilePane);

    }

    @Override
    public void start(Stage stage) throws Exception {
        this.setupStage(stage);
    }

    private void setupStage(Stage stage) {

        Scene scene = new Scene(this.parent, 640, 480);

        // Set the stage title
        stage.setTitle("JavaFX TilePane: Tile Arrangements for UI Elements");

        // Set the stage scene
        stage.setScene(scene);

        // Center the stage on the screen
        stage.centerOnScreen();

        // Show the stage on the screen
        stage.show();

    }

}
In this example, we create a TilePane and add twelve (12) ImageViews to it. The images are loaded from resources, and their dimensions are set to maintain a consistent appearance within the tile grid.

Customizing TilePane Behavior
The TilePane offers several methods to customize its behavior, allowing you to create a layout that suits your specific needs. Here are a few notable methods:
- setAlignment(Pos value): Sets the alignment of tiles within the TilePane. Possible values include Pos.CENTER, Pos.TOP_LEFT, Pos.BOTTOM_RIGHT, and more.
- setOrientation(Orientation value): Sets the orientation of the TilePane to either HORIZONTAL or VERTICAL.
- setTileAlignment(Pos value): Sets the alignment of child nodes within their tiles.
- setPrefColumns(int value) and setPrefRows(int value): Sets the preferred number of columns or rows in the TilePane.
import javafx.application.Application;
import javafx.geometry.Orientation;
import javafx.geometry.Pos;
import javafx.scene.Scene;
import javafx.scene.image.Image;
import javafx.scene.image.ImageView;
import javafx.scene.layout.*;
import javafx.stage.Stage;

public class Main extends Application {

    private final BorderPane parent = new BorderPane();

    @Override
    public void init() throws Exception {
        super.init();
        this.buildUI();
    }

    private void buildUI() {

        // Create the TilePane
        TilePane tilePane = new TilePane();

        // Set horizontal gap between tiles
        tilePane.setHgap(10);

        // Set vertical gap between tiles
        tilePane.setVgap(10);

        // Set preferred number of columns
        tilePane.setPrefColumns(3);

        // Set orientation to vertical
        tilePane.setOrientation(Orientation.VERTICAL);

        // Center Tiles within the TilePane
        tilePane.setAlignment(Pos.CENTER);

        // Add ImageViews to the TilePane
        for (int i = 1; i <= 12; i++) {

            Image image = new Image("image" + i + ".jpg");

            ImageView imageView = new ImageView(image);

            imageView.setFitWidth(150);

            imageView.setFitHeight(150);

            tilePane.getChildren().add(imageView);

        }

        // Add the TilePane to the BorderPane
        this.parent.setCenter(tilePane);

    }

    @Override
    public void start(Stage stage) throws Exception {
        this.setupStage(stage);
    }

    private void setupStage(Stage stage) {

        Scene scene = new Scene(this.parent, 640, 480);

        // Set the stage title
        stage.setTitle("JavaFX TilePane: Tile Arrangements for UI Elements");

        // Set the stage scene
        stage.setScene(scene);

        // Center the stage on the screen
        stage.centerOnScreen();

        // Show the stage on the screen
        stage.show();

    }

}
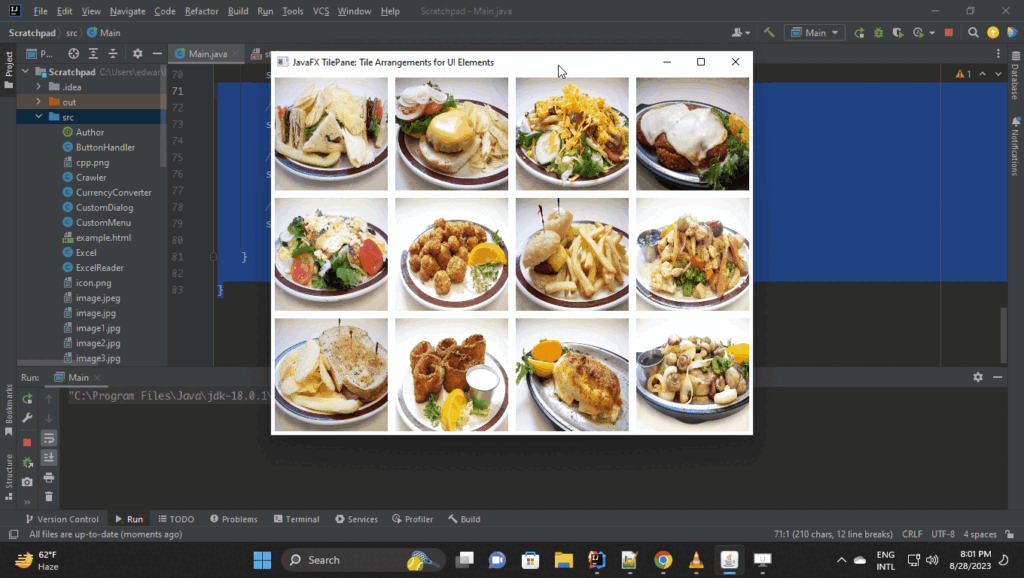
In this example, we’ve set the TilePane’s orientation to vertical, added horizontal and vertical gaps between children, and aligned the tiles to the center of the TilePane.

Conclusion
The JavaFX TilePane is a powerful layout manager that simplifies the arrangement of UI elements in a grid-like pattern. It’s particularly useful for displaying sets of items, such as images or buttons, in an organized and visually appealing manner. By utilizing the TilePane’s properties, you can easily customize the layout to match the design requirements of your application.
In this article, we’ve demonstrated how to use ImageViews to create a simple TilePane layout and how to customize the layout using various properties. With the knowledge gained from this article, you’ll be well-equipped to leverage the capabilities of JavaFX’s TilePane for your UI design needs.
Sources:
I hope you found this code informative and useful. If you would like to receive more content, please consider subscribing to our newsletter!


